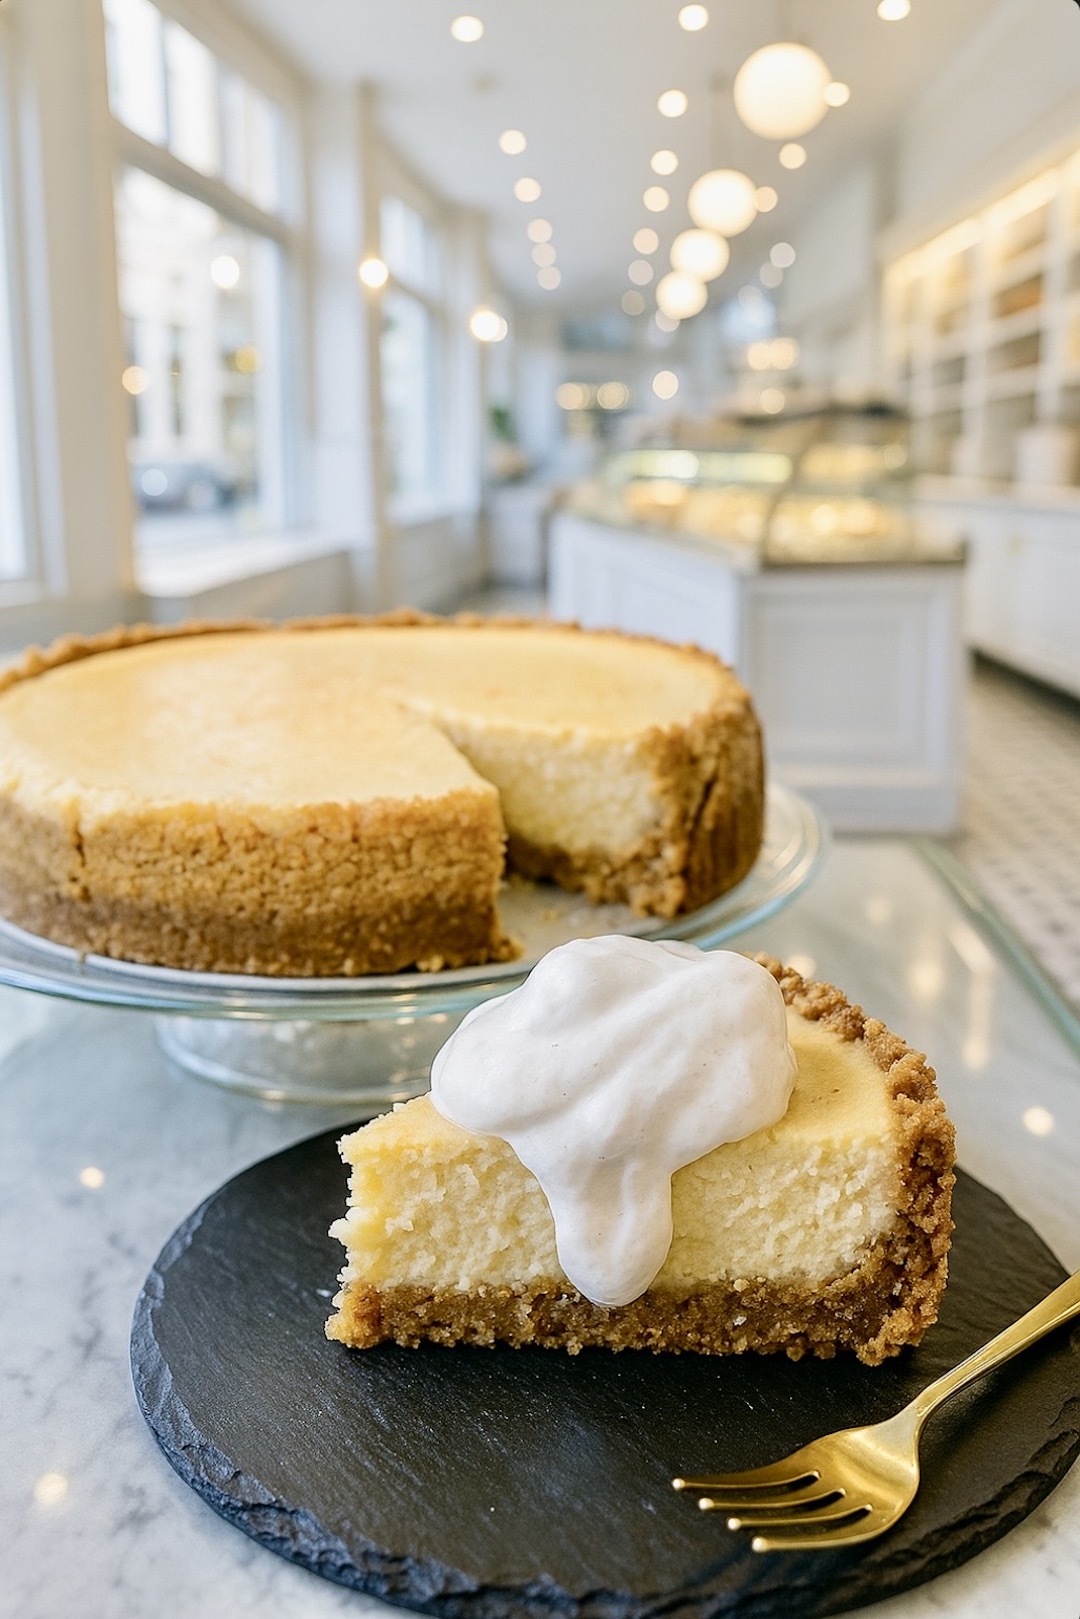
A hoy-hoy and welcome back!!! During my unintended sabbatical, I have been working on pie dough. That’s right, pie dough. I know, you are going to tell me that store bought pie dough is just as good as homemade pie dough. Before last year, I would have agreed with you wholeheartedly! However, now, I must respectfully disagree. When you have a substantial piece of buttery, flaky pie crust that melts in your mouth, it honestly doesn’t matter what filling you have, it will taste good. Okay, that might have been a tad bit of exaggeration, but you get my meaning. I have even had several people tell me that my crusts reminded them of croissants with all of the layers that one can achieve. I will take that as a win! What made me want to attempt to make my own pie crust regardless of the fact that I found store bought crust to be amazing? This includes a sweet little restaurant in the town I grew up in and two people.
Sweet, little restaurant, you say? Indeed I do! LOL. It was located in the center of downtown in a grand Victorian, red house. It was stunning. They had turned the living areas into the restaurant portion and I believe it was a mother-daughter team, the mother starting it with the daughter helping her. The food was homey and delicious and they boasted a large selection of iced teas that would change weekly. My favorite (and the best damn iced tea I have EVER had) was the tart cherry iced tea… I still dream about it from time to time. This restaurant also had a copious selection of fresh made pies. Fresh. Made. This was the first time I had ever had pie crust to this caliber: light, crispy, flaky, and tender. I could honestly go on and on, but I won’t. All I can say is that it was the best crust I had ever had, ever. One time, my mom and I asked the owner and baker how she made such splendid crusts, and she told us! It was lard. Yup, she used lard (and cue the lard angels to float down and sing their deliciously fatty songs). You’re going to make lard pie crusts, you ask? No, well…. Not yet. The point of this vignette is to simply relay where the seed of making my own pie crust was planted.
Now, indulge me a little more: five or so years ago, my husband and I got rid of cable. Wow, Bridget, that is super… we don’t care. Hold on, hold on! We got rid of cable, therefore we began to stream and one of the streaming platforms we watch is the YouTube. On the YouTube, we were introduced to two women: Claire Saffitz and Erin Jeanne McDowell. Their YouTube channels have become my happy places and go-to’s for even background noise when I am working on something. I first saw Claire on Bon Appetite where she was doing a little segment called Gourmet Makes. Then she left and started her own YouTube channel, Dessert Person. I adore her (as all of my friends and family are aware) because she honestly reminds me of…. Me. LOL. She gets easily frustrated, she needs time to processes things (especially when they are not going how she thought they would), very organized, and when concentrating, does not process joking around of people at the moment…. Me.  LOL. Read the next part in a whispered voice: My awesome sister-in-law even got me a Claire candle for my birthday. It is the most ridiculously wonderful thing, ever.
Okay!! Then there is Sweet Erin Jeanne McDowell. She is like sunshine personified. The bandana wearing lady has so much positive energy and excitement about her baking in a contagious manner that makes you want to get up and try her tips and tricks for baking the perfect pie, cake, donut, or whatever she happens to be baking that day! Between the two lovely ladies and a couple more sources on the Internet, I came up with a plan for attempting to make my own pie crust. I mean, how hard can it be? (Says the woman who said the same thing about wedding cakes). As mentioned above, I researched the heck out of this before I attempted it. A lot of Googling occurred, but, I will be citing the three main sources: Claire’s, Erin’s, and my 1972 Betty Crocker cookbook. Without further adieu, let’s start this!
Ingredients and Measurements
Based on my research, I have found that there are four, sometimes five, staple ingredients for a standard pie crust.
- AP Flour (usually)
- Salt
- Butter
- Water
- Sugar (in some recipes)
Why did I put usually next to the AP Flour. I read in my Betty Crocker cookbook (1972) that they also used self-rising flour but no salt added. This was the only source I found that mentioned self-rising flour. I shall also impart that instead of butter, they used lard or shortening (I’ll come back to this a little bit later). Now here’s the interesting part, well, interesting to me. Claire’s book (2020) breaks down the measurements into standard (which measures by volume), grams, and ounces. Erin’s book (2020) breaks down her measurements into standard and grams. I must mention, however, that she also adds ounces when giving the measurements for the butter. My beloved and well-used Betty Crocker cookbook (1972) simply provides standard measurements. On my Internet searching, I noticed that most of your “home taught or home bakers” used standard measurements and if you got onto a “professional” website, like King Arthur or Pillsbury, they tend to use grams and such. I know most professional bakers and pastry chefs use grams, etcetera as it is a more accurate way to measure out your ingredients (honestly, first taught to me by my Martha).
STOP: Bridget, what the hell do you mean, “standard measurements”??? Sorry, LOL, when I refer to standard measurements, I am referring to measuring in cups, tablespoons, and teaspoons.
Super, now, what do I use? Well, I used to use just standard. And there is NOTHING WRONG with it! Heck, our grandmothers and great-grandmothers used it and did them just fine. So, you could absolutely use standard. I have, however, switched to grams. I find that weighing out ingredients for baking provides a more consistent result, but use what you are most comfortable with.
Putting it All Together
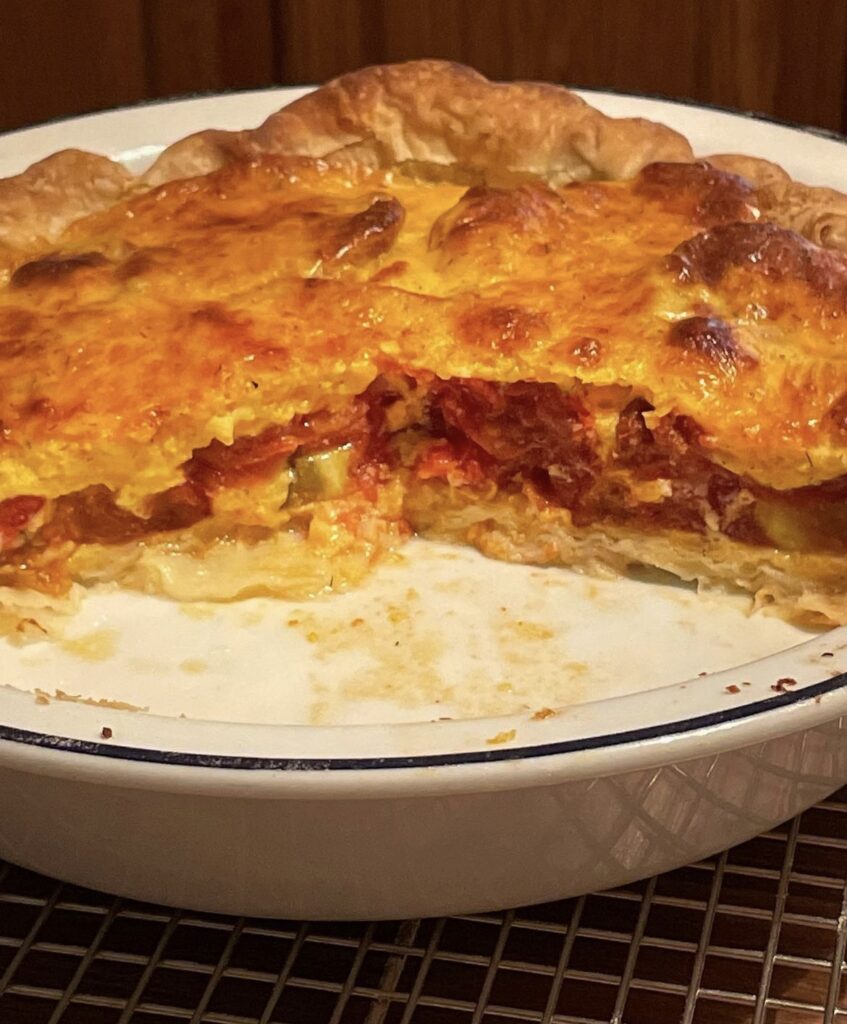
Out of those ingredients I listed above, I use AP flour, salt, sugar, butter, and water. This is not a sweet crust despite the sugar in it, it is a very small amount. I have used this crust to make savory dishes too (like my heirloom tomato and cheese pie). You can choose to not add the sugar and that is completely fine too. Anyhoo, my ingredient list for double crusts is as follows:
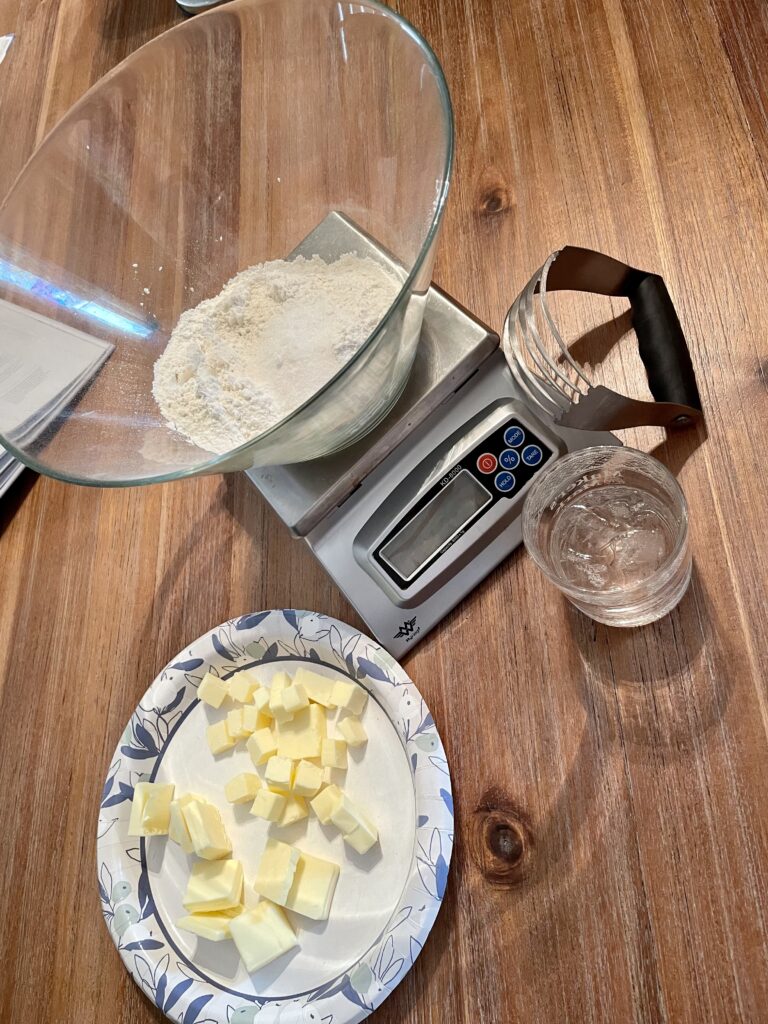
- 284 grams of butter (chilled)
- 400 grams of AP flour
- 26 grams of sugar
- 1.5 teaspoons of salt
- 120 grams of iced water (yes, with ice floating in the water)
List of items you will need to complete this recipe:
- Bowl
- Butter cutter or fork or fingers
- Knife
- Scale
- Rolling Pin
- Pie plate
- Parchment paper
- Beans or pie weights
- Baking sheet
- Extra flour
- Bench scraper
Directions
- Get your ice water ready
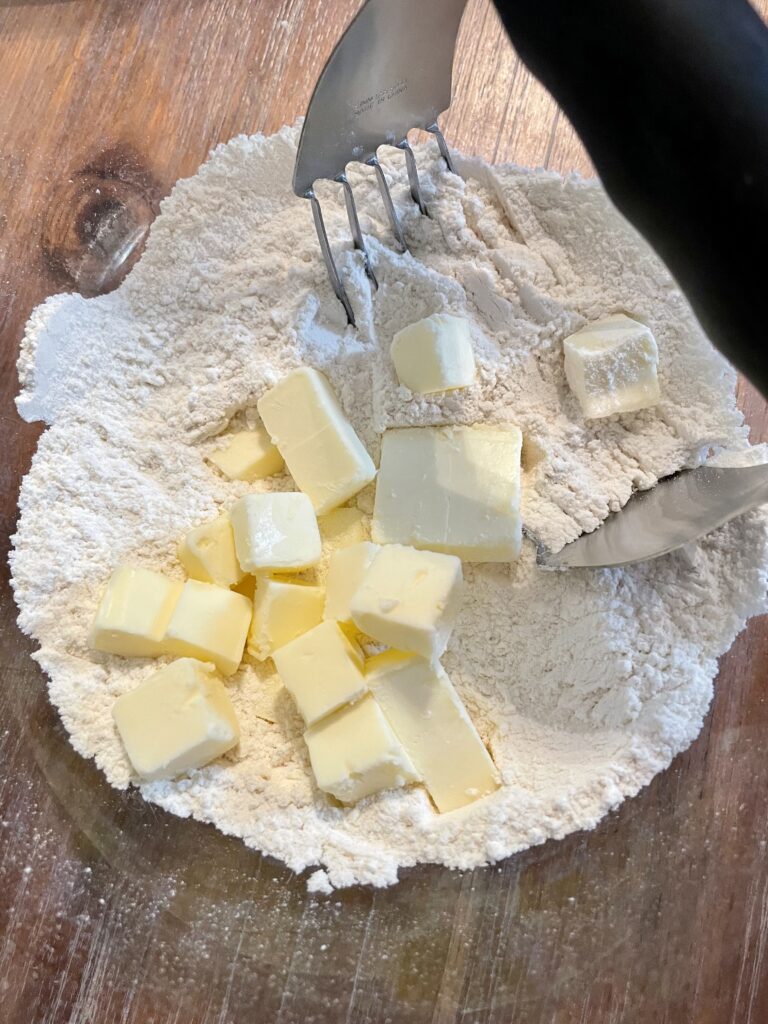
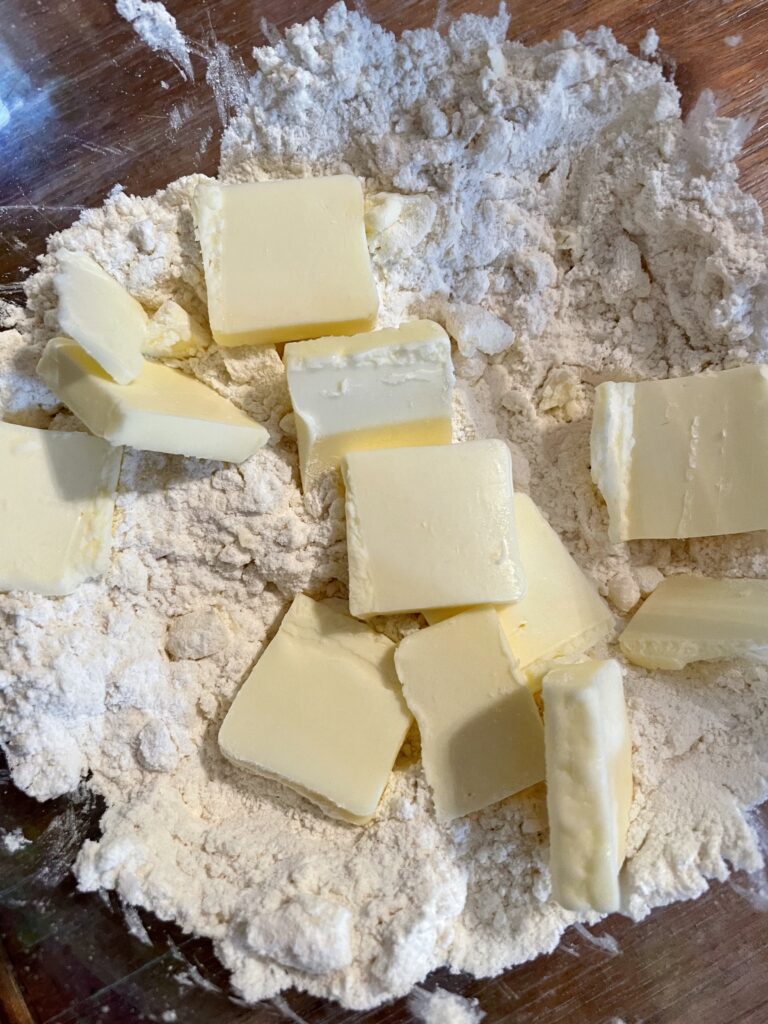
- Take your butter (2 and a half sticks). Cut half of the butter into cubes and the other half into very thin slices, place back in refrigerator. It is imperative that you keep everything as cold as possible. If you have hot hands, it has been suggested to cool down the flour and mixing bowl by placing them into the refrigerator.
- Using your scale or measuring cups, weigh out your flour, sugar, and add your salt, mix to combine
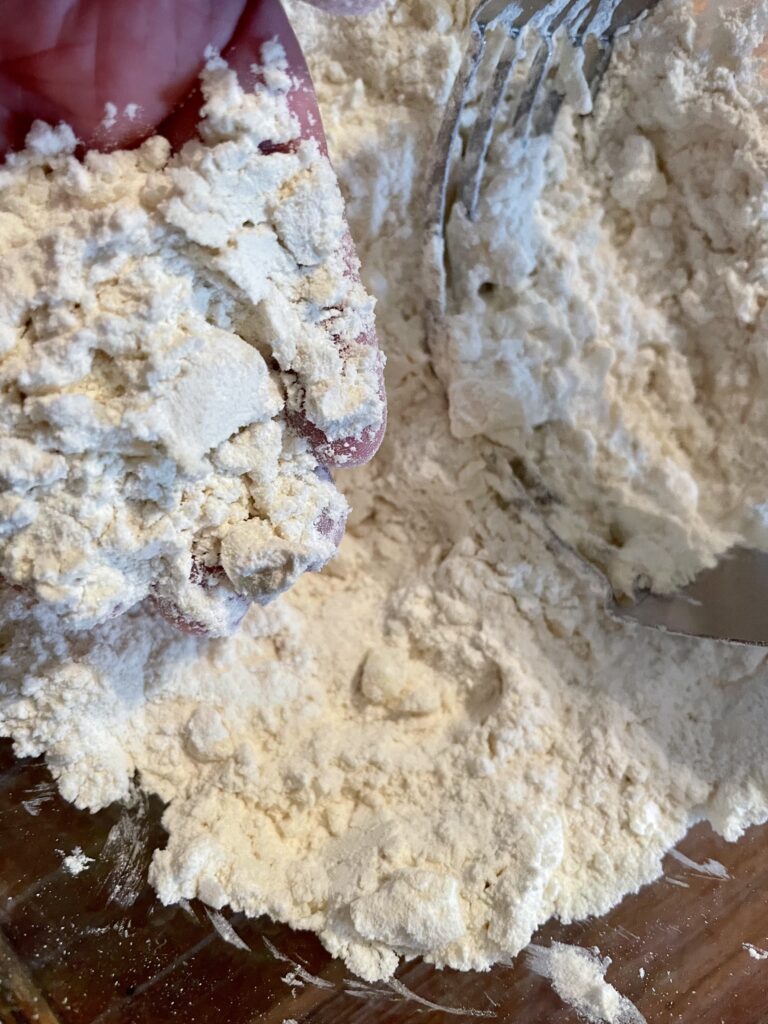
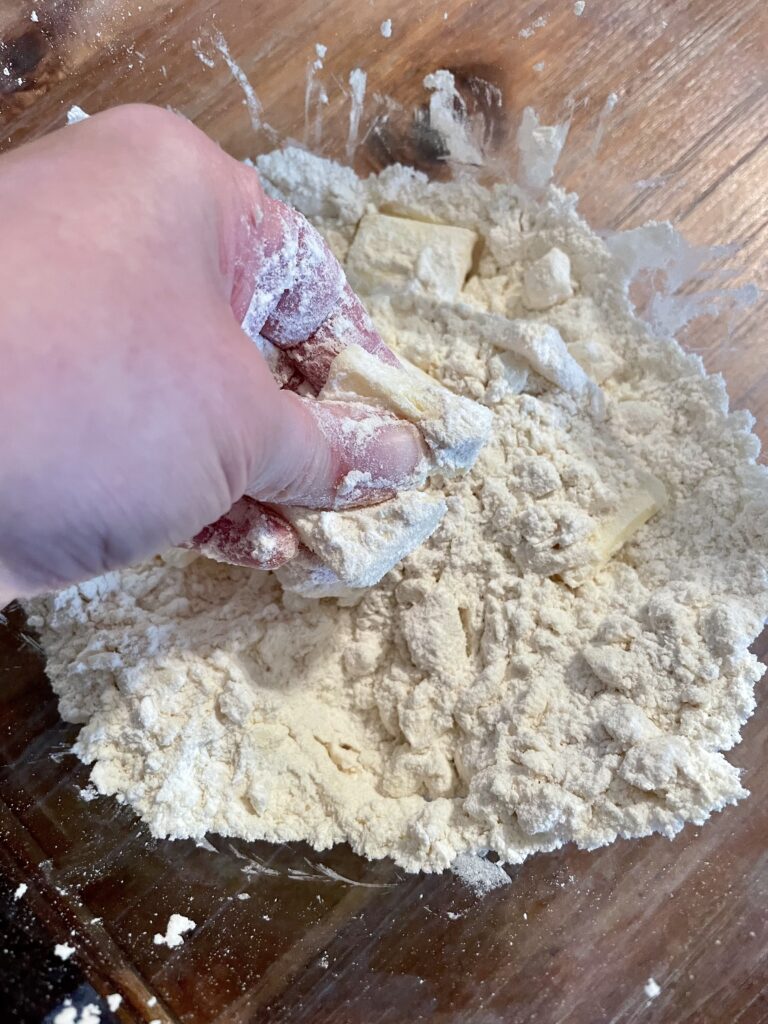
- Now take your cubed butter and place it in the flour mixture and coat the butter cubes with the flour mixture. Take your butter cutter or fork or your fingers and work the butter into the flour until the flour mixture resembles sand. NOTE: If you have warm hands, I would suggest using the a fork or butter cutter to cut the butter into the flour. You DO NOT want your butter to get warm.
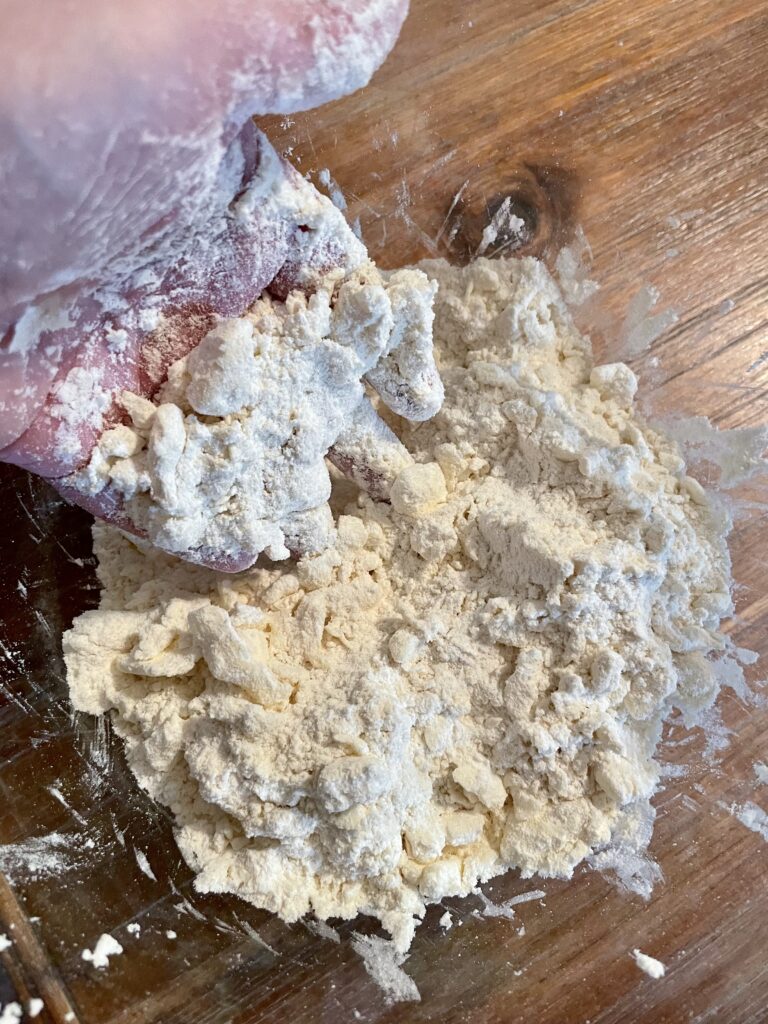
- Grab your sliced butter that you kept in the refrigerator and put that into your sandy, flour and butter mixture. Take your thumb, pointer, and middle fingers and message (rub) the butter slices into the flour mixture. This butter you will not get to incorporate into the mixture, that’s what we want. I like to incorporate the sliced butter until small and medium pebbles are formed. Clumps are okay.
- Make a well in the flour.
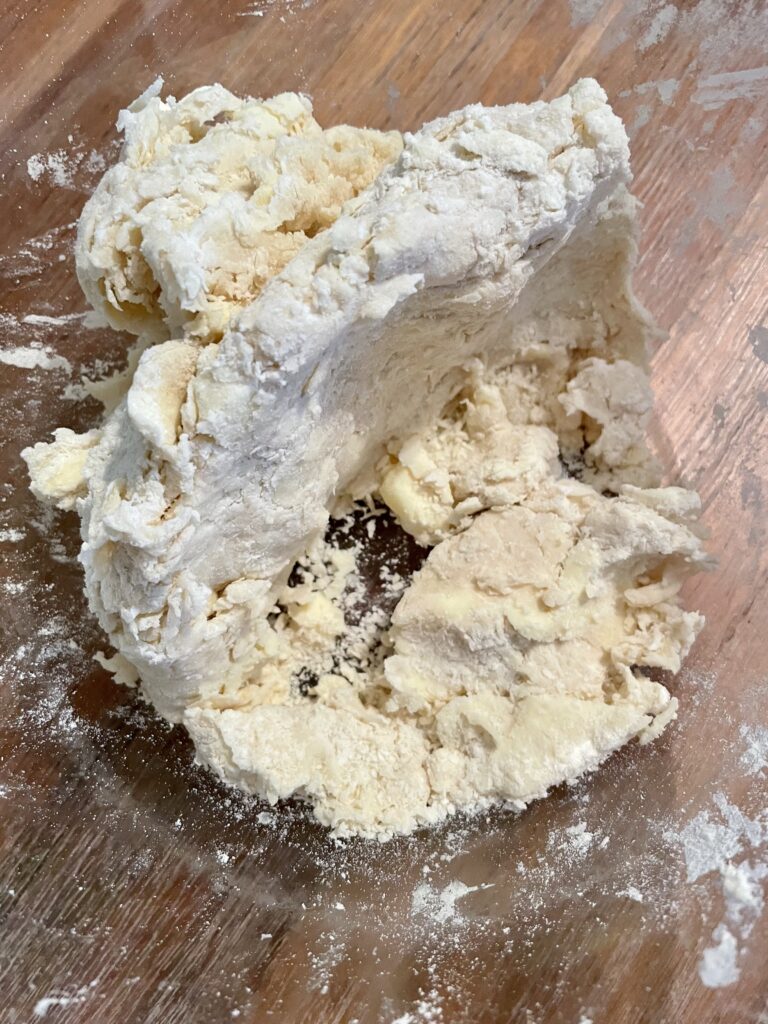
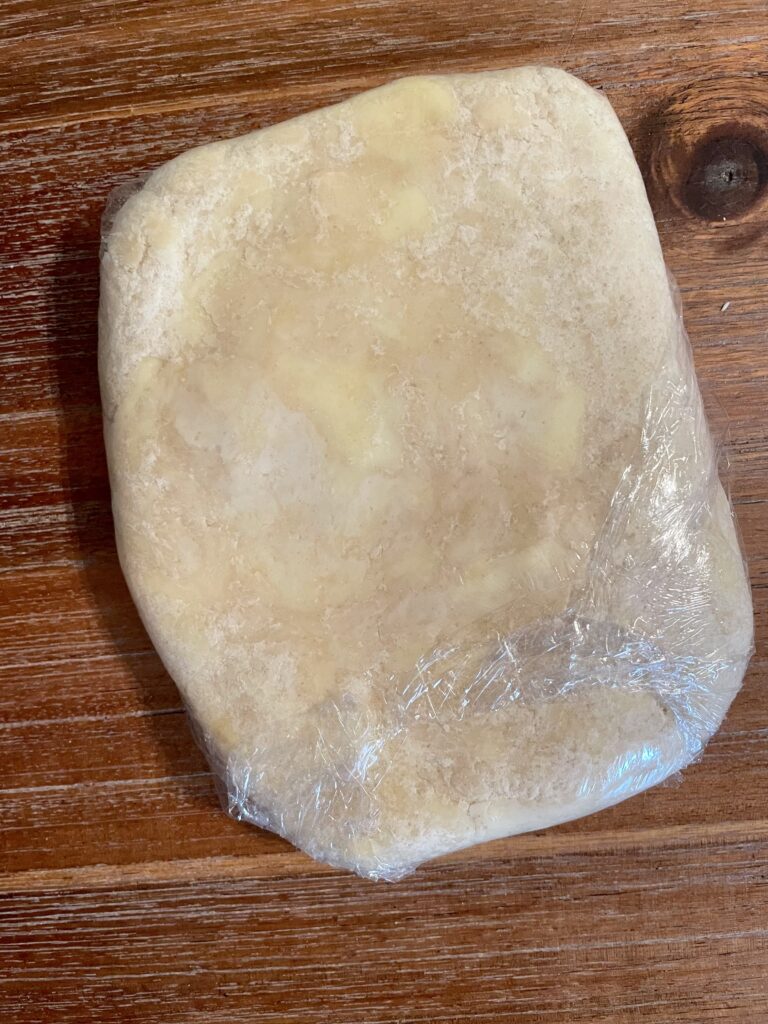
- Take your water and pour a little but into the well. We are looking to hydrate the flour. If ice cubes fall into the dough mixture, make sure to take them out: do not fold them into the dough! Using your hands, toss the flour with the water, this will create larger lumps and the flour and butter mixture to come together into a ball, keep adding water until most of the mixture is one homogenous ball of dough. But be gentle and try to not work it too much. Turn the mixture out onto plastic wrap and with plastic wrap, wrap it and form it into a disk.
In the Big Freezer
- If using that day: place disk into refrigerator for two to three hours. If not using that day, place in freezer until you are ready to use. When ready, take disk out of freezer and place into the refrigerator for a day or overnight.
When you are placing the disks into the refrigerator you are doing two things: allowing the dough to rest and further hydrate. Both Erin (2020) and Claire (2020) suggest placing the disks into the refrigerator. Betty Crocker’s Cookbook (1972) does not mention this and has you making the pie crust and baking. I am thinking this is because their pie crust is made out of lard or shortening and therefore, may not leak like a butter crust will when baked and not cold. Again, for a butter crust, the name of the game is to keep everything COLD.
- Once the two hours have passed, take the disk out and get ready to roll out!!
Roll Out!
- Take you chilled disk and roll it out in a circle to about quarter of an inch to one third of an inch thick. Once that has been rolled out, fold the dough into quarters and roll out again. Once you have the dough rolled out again, for a second time, fold the dough into quarters. Cover the dough with plastic wrap and place back in the refrigerator for another hour or two.
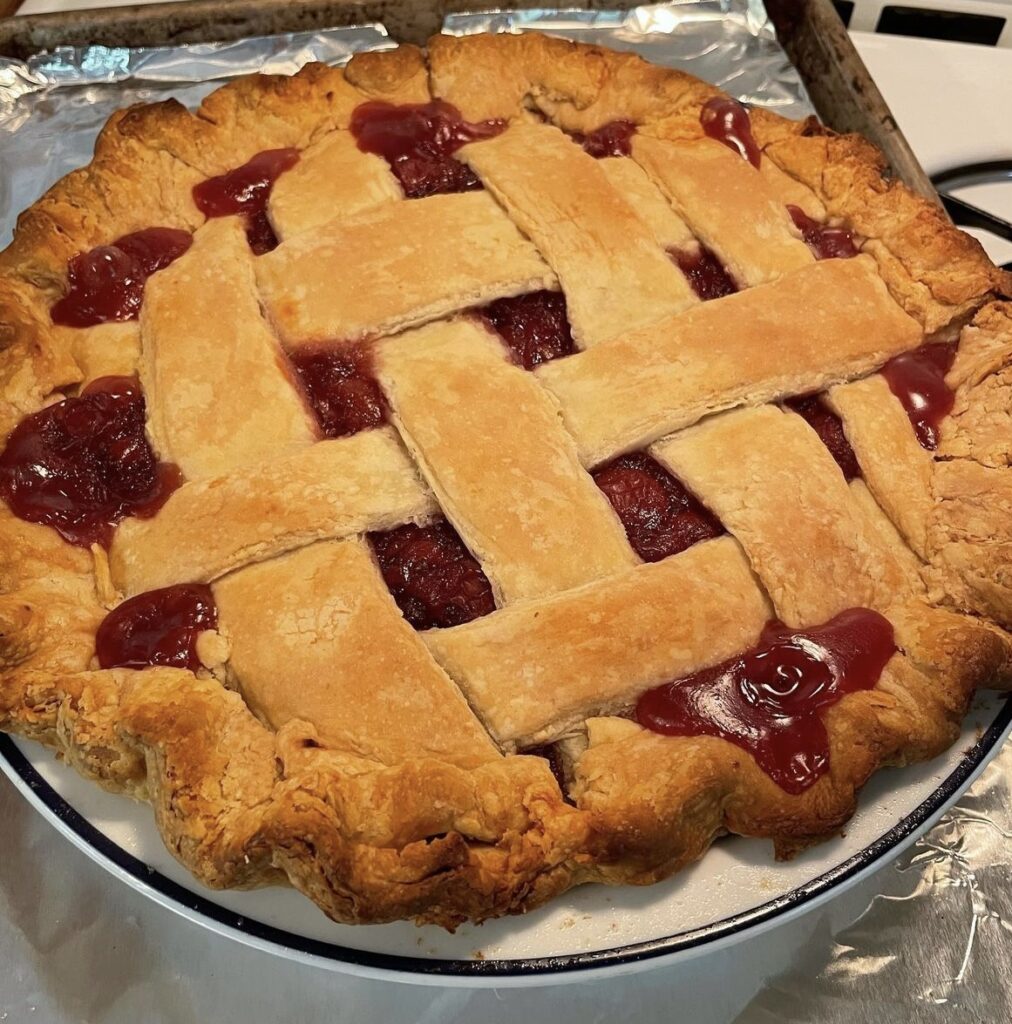
- Take out your dough, again, and roll out, this time making sure it will fit into your pie plate with overhang for the crust. Place your shell into the pie plate. Take your overhang and cut it to about one inch, then fold the overhang under itself. You now have a thick ring of dough around your pie crust’s edge. Crimp this! Its your edge! (This crimping could include using your fingers to pinch or even a fork to press down and make marks in the dough. I usually go for the finger pincher technique, myself)
- Place the pie shell in the plate into the freezer about an hour. Yes, the pie plate also goes into the freezer, the whole thing!
- In the meantime, preheat your oven to 425 degrees Fahrenheit.
Pie Plates
Why am I adding a section for pie plates? Why in the world are you placing the pie plate into the freezer?!! All shall be revealed in good time! As in, right now. LOL. When I used store bought pie crusts, I would use any old pie plate I had, be it glass or metal. It honestly didn’t matter because I would make my filling, roll out the crust, put crust in dish, filling in crust, and bake! However, these crusts have pieces of butter spread throughout them, so they and the pie plate need to stay as cold as they possibly can: which means using the freezer to ensure this.
Why do we need to do this? Because of the butter.
This means transferring the pie, plate and all, from the freezer directly into a very hot oven. We do this, because the flash of hot air melts the butter and evaporates the water in the butter, which in turn, creates a crisp and flaky pastry! In order to achieve this light and flaky crust, we need a pie plate that can stand up to the thermal shock of being placed in a freezer and then into a 425 degree oven. The pie pans that you can do this with (but always check the manufactures care instructions) include: metal, porcelain, and ceramic; not glass. If you were to take glass from the freezer to a very hot oven, it will shatter; and having a shattered pie plate is a very shocking occurrence, not that I would know from experience or anything….
Funny enough, I also just learned (while performing my diligent research for ya’ll) that placing a pizza stone or metal cookie sheet in the oven as it heats up and then placing the chilled pie plate on that will better ensure for a set, crispy, and golden crust! In conclusion, please, when making butter pie crusts, freeze them in a thermally appropriate pie plate; then take from the freezer to a very, very hot oven! Thank you.
To Parbake or Not to Parbake?
- If you are parbaking your crust, take parchment paper and set inside the frozen pie shell. Next, place pie weights or rice or beans ( I use beans) inside the pie shell, this will prevent the crust from slouching and puffing. Place pie crust, weights or beans and all into a 425 degree oven for between 25 and 30 minutes. Remove from oven, remove (carefully) the pie weights and transfer them to a bowl to cool down.
- Turn your oven down to 350 degrees Fahrenheit. Then place the “naked” pie crust back into the oven for another 20 to 25 minutes. The crust at this point should be golden brown and done! Fill and go!
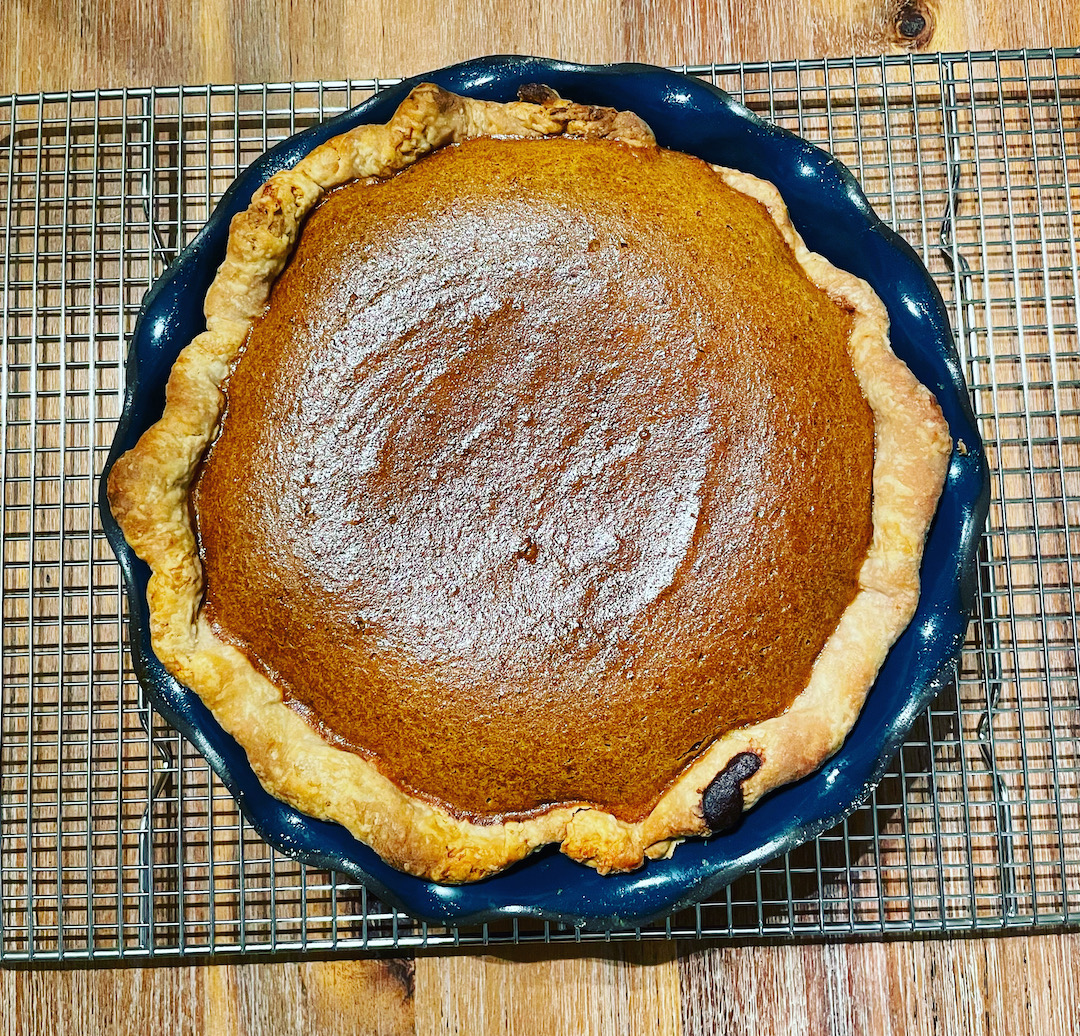
NOTE: I have noticed that Erin and Claire, especially Erin, bake their crusts before filling for almost all their pies. If they are a double crust pie, of course, they do not, but for the single crust pies, they do. If you are worried about the edge becoming too browned, you can place foil over it. I have done this with my pumpkin pie and the crust was very, very good!
Double NOTE: Bridget, what the frijoles. I baked my crust and there is melted butter all over the place!! Yes, that happened to me multiple times. When it did, I went into research overdrive to figure out why? Why? WHY? What did I do wrong?! Well, turns out, placing that dough in the pie shell in the freezer for at least 30 minutes is what remedies this. Even though, I must note, it can still happen (just a little). What happens if my butter goes everywhere? I will explain my personal experience here and then I will tell you what Erin said might happen. When it happened to me, my crusts were still good, however, they were not as flaky or light, and were more difficult to cut. Again, they were still very good. Erin had stated that when the butter leaks out, they can become chewy and thin, which I can see.
The Choice is Yours
Make your own or buy? I leave that decision up to you. Either way, I hope you have enjoyed and was entertained by my own pie crust journey. I have enjoyed researching and testing out different techniques. Heck, try it with lard or shortening and let me know how that works and tastes! This can also be a fun opportunity to use this as an excuse to purchase new and fun pie plates! I cannot get over the jewel blue tone of my newest pie plate! Either way, have fun and enjoy all of your food!
Works Cited
Saffitz, Claire. Dessert Person. Clarkson Potter, 2020.
McDowell, Erin Jeanne. The Book on Pie. Houghton Mifflin Harcourt, 2020.
Betty Crocker’s Cookbook. Golden Press, 1972.