A hoy-hoy! In today’s post, we will cover the different scrapbooking tools one can use to make scrapbooking both easier and fun! I know, hold on for dear life, it is about to get crazy! LOL. So, hopefully you have read my first scrapbooking post, if not, look around the blog in the Scrapbooking section! It’s not necessary, but it might help. Also, it is a fun Disney scrapbooking! Anyhoo, as we go through this post, I will make a list of items I use and why. Hopefully, for new or first time scrappers, this will help get you started, and for seasoned scrappers to see and compare how I scrap to your own methods! Now, buckle up, Twinkle-Toes, for a wild and crazy ride!!
Paper
Let’s start with paper! Although honestly, I could talk about paper for pages and pages, really. I know, that sounds pretty intense, but there are a lot of papers to choose from! Hear me out! There is background paper, sparkly paper, main paper, main paper that can be background paper! Paper, paper, paper! But, Bridget, how in the hell am I going to know what kinds to get and use? Remember in my first post, I stated to think about what you are scraping and choose your paper based on that. Also, remember to use the colors in your pictures to help you with paper choices as well!
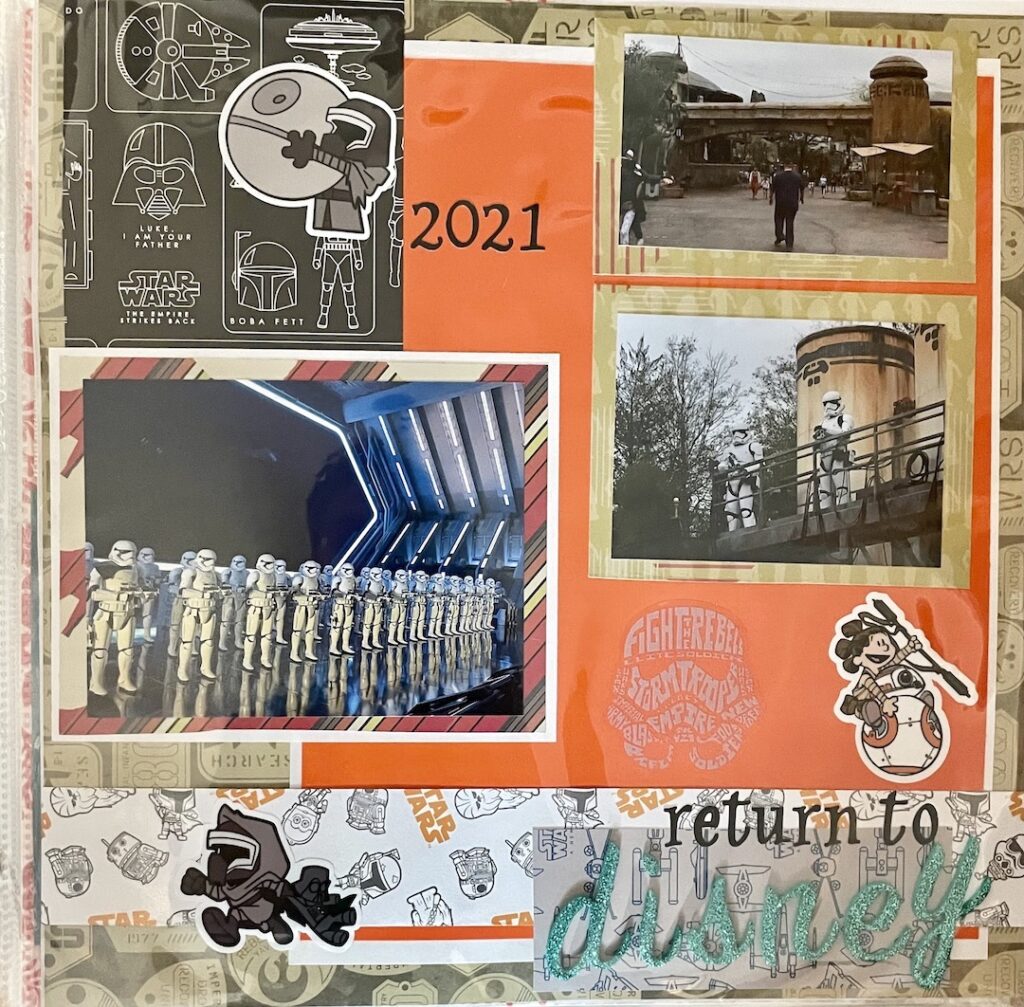
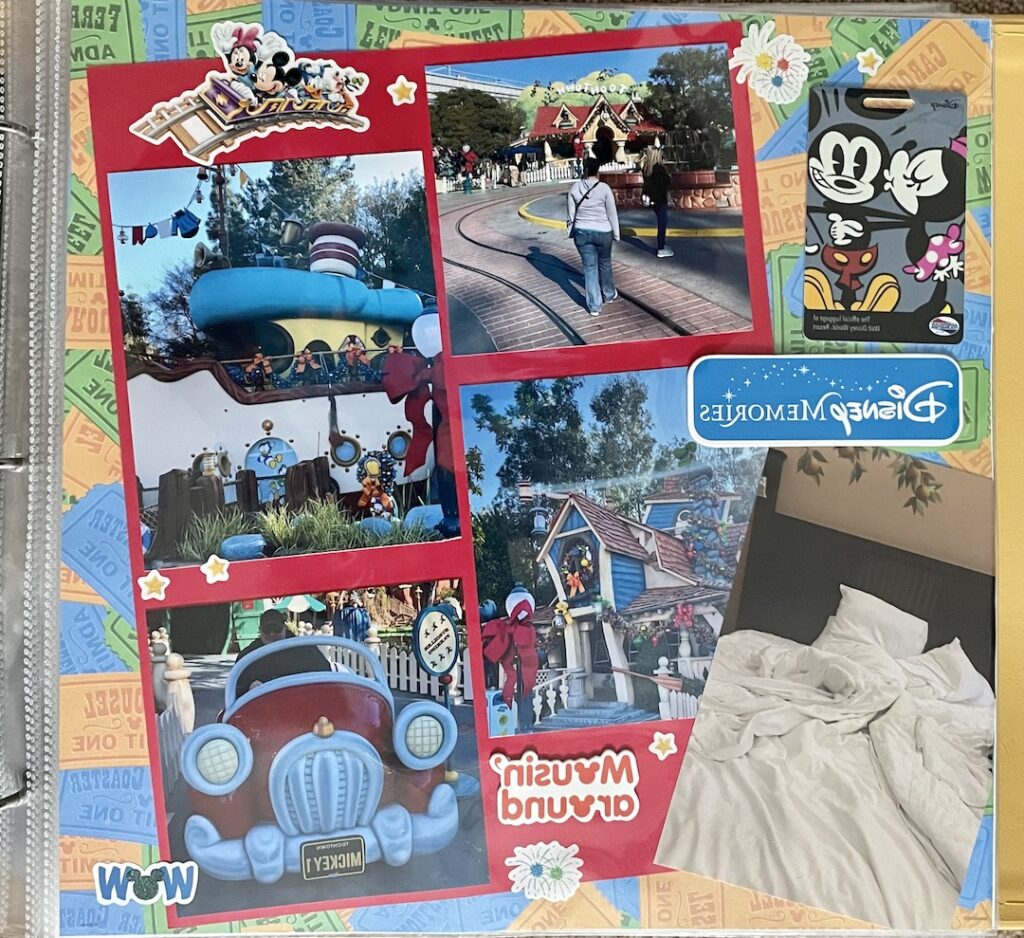
What is background paper? Good question. That’s just what I am calling the paper one uses to accentuate a picture or a themed piece of paper. For example, both in my pictures and in the themed Disneyland paper I chose, I pulled out the red from both by using a red background paper. It makes the photos and the Disneyland paper pop (I think, anyways). Or in the Star Wars page, I used orange to pull from the Star Wars paper. You can also use sparkle paper for the same effect (especially you want to use similar colors, for the black of Kylo Ren’s outfit, use black sparkle paper). Can you use two or three background papers against your photos and/or documentation items? YES! Some people use two or three! It is completely up to you!
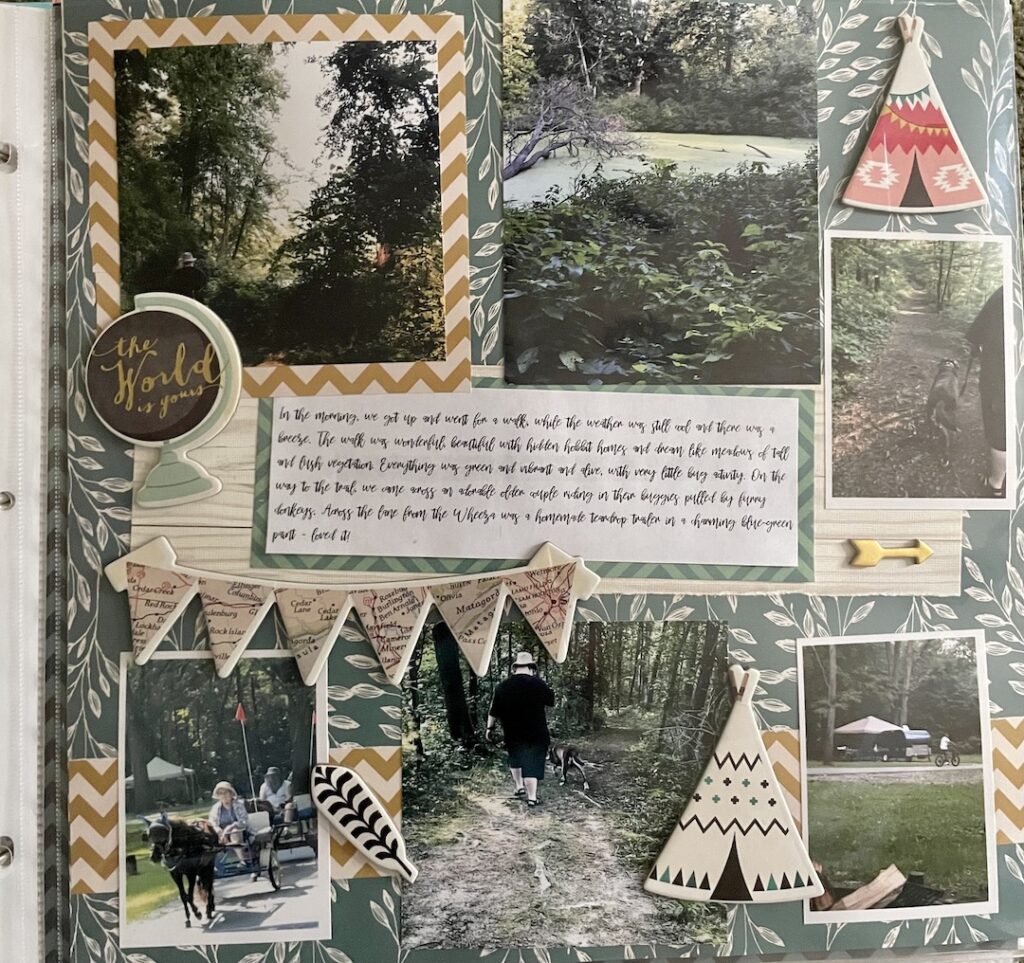
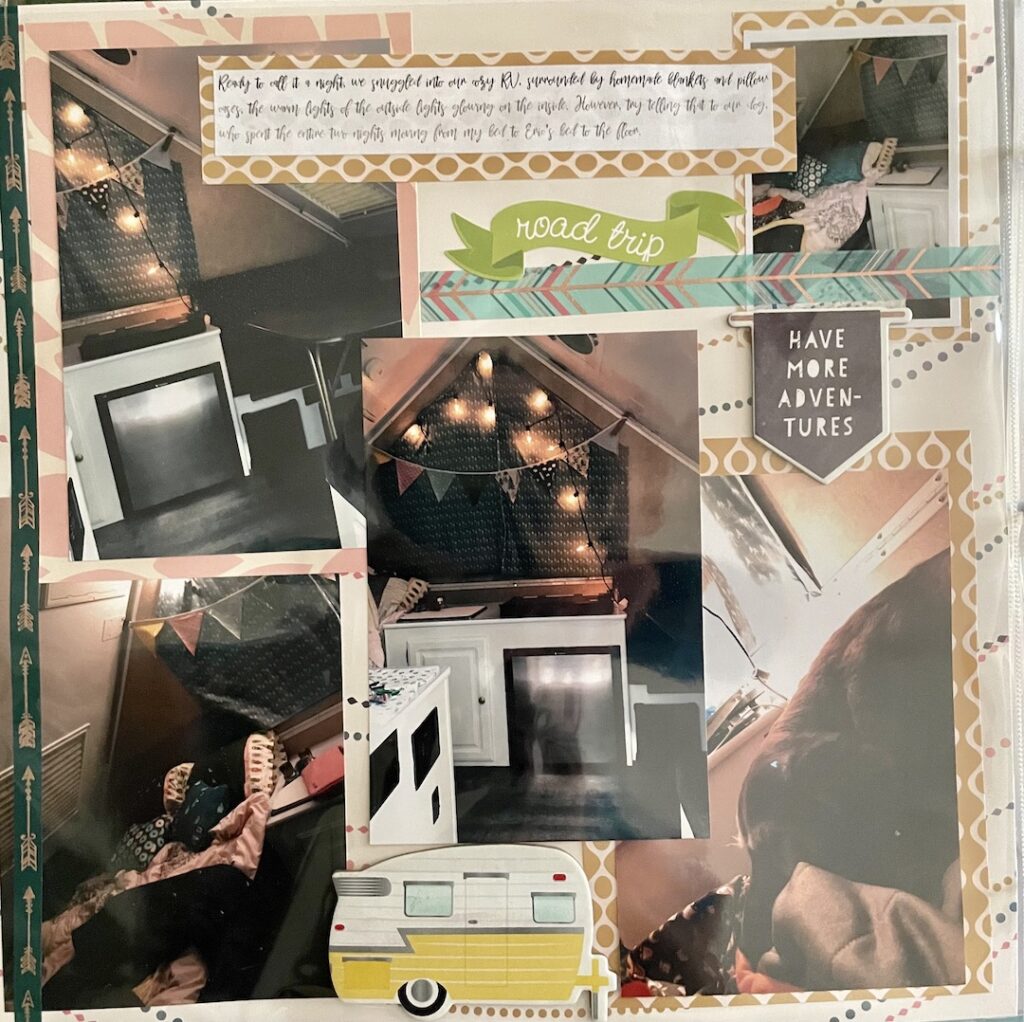
As the background paper accentuates, not only your photos, but also you main paper, let’s talk main paper!! This is the fun part!! Well, one of the fun parts! For camping, I use outdoor, sometimes straight up camping paper, and abstract outdoor paper for my camping stuff. You don’t have to go camping, camping, camping. You can use more abstract patterned papers along with your outdoor or camping paper. Same for my Disney. I have a camping scrapbook, but I did one paper with cool food as the theme as I was showcasing the camping food we made. I’ve used the same paper for other food type photos. Research, use Google, or Pinterest to find inspiration for different layout options! That is how I get a lot of my ideas and then run with them and change them as you want. On the layout pages, they will show you how to not only layout your photos, but what types of papers to use and where (like your main and background papers).
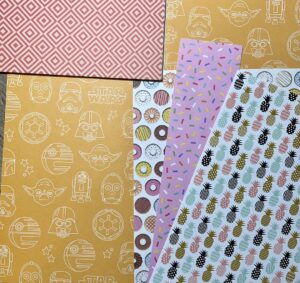
Where do you get your paper? All over! All. Over. LOL. But really. I have gotten scrapbooking paper at the Dollar Store. You never know! Mostly places like JoAnn’s and Hobby Lobby. I really like their paper options. I have started getting my paper online too. Recently I purchased (twice now because I love it that much) Star Wars paper packets. I think it is supposed to be for a Cricket or whatever, but the pack is great for scrapbooking too! I learned about online shopping for scrapbooking paper from one of my best friends that bought me camping paper for my Birthday one year, and it was so cool! I started looking online after that! You can also see the progression from when I started in high school to now. I have a crap ton of extra paper that I have collected, and pick and choose from to use throughout my scrapbooks. In the scrapbooks of old you can see I only use one maybe two pieces of paper per sheet. Now I use several with different patterns, colors, and even textures!
Cutting Tools
Okay! Let’s talk cutting! Believe it or not, there is a plethora of ways to cut your paper and photos! I know, crazy, I’ll give you a minute to recover. Alright. First of all, there is, of course, the oldie but goodie, the old straight scissors, you know, regular scissors that we all grew up with. LOL. Then there are decorative edge scissors: they have edges that will cut in waves, zig-zag, scroll, waves; the list goes on and on for the different decorative edges that you can cut.
Then there are the paper trimmers. Plastic contraptions that have rulers and straightedges built in. I have purchased one a couple of years ago and honestly, I don’t know how I ever scrapped without it! I love how easy it is to use, and how straight and perfect my cuts are! Makes me (Type A) a very happy person. Moving on from there, they also have die cutting machines that have patterns to use to cut out different shapes. You can also purchase a cutting mat that uses a ruler and spin cutter (like a pizza cutter for paper). There are also punch out cutters which you can use to punch out shapes, or trim off the sharp corners of your paper or photos.
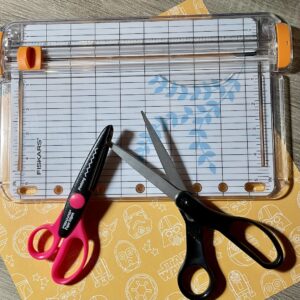
What do I use? I use my paper trimmer the most, followed by my regular scissors, and then my decorative edge scissors. Lately, I have been liking straight edges, but is a personal preference and up to you and how you are feeling that day! I’m sure I’m missing some cutting tool or another, but honestly those three tools are what I use the most, with my paper trimmer at the top of the pack. But play around and see what you like the most!
Tape
Back in the day (LOL, sigh) but really, back when I first started, you could buy the double sided crafter’s tape for a pretty penny (aka expensive), or, as any self-respecting high schooler would do with little to no funds, you use Scotch tape and if you get lucky, you use the double sided Scotch tape. I have used Scotch tape for years, I mean years. Honestly, most of my scrapbooks are still holding together and not falling apart, so, I guess that says something about good ‘ole Scotch tape. BUT. Scotch tape is not acid free and I do remember that back in the day, they (meaning the scrapbook people) would also talk about using acid free tape and even paper to prevent the products from eating away at your photos. Now. 25 or so years into scrapbooking and honestly, all of my pics still look fine with nothing eaten away.
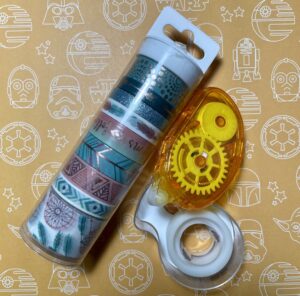
However, because I can (and can afford it), I do now use the double sided crafter’s tape specifically made for scrapbooking. Here’s the main difference from back then to now: I can find this stuff everywhere! I mean, everywhere!! Before, you would have to go to a scrapbooking party to get the stuff! Now they even have it at Walmart! There are also crafting adhesive dots and even Elmer’s has glue for scrapbooking! The dots, I found to be okay, but just seemed to be a pain as I had to stop and peel off a dot then decide where to place it. Also, I didn’t like that you could see the dots’ shape through the photo. Honestly, the double sided running tape, is on a wheel and you simply run the tape over where you want it, and Blamo! You have a lovely run of tape! To me, this seems more secure as well. And yes, Scotch tape even makes tape that is scrapbook safe. Again, I just really like my tape runner.
Alternative Tape: So, there is also tape that you can use like Scotch tape, BUT, it is decorative! You can use this tape to secure your photos on the corners like the old, vintage photo albums, but they also have cool designs! I have used them, but again, I mainly use my crafter’s tape runner. But using this decorative tape is fun to mix it up! Play around, though, and find what works for you! What I like, might not work for you and that’s okay!
Stickers
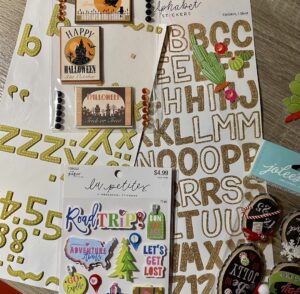
Sweet Baby Jesus. I love stickers. I mean, I really love stickers. A lot. I may or may not have an addiction to them (I definitely do not, by the way) and I just can’t help myself! Similar to the paper, there are so many different kinds of stickers, and I love to use them to accentuate my pages. They are just to much fun! However, I do have warn you: they are expensive little suckers. I usually try and wait to get them on sale whenever I can. A lot of the stores do put them on sale regularly, but, they are still rough on the pocket book.
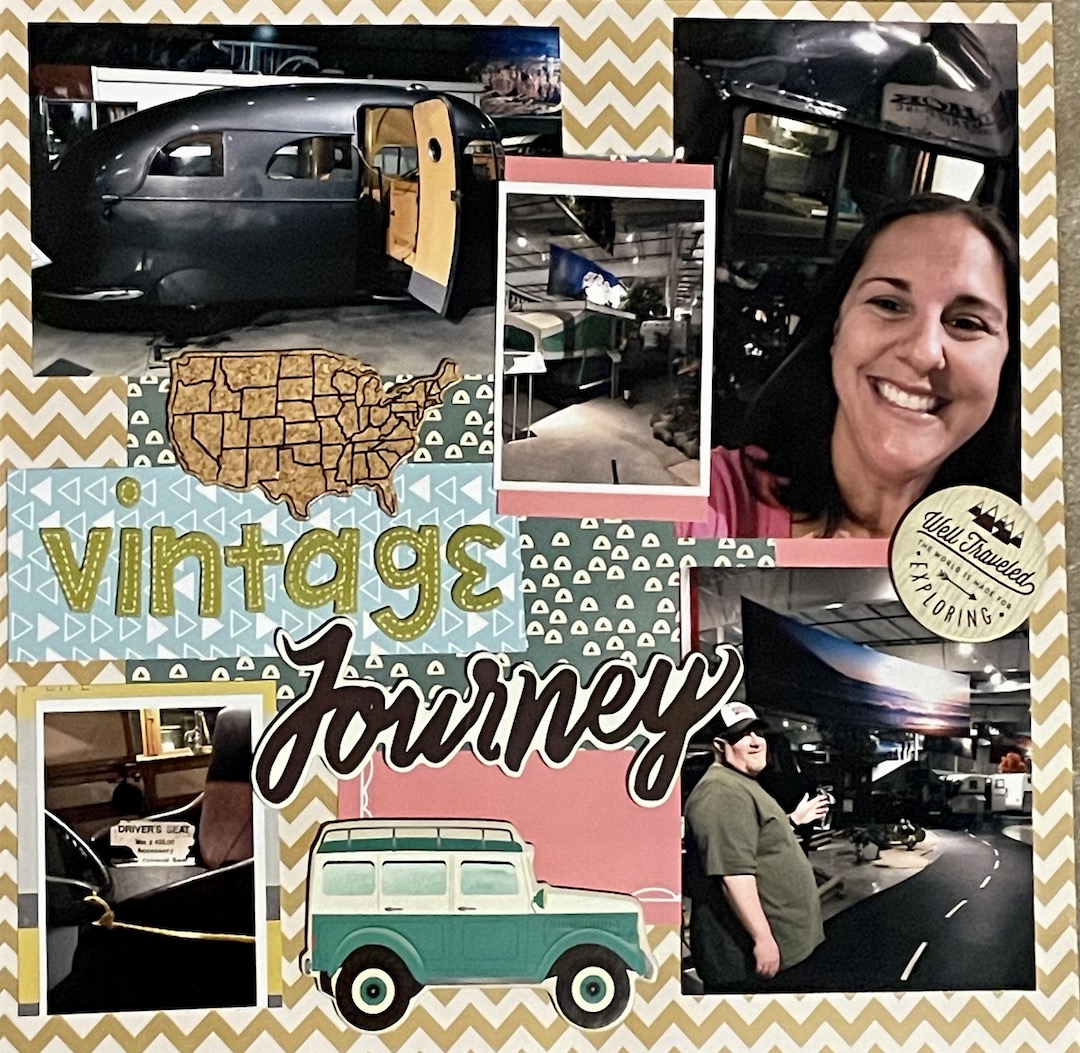
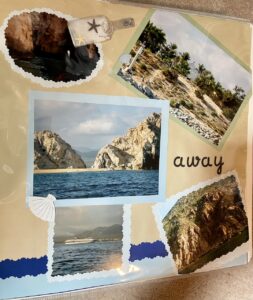
Do you have to use stickers? No. But, like, why wouldn’t you??? All joking aside, you don’t have to use stickers at all. There are some pages that I make that are so full with photos and busy patterns that the stickers would get lost, or make the page way too busy. But in general, I do enjoy using stickers to fill in and accentuate my pages. I will place two photos, an older scrapbook page I did that honestly doesn’t have much in layout or stickers and then a recent scrapbook page. I like to call them minimalist vs. baroque. HAHAHAHA. Now some people might think that my more recent pages are too busy, but I personally like them, especially when I see my “vintage” pages. LOL.

Any specific brands? Not really. I buy what I know I will use, (a lot of camping, Disney, and food) and I always look to see what is on sale. I honestly have never looked at brands. As I had mentioned in the page section, I even look at the dollar store as they can have some really cute stuff! Any type of ideas for placement? Not really. I honestly look to see where I have blank spots and if I think a sticker would benefit being there, I put it there! I will say, I like to place stickers by titles and in the corners of the pages for some reason. But again, this is YOUR scrapbook and your page! Have fun with it! But definitely kick it up with stickers!!
Stamps
There are a lot of people who use stamps in the scrapbooking, and I honestly think that is a great idea. It saves you on stickers (yes, I said it) and stickers for lettering. There are so many different types of stamps and a huge variety of ink colors to match with any theme that you choose to use. I have actually purchased some and used them, a couple of times. Then I stopped. Yeah. I am lazy. I know, I know, but I have to admit this, which is why I am going to state that stamps are a great cost effective way to scrap. However, for me, they were a pain to take out, use, and then clean. You should really clean your stamps after every time you use them to stop ink buildup.
Seriously? That’s why you don’t use them? Yes. Hey, I never said it was a sane reason. I told you I was being lazy, so I don’t want to hear it. LOL. Again, that is why I am telling you to try them out as they are super smart way to scrapbook!
Scrapbook Albums
Pages completed to the best of your fantastic abilities? Yes? Awesome. Now we need to put this altogether in an actual scrapbook. Thrilling, I know. But it is actually really cool when you do finally put it all together, I must admit! However, I must say that we need to choose an album to put this all in. And, of course, there are options. LOL. When I first started, I had the fancy and expensive albums that you purchased from the shows. Those are the bound albums. They are nice. However, the longer I have been doing this, I have switched over to the three ring albums. Why? Honestly, because the bound albums sheet protectors and filler paper are not only harder to find, but they are more expense (as are the albums themselves). I am also able to get more pages into a three ring binder without stretching out the album.I have an album from high school and poor thing is falling apart.
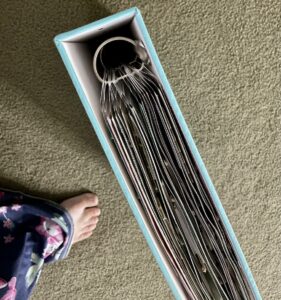
Another point I would like to make as to why I like the three ring binder over the bound, is if you miss a page while putting it all together in a bound album, you have to take it all apart and redo the whole thing. For a three ring binder, you go to the section you missed, you open the binders, fix it, close it, and you are done! You don’t have to take it all apart! There are albums that are like notebooks, but honestly, I would use those more like a journal. Trying to make a scrapbook out of those would be hard. Sometimes I like to move my pages around. If you put it in a notebook style album, once you have it on the page, that’s it, you can’t move it. They also have the self-sticking albums. Now, these are good if all you want is to place your pictures in an album, they are perfect. However, you can’t really scrapbook in them. I must say that again, when I was younger, I took some of my mom’s pictures and put them in self-sticking albums and they are still sticking! They even have tutorials where you can make your own album, pretty cool, but I have not attempted.
Where do I get my albums? Lately, I get them from the Internet. LOL. You know the site. Before I would look at Walmart, JoAnns and, Michaels with coupons. But the ease and price of the albums, getting them online is so much easier, and honestly there is are more extensive collections to choose from.
Filler Paper/Sheet Protectors
So. You have chosen you pics, your paper, stickers, and album. Now you need to actually scrap! But on what? Paper!! What kind of paper?? I’m glad that you asked! Typically, when you get an album, they do provide you with paper and the page protectors. But they are never enough. When you get the three ring binder albums, they do not give you paper. Either way, it is good to have extra paper and protective sheets on hand. Warning: make sure you have the paper and protective sheets that will go with your album. Protective covers and paper meant for bound albums will not work in three ring binder albums and vice versa.
NOTE: The paper does come with the extra page protectors.
Another Warning: Make sure when getting the page protectors that you get the correct size and that they are not the pocket page protectors (yes, I have done both). Nothing is more frustrating when scrapping then getting home and finding out you got the wrong stuff cause you were in a hurry in the store (a store that is 30-45 minutes away). Yup.
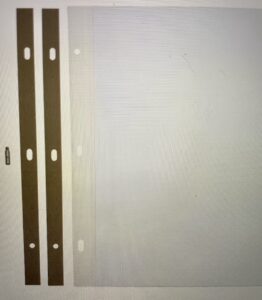
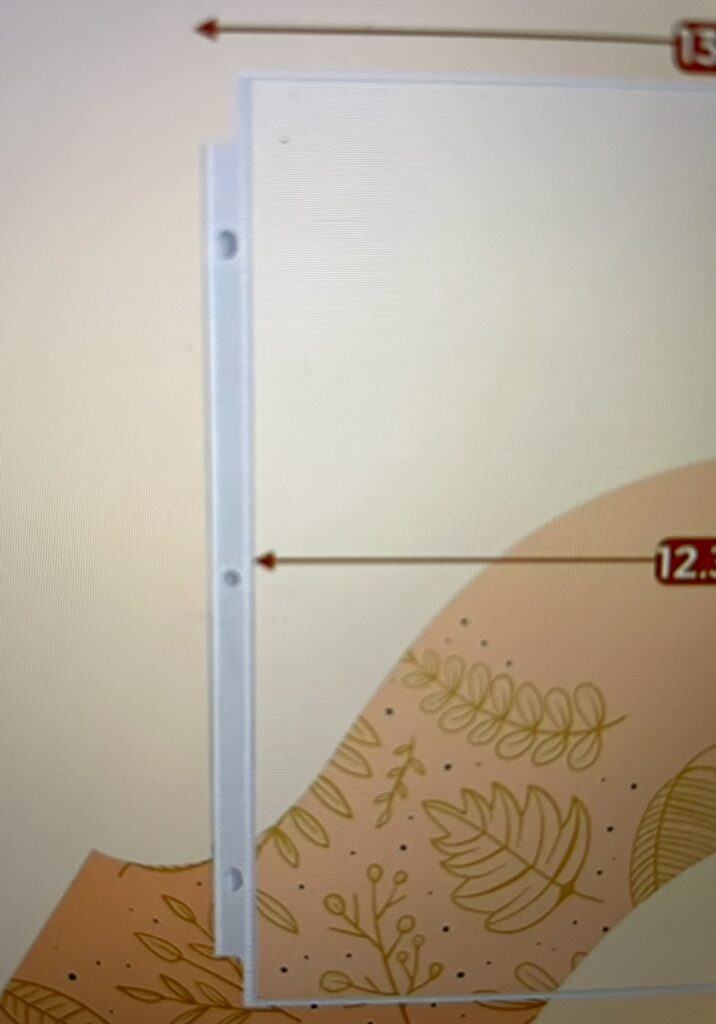
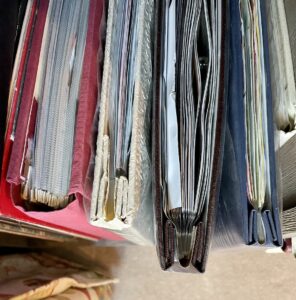
How do you know which ones to get to make sure they will work in the album you purchased? You are looking at the holes to the left of the page protector. Please refer to the pictures I have provided to show you the difference in the holes. Just be mindful, as I have said before, it is very frustrating to get home, get ready to scrap and then find out you have the wrong stuff!!
Conclusion
In the end, this is your expression of keeping and cherishing memories made. Do what feels right to you and what you enjoy. I simply wrote this in an effort to help make scrapbooking more manageable as it can become overwhelming with everything they have to offer to help you create your scrapbook of awesomeness. I hope this helped or at least was entertaining! Now, get there and start scraping!!!

This is so detailed and fantastic!
If only I could be as talented and creative as you!
Of course you are!!!! Thank you!
My mom and I scrapbooked for years!! We would go to weekend long treats and we both made the same changes you did! More stickers, more fun pages, more tapes, and of course the move to the three ring binder. I hated unscrewing scrapbooks to add a missed page!! Lol Recently, don’t hate me… I’ve dabbled into Shutterfly online scrapbooking and Google’s scrapbooking. I really miss the old ways but I like the new ways too??? I dunno, we will have to talk in person about this. It’s a lot of pros and cons to be honest. But anyways, awesome work love!!! ♥️♥️♥️
No, I have also dabbled into the Shutterfly! HAHAHA!!Thank you so much! And I don’t think I knew you were so into the scrapbooking! We should do a post together!!!
Stickers are the best!!
I mean, they really, really are! LOL