
A hoy-hoy and welcome to my blog!! I have been toying around with the idea of writing one with the expressed purpose of showing people the stuff (for lack of a better term) that I do. Some people have one or two hobbies. I take after my father and therefore have many hobbies. “How many, and what are they?”, you are hopefully asking! Welp, I love to decorate cakes, sew, cook, and I’m a proud scrapper! I also enjoy long walks at the fairgrounds with my dog…hahahaha.
However, on this my very first blog posting (is that what you call this?) I have decided to go through the process of baking and frosting a cake. Frosting cakes has honestly been the one hobby I have been doing for the longest. I began when I was in either the third or fourth grade, I think? Someone who knows me, correct me here if I am wrong, hahaha. My very talented cousin, Lori, is the person who would come every year and to help make and frost the cakes (while my mother burned the hell out of herself cleaning everything). Since then I have created countless birthday cakes and two wedding cakes…. The wedding cakes shall never be done again as decreed by both myself and my husband. So, there’s that.
Anyhoo… I do, however, love to make people their birthday cakes when they do so choose. And this year, my saintly mother-in-law (I’m not joking, this woman is the sweetest, kindest person ever) asked me to make her a lemon and coconut cake. CAN DO, LINDA!!! Or as my husband would pronounce, “LEEENDA”. Yup, I’m a lucky lady. HAHAHAHA
First of all, we shall discuss the great debate between boxed cake mix or “from-scratch” cake. Now. Here is where I stand on this issue. Remember, I am but a lowly self-taught/watched A LOT of PBS cooking shows and Martha, my Martha (that’s right, I love Martha Stewart and yes, it is a good thing). HAHAHAHA. But I digress; like I was saying, I use boxed cake mixes. And NO ONE CAN TELL THE DIFFERENCE. I’m serious here, people. Most of my loved ones think I am baking these suckers from scratch and perhaps I allow them to think like that, I mean, who am I to dash their dreams?? I do, however, add certain ingredients depending on the flavor of the cake.
Prepping your pans: I typically use Non-stick cooking spray and for the bottom I do cut out and place a circle of parchment paper. This will ensure that your cake comes out without any hitches… however, if you don’t, I got you covered. We will go over that in the frosting section.
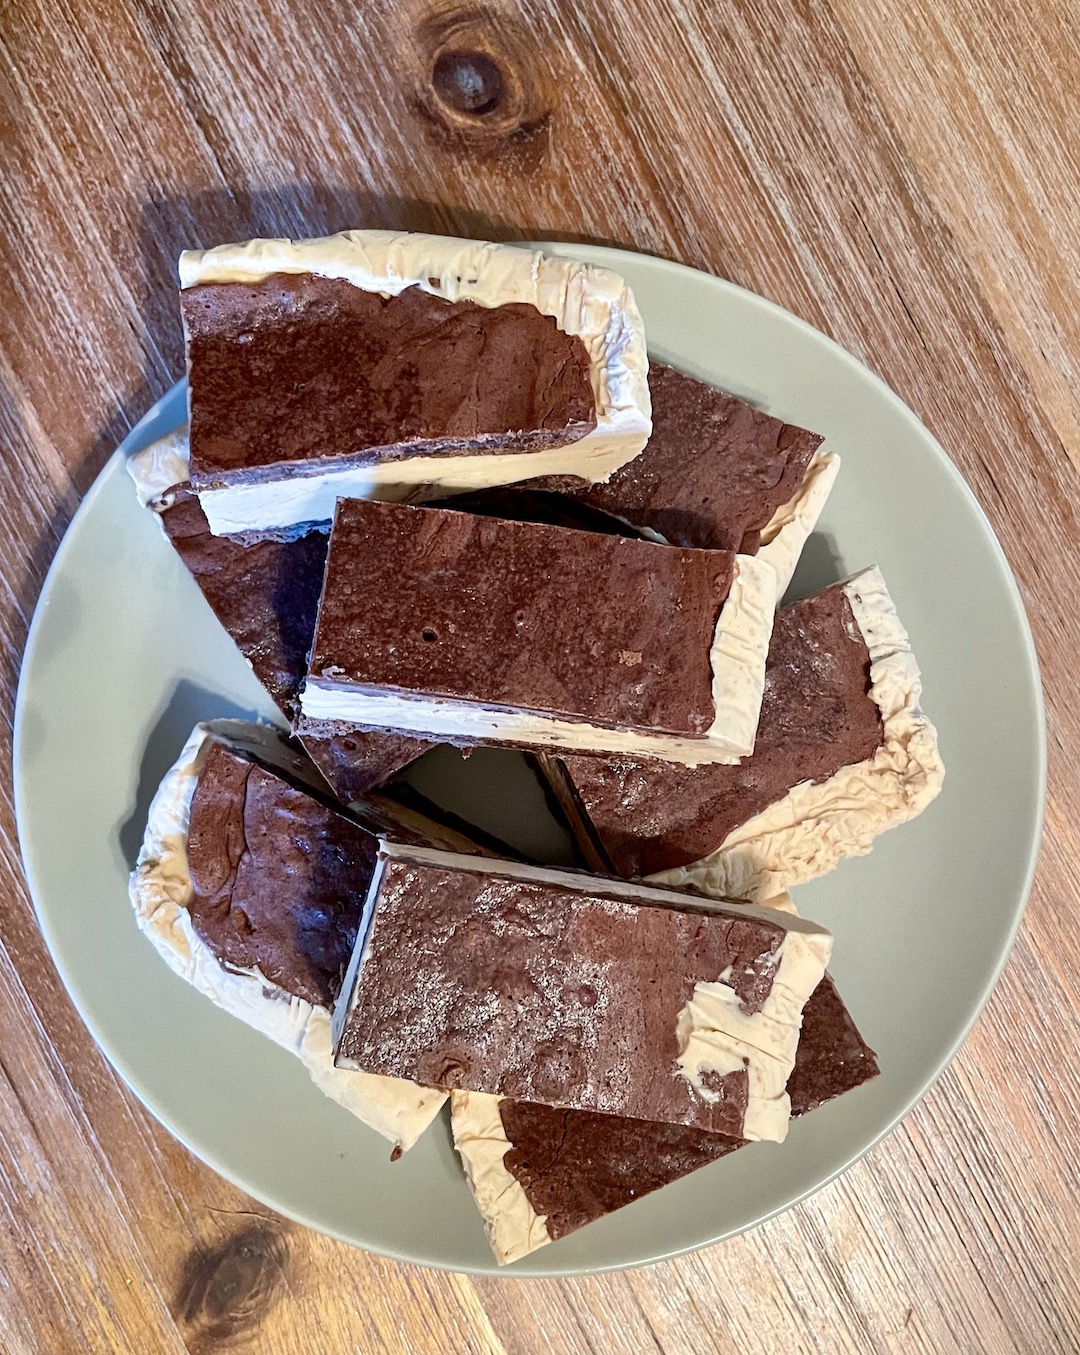
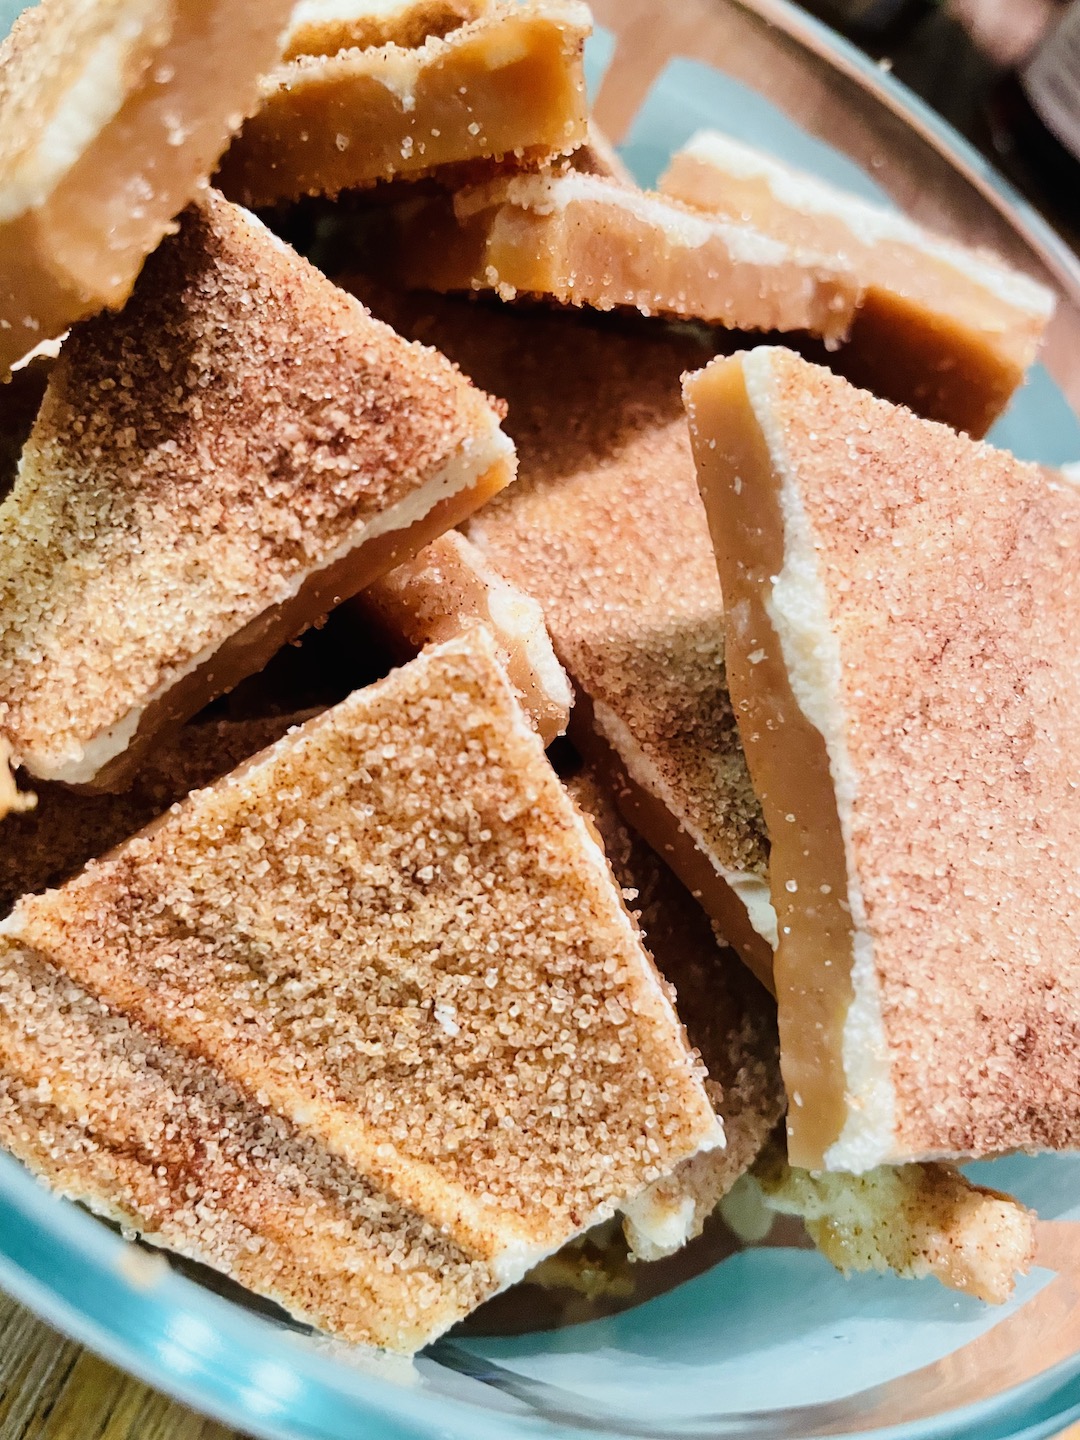
DISCLAIMER: That being said, there are certain cakes that I do think one should make from scratch like banana and carrot cakes (and others too, when my memory is there or in future blogs).
Back to the cake! So, I used whatever white box cake mix you prefer (or is on sale) and I added both vanilla flavoring AND coconut flavoring – I mean, this is a coconut cake. But I made sure to add the coconut a little at a time because I did NOT want the cake to taste like suntan lotion, that is not good. I wanted just a hint of the flavor because I knew I would be adding flaked coconut as well as more coconut flavor to my frosting. But, before you add flavoring to anything else, make sure the coconut is not too overpowering in the cake. Taste your cake first. Which I did. Because, well, it’s cake. With coconut flavor! I did try a tiny piece of the cake and was very happy and pleased with myself! I mean, if you aren’t pleased with yourself, who will be??? HMMM???? The cake had a nice hint of coconut, nothing overpowering.
After the cake has been baked, we will need to turn our attention to the lemon curd (you know, the lemon portion of this lemon coconut cake). Now, again, you can either buy your lemon curd or you can make it. MAKE IT. I know, I know. You are like, “but woman, you just told me I could use box cake mix and now you are telling me to make lemon curd??”. Yes, I am. I have found that the store bought lemon curd has a tinny or metallic taste. We want bright bursts of lemon, sunshine and summertime, people!! Not metal! So, please, try this recipe! Watch a video! It’s not hard!! Really!!
4 large egg yolks
2/3 cup of granulated sugar
1 Tablespoon of lemon zest (I used the zest of two lemons, but I like mine lemony)
1/3 cup of fresh lemon juice (I squeezed two lemons)
1/8 teaspoon of salt
6 Tablespoons of butter, sliced into six pieces
PLEASE use real lemons. PLEASE!! If you use the stuff from the plastic bottle, then just buy your curd. If you want that bright, wonderful lemon flavor squeeze your lemons! It makes such a difference! (and yes, I have tried from the bottle….yuck).
- Set up a double boiler. Grab a sauce pan and fill with about two cups of water. Then get a bowl that will set OVER the saucepan. Make sure the bottom of the bowl does not touch the water. If the bottom of the bowl touches the water, drain out some of the water. Now turn on the heat to bring your water to a boil; then back down the heat and keep it on low.
- In the bowl, add your egg yolks, sugar, lemon zest, salt, and lemon juice. Place the bowl on top of the saucepan and whisk. Now, this is where Arnold Schwarzenegger would be super useful. Just power through. You got this. But you have to keep stirring or the egg will cook and you will have bits of scrambled eggs in your lemon curd. As the mixture begin to warm up over the double boiler, the egg yolks do begin to thicken. You are looking for a consistency similar to your grandmother’s gravy or Hollandaise sauce.
- Once you hit that consistency, take it off of the heat, and tablespoon by tablespoon, add your butter. So, keep stirring and add a tablespoon of butter. Before you add the next tablespoon, make sure the first one is gone, or incorporated into the mixture. Do this until the butter is gone. NOW the curd will really thick.
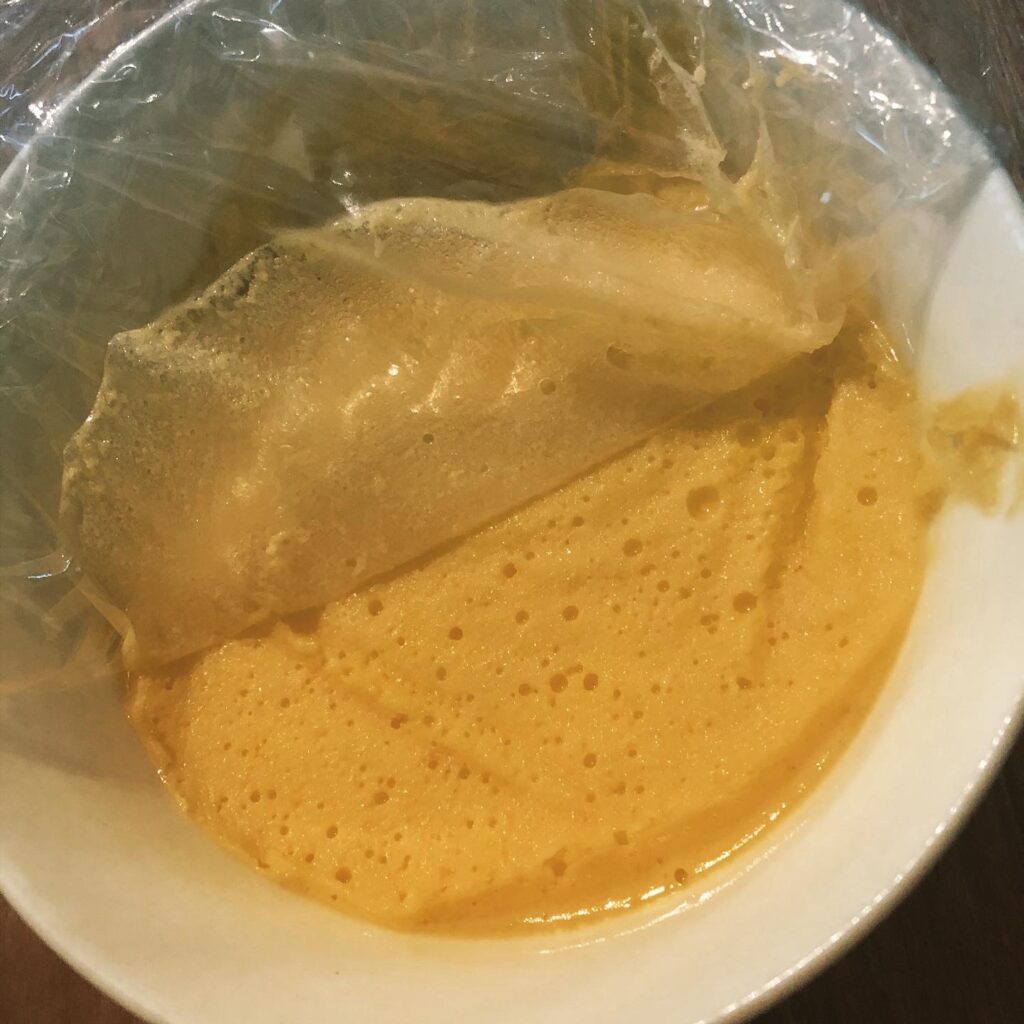
- Move to another bowl and place plastic wrap over the top of the curd (this prevents a skin from forming, which is really gross). Chill overnight!
Time Line Tips and Tricks:
Cake: You can make your cake as much as a couple months ahead of time. Just freeze it. Double wrap it in cellophane and then double wrap it in tin foil. However, I usually make my cakes the day before and let them cool overnight. Whenever you see those, “nailed it” pictures with the frosting melting off… well, yeah, it’s melting off. NEVER frost a warm cake. If you are in a warm climate, or it is warm in your kitchen, try to keep the cakes cooler and place your frosting in the fridge if the frosting is getting too squishy or runny.
Lemon Curd: The day before which allows it to set-up and cool
Frosting: I make the frosting the day of. That way it is at its fluffiest and will bend to my will without any arguments or fighting!!! Oh, wow, okay, sorry about that. HAHAHA. Seriously though, I like to make the frosting the day I decorate because you can make it to the spreadable consistency that works best for you and your cake (you don’t want it too stiff or it will tear the cake as you frost or bust through the piping bag).
Next, let’s make the frosting!!! This is step one of the fun part!! In my humble opinion. Play with the different types of frostings! There is such a variety of frostings! I debated between whipped cream or buttercream. In the end, I chose the buttercream because I felt this would be thick enough to keep the lemon curd from seeping out between the cake layers and from the top of the cake. NOTE: to test this theory for next time, I think I will make lemon curd cupcakes and use the whipped frosting to see if it is able to contain the curd. If it doesn’t, I mean they are cupcakes and who doesn’t like a messy cupcake!!! Or I can try it on one cupcake and if it doesn’t work, put the curd on the inside of the cupcake and frost over that).
Okay, I have to tell you something. Come on in close. A little closer. Closer. There. Okay. What I am about to tell you sounds like crazy talk, but, if you want light and fluffy frosting that dances on your tongue instead of coating it into a layer of fat, you will do these next few steps. A basic buttercream frosting is butter, confectioners sugar, salt, and whatever flavoring you are using. Here is what I use:
8 cups of confectioners sugar (2 pounds)
2 cups of room temp. Butter
3 teaspoons vanilla
1-3 teaspoons of coconut flavoring (taste as you add)
3-4 Tablespoons of milk
A pinch of salt
Making the frosting! I know, I know, you are going to say that you just throw it altogether and blamo! Frosting. Which, yes. You could do that. OR you could try it this time-consuming way. Which I just recently did. You are going to think me crazy, but please, give this a try at least once. First, sift the confectioners sugar. Do it. It will make the frosting smoother and creamier. In another bowl, add your butter. Whisk until light in color and fluffier. Now is the time to combine sugar with butter. 1/4 cup at a time, slowly incorporate the sugar to the butter. Once the sugar has been incorporated into the butter, add the next 1/4 cup and so on and so forth. I know. In know. This is going to take FOREVER, but it is worth it!! Halfway through mixing the sugar into the butter add your milk and flavorings. Then sloooowly add the other half of the sugar: 1/4 cup at a time. After all of the sugar has been incorporated, turn your mixer to medium high and whisk for another 5-6 minutes. DONE.
FROSTING THE CAKE!!!!
First things first; how many layers do you want? You have two layers that you have baked. You can cut those two layer in half, making four layers. If you have four layers, then I suggest doubling your lemon curd recipe to make sure you have enough for the three layers. Just remember, the more layers you have, the more unstable the cake can become, especially with slippery lemon curd as your filling. If you want to do this and you notice your cake sliding to one side or the other, simply add wooden dowels into the cake. That will stabilize it and prevent it from slouching or sliding apart. I left my cake into two layers.
The Layers: Look at your layers. I know many bakers state that they will cut off of the tops to make the layers level. Which, if you are decorating a four or more layer cake, then yes, do that. I hate to waste the cake on a simple two layer cake. And let’s be honest. Your doing this from the bottom of your heart, without pay. You want this to look wonderful, but if it is not perfect, your friends and family will be okay with it. It’s the taste, after all. At least, they better understand, darn it, you are trying your best here!! Moving on… I was taught that you place the top of the cake on the bottom so that the flat, bottom of the cake is now your top. Now you have a flat surface to work on. Did that make sense? I hope so. If not, let me know!
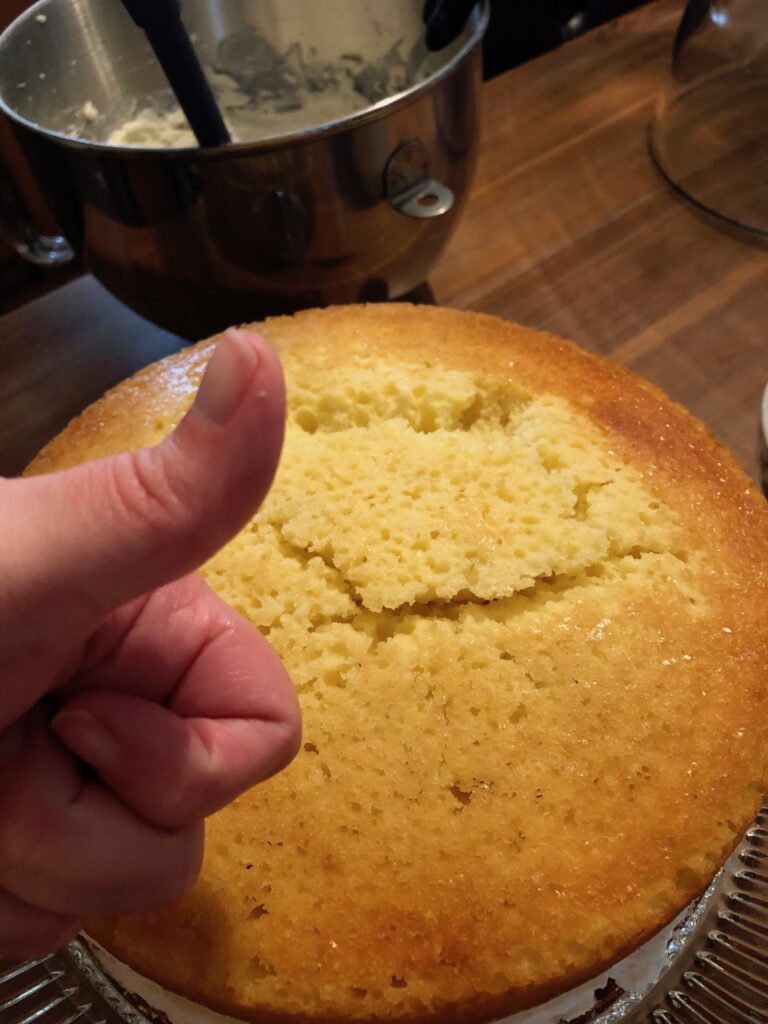
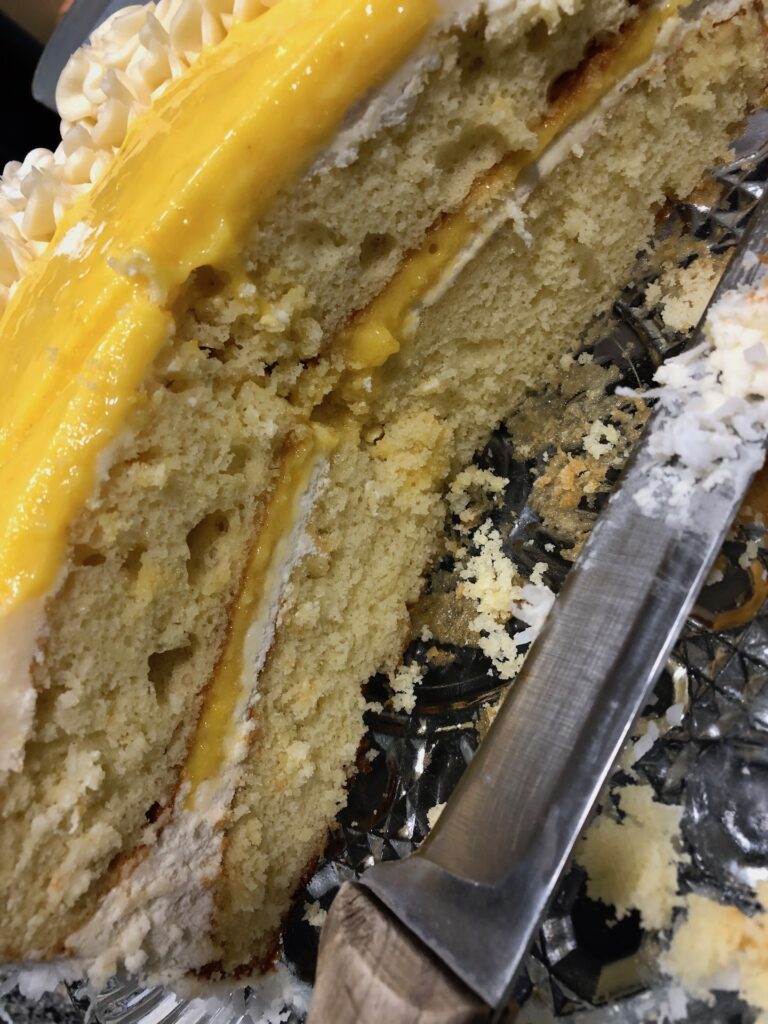
EMERGENCY NOTE (remember when I said “in case you don’t use parchment paper on the bottom of the cake pan?”; well, here it is): What if your layer falls apart or has a tear or crack in it (as shown on my cake)? Do Not Panic. For real. Every baker will tell you, frosting and decorations are your friend and ally. The frosting will cover all mistakes. Well, most mistakes. But really. If your cake layer cracks or has a tear or something like that, just put it on there. As you frost, you will cover it up and no one will be the wiser. I promise. No one has ever noticed on mine, even the time the stupid layer broke in two. Yeah, that was fun. But, frosting hides all!!! Take a deep breath, everything will be okay!! Remember, you are doing this from the bottom of your heart and it will taste awesome. That’s all people care about in the end.
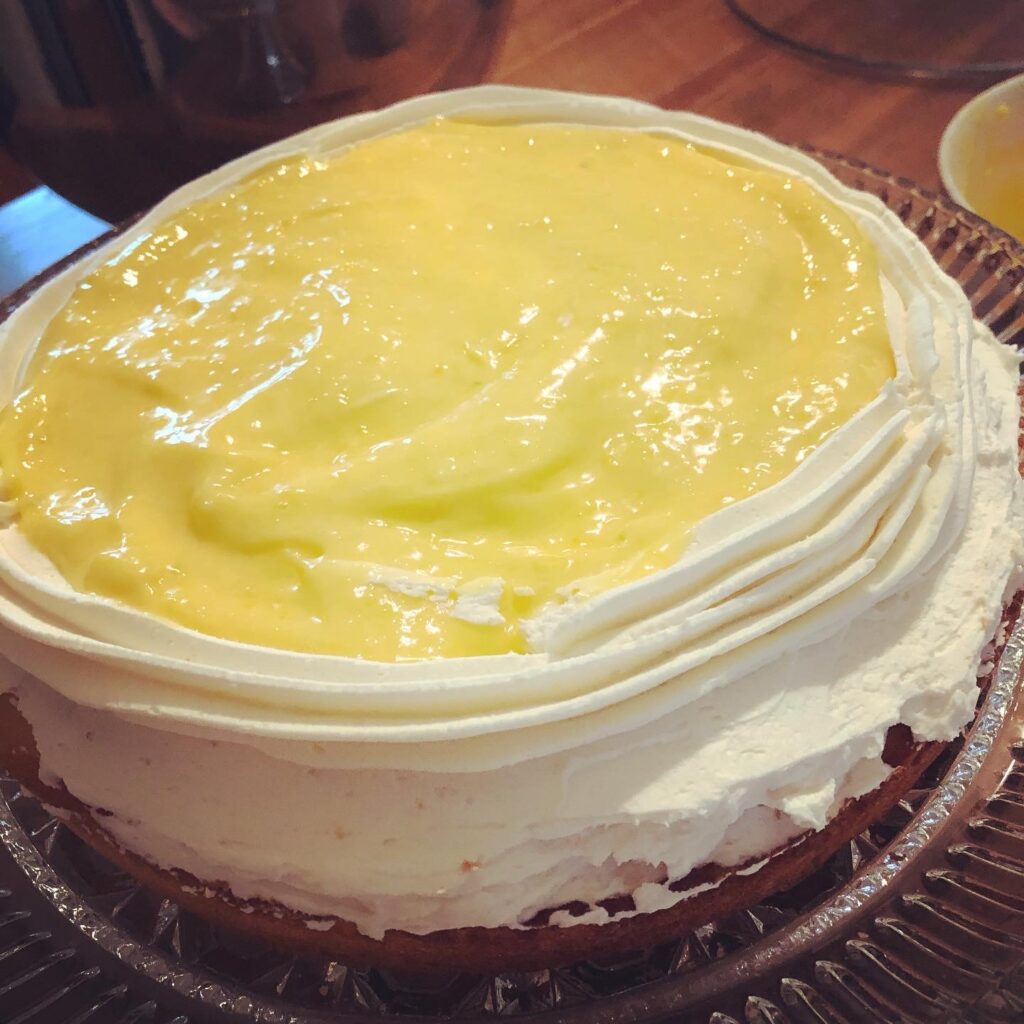
Layer One: Place a thin layer of frosting on top of the cake. This is to prevent the curd from being sucked into the cake. The cake will act like a sponge and absorb the curd: that thin layer of buttercream will prevent that from occurring. Take some frosting, and place in a piping bag with a large tip ( I used Tip # 1M) and make a wall around the edge of the cake. Again, this is creating a barrier to make sure your curd does not squish out when you place the top cake layer over this. I took a picture to show you what I meant! Then, take a spoon and spoon in your curd. It’s like a little pond or tub of lemon curd!!
Layer Two: Again, place the second cake upside down onto the lemon curd pond. If you piped your wall on there thick enough, you should be fine. Now. The Crumb Coat. What in the hoot-a-nanny is the crumb coat, you say? The crumb coat is where you place a thin coat of frosting on the cake. You then place the cake in the refrigerator to harden the frosting. This locks the cake’s crumbs so that when you apply the final layer of frosting, there will be no crumbs sneaking their way out! So, gently apply your crumb coat. Put in the refrigerator. Then take it out and apply your final coat.
Smooth Sides: What utensils should I be using when applying the coats of frosting to the cake? Please refer to the picture and the three items in said picture. I use the spatula to scrape the frosting out of the bowl and onto the top of the cake. Then I use the off-set spatula to smooth the ginormous pile of frosting on the top and over the sides of the cake. Go slow and take your time. Move the off-set spatula in back and forth movements to spread out the frosting. Once you have the frosting covering the cake, use the bench scraper to smooth everything out. Place the bench scraper parallel to the cake at a 90 degree angle and rotate the cake to scrape off excess frosting and create a smooth surface. For the top, take the scraper and level off the frosting.
“I scraped off too much of the frosting!!!” Don’t worry! It’s frosting! All can be fixed with patience. I stress the patience. I don’t have any, but hopefully most of you do. HAHAHAHA. Simply take some leftover frosting from your bowl and reapply with the off-set spatula; then smooth off again. With this cake, though, I wouldn’t worry about it too much because you are going to put shredded coconut on the sides. The coconut will hide any flaws. So. You know, don’t worry about smoothing it out too much. Just make sure you don’t have four inches of frosting. Unless you like four inches of frosting; in that case, frost to your saccharine heart’s desire!
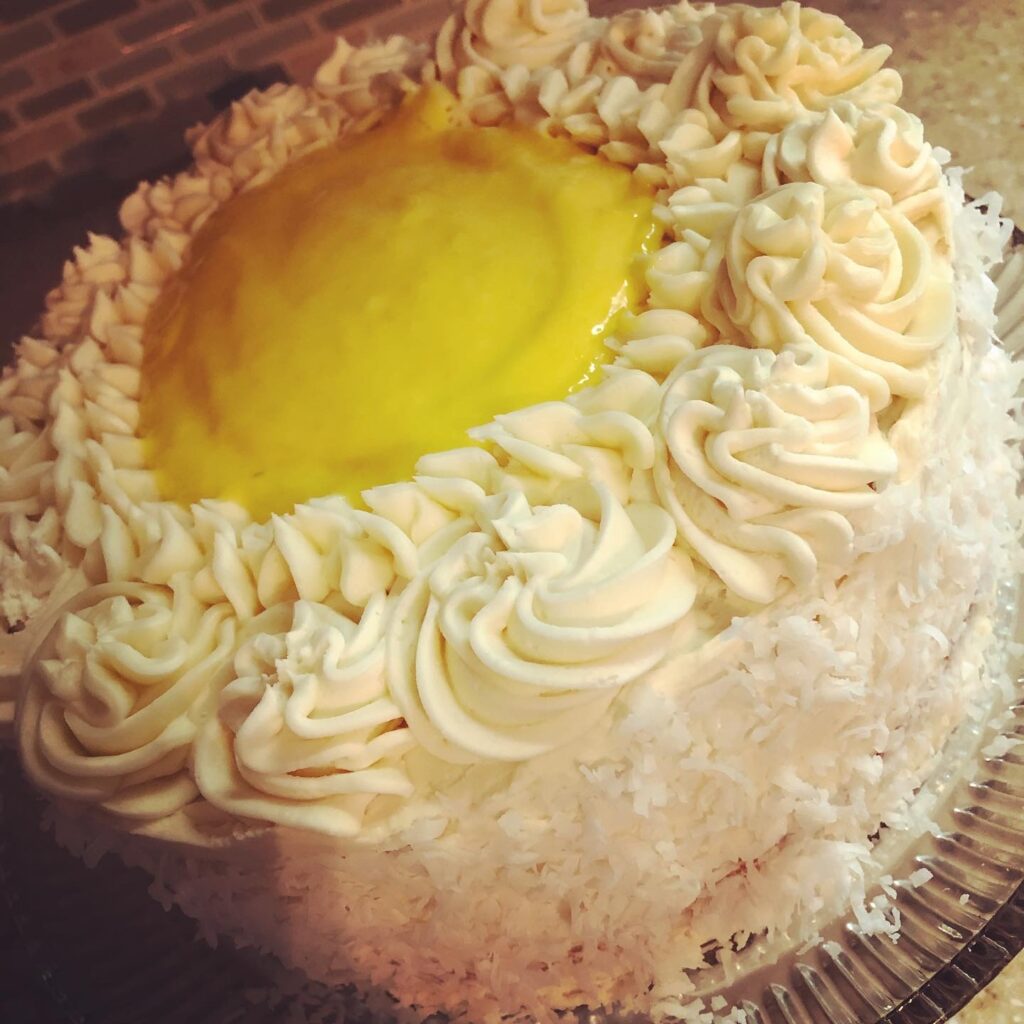
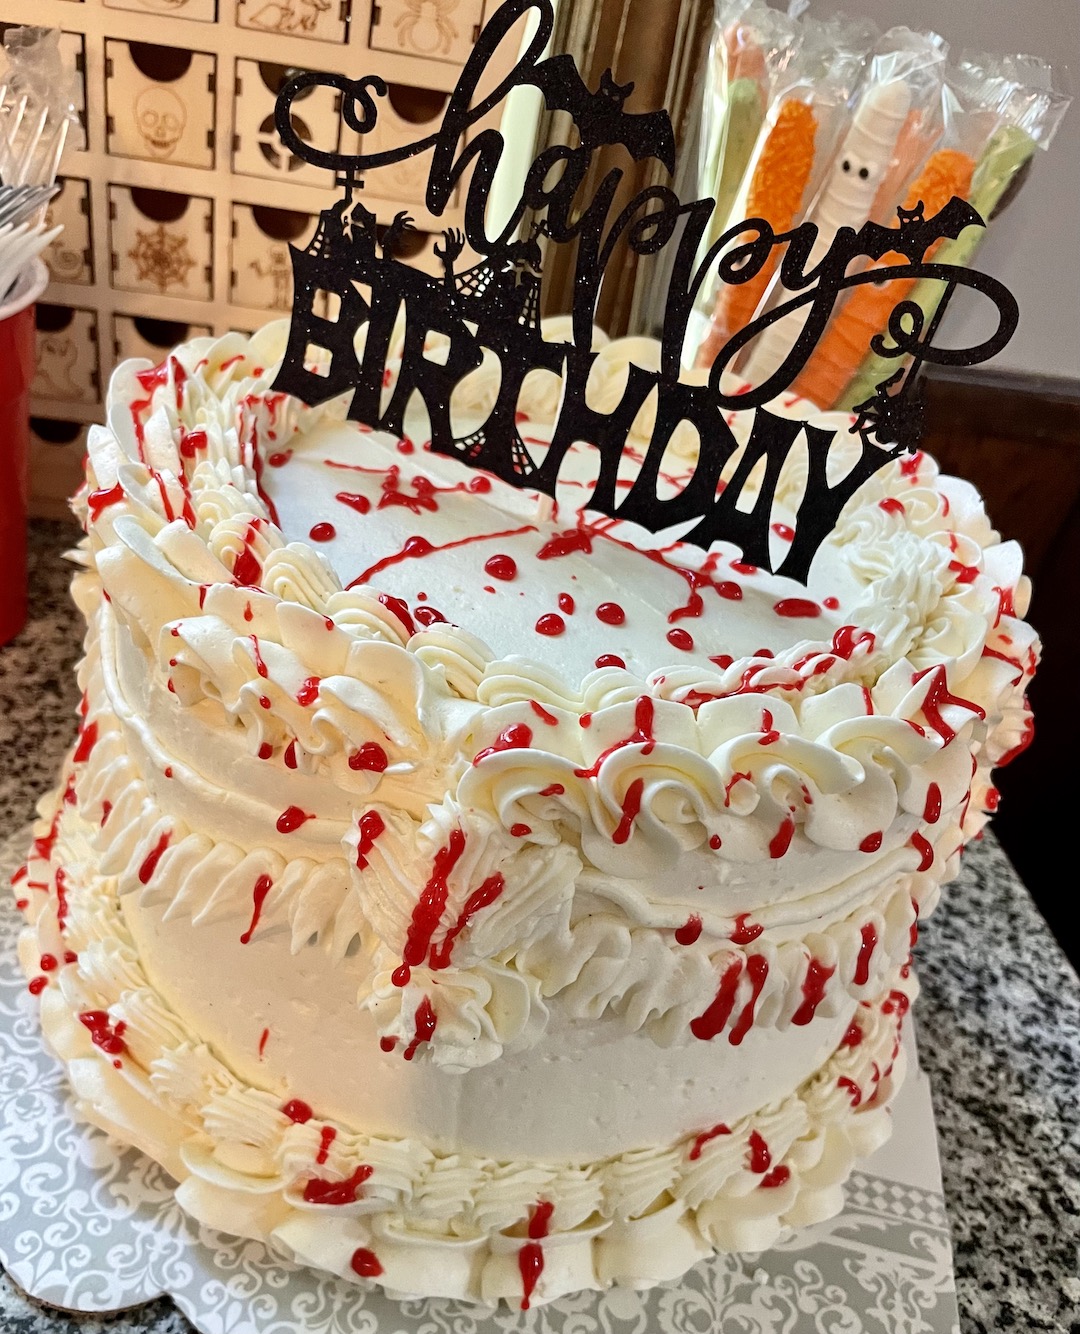
Leftover Lemon Curd: Right. You are going to have leftover lemon curd. You could either: A) use it for other stuff like lemon curd and yogurt in the morning or lemon curd and raspberries for a light and refreshing dessert! Or B) do what I did and put it on the top of the cake. If you choose option B, this will lead us into the fun world of decorating! Okay, actually, I think I will make another blog post for decorating. Why? Because this dang tootin’ post is pretty damn long as it is, and decorating is fun and deserves its own post!
BUT – take leftover icing and make some type of wall for the curd to be contained in. I did rosettes, but you could do whatever makes you happy. Just make sure it contains the curd. Unless you want curd running down the sides of the cake…. Which could be neat looking! Have fun! It’s you cake and you are the god or goddess of your cake!!!
Well, this is it! I really hope that you enjoyed my quirky little post and I hope that you enjoy this blog! Next time I might go over scrapbooking or sewing! Thank you so much and have a wonderful day!!
I cannot wait to attempt this recipe! Thanks for laying the groundwork and giving me hope for smooth results! Yay!!! Love you, love your blog!!!
Thank you so much!! Please let me know how it goes!!I have always found this recipe to be fun and easy to make!!
So proud of you friend!! The cake looks amazing!!!
Love the blog Bridget
THANK YOU!!! I’ll be adding one new blog every Friday!
These are great instructions! I still think I’d rather have you make it for me. 😉
HA!! I can do that… LOL
Oh baby, this looks wonderful! Very proud of you. Love, Mom
Thank you!! Love you!!
Looks delicious! So…how much to have one delivered? 😉
We are working on delivery! (Just kidding) hahahaha
This is incredible!!!!!! Great job!! ♥️♥️♥️
Thank you so much!!!!
Love this! Cake looks amazing! Anytime you want to write about cake, I’ll be more than happy to taste it! Looking forward to you next one!
Thank you!! Every Friday!!!
Love it Bridget! I, along with others, am always ready to be your taster! Why haven’t I sampled this!?! Super exciting and can’t wait to see what else you share- both on here and with me!! Love you lady!! ❤️
I feel like I’m in the kitchen with you!! Love it!
Thank you!!