On this Spooktacular Blog, we are posting not only for Halloween, but for Friday the 13th!!!!
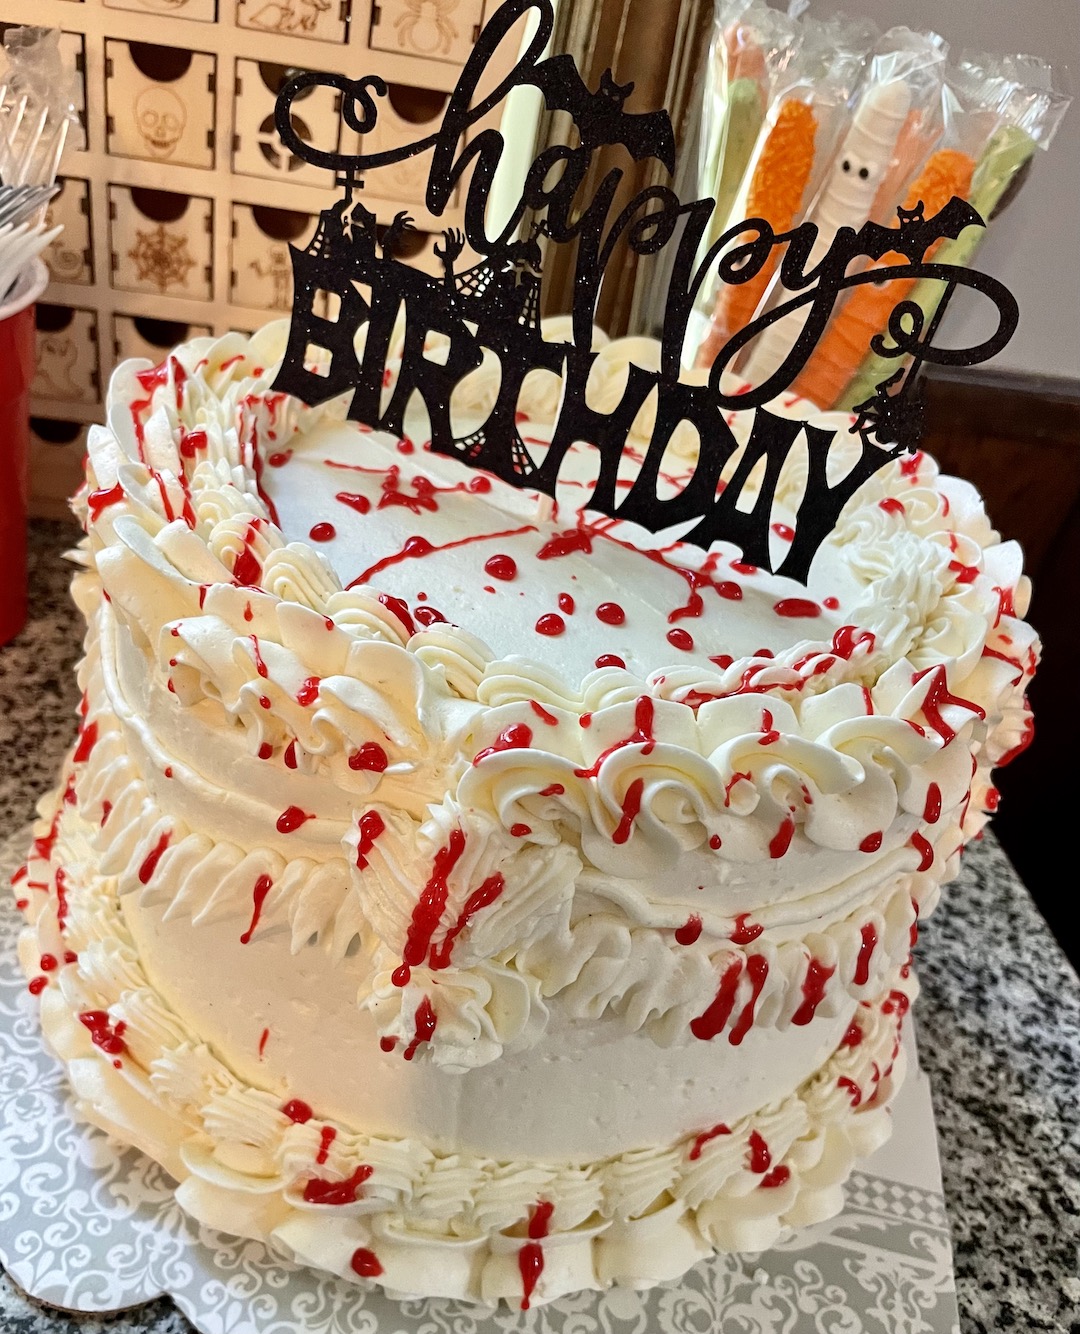
A hoy-hoy and HAPPY HALLOWEEN!!! I have shown you basic cake decorating and decorating on cupcakes. But this time, this time, I am going to talk to you about uber decorating a cake! Like, we are going to decorate the bleep out of it. AND in accordance with Halloween (spooky season), I will be writing this post about Disneyland’s Haunted Mansion Wedding Cake!! (Imagine while reading that last part ghosts and creepy doors closing with moaning things in the background). Thank you.
Haunted Mansion Cake History Time!!
Since going to Disney World in 2019, I am not ashamed to say that The Husband and I (along with my sister-in-law) have become addicted to Disney. For my 40th birthday, we decided to go to Disneyland in California. LOVE IT. LOVE. IT. Yes, we will be going back there, mark my words. Anyhoo, The Husband and I did a lot of research on Disneyland AKA, watched a lot of YouTube videos. One of the YouTubers tried and loved the Haunted Mansion Wedding Cake with chocolate cake, frosting, and the best part of all parts that made me write this down and make sure we got it, was….. tart cherry filling!!!!! Have I mentioned how much I love tart cherries or cherries in general? I do. A lot. Love them. So, yes, I got the cake. Stood in line and ate the cake at like 9pm at night. It was magnificent!!!! Glorious!! And the best part??? I can make this at home!!! The frosting was my cousin Lori’s frosting that I grew up eating, the cake was her chocolate cake and the cherry filling can’t be that hard! Sure enough, I came home and for my mom’s birthday, I made this cake! So good. So good, and actually, I liked mine better because I added more cherry filling!
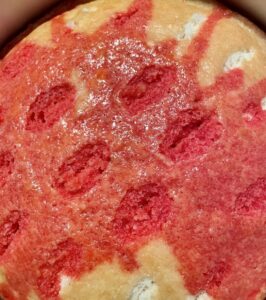
Fast forward to now and my little sister from another mother (it’s Krissy, and I’ve known her her whole life – she is my godmother Pat’s daughter). Anyhoo, it was Krissy’s birthday and she loves, loves, loves Halloween. Therefore, for her 40th birthday party, I made her the Haunted Mansion Wedding Cake. However, instead of chocolate cake, I used white cake and added cherry jello into the cake to make it look like it was bleeding. Spooky, right?? I won’t go into the cake making process as I used a white cake box mix (See my first blog on my discussion on box vs. from scratch cakes). After the cake was out and cooled for 15 minutes, I made the jello and while it was still liquid, I poured it over the cake and let it cool completely. What I will go through is the cherry filling, the frosting, and the decorating. So, ghouls and goblins, let’s get started!!
Tart Cherry Filling
The recipe cannot be easier, but it is so tasty! I not only use it for cakes, but I love the leftover filling to use either for breakfast or dessert cups of plain yogurt topped with the cherry filling. So. Good. You could also use this for tart cherry pie (you know, with the homemade pie crust I talked about in my other post). Right? Right? Without further adieu, the recipe:
2 cans of tart cherries in water (make sure to get with water)
1/2-3/4 cups of sugar (depends on how tart you want your filling)
1/4 cup of cornstarch
1 tsp. Of vanilla
1 tsp of almond
1 TBL of butter
- Place your cauldron over the roaring fire – aka – place your pot over a medium to medium low fire.
- Add the cherries, sugar, and cornstarch, stirring to combine. Allow this mixture to heat and thicken up.
- Once it is thickened and bubbling, take off the stove and add your vanilla, almond, and tablespoon of butter, stir.
- Allow to cool
- Refrigerate overnight or allow to cool to room temp before layering into your cake (if you use this while it is warm, it will melt your frosting)
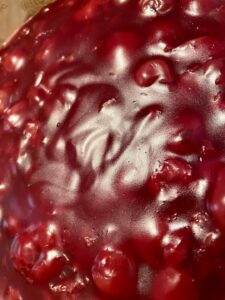
Optional: Once the filling is made, you could (which I did) add some red food coloring to make the filling a bright, bloody shade of red! Or you can leave it an au naturel shade, but it is a muted pink, just letting you know.
Okay! Your goo of bat and werewolf eyes are done! AKA – tart cherry filling. LOL (that’s right, I’m gonna run with this Halloween theme, Krissy isn’t the only Halloween fan).
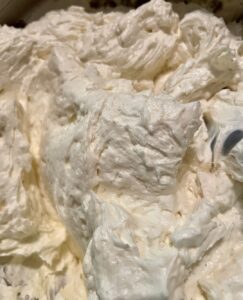
Ermine Frosting (boiled milk frosting)
This is an older frosting that stands the tests of time, truly. Rumor has it, Bridget Bishop was tried as a witch during the Salem Witch Trials due to her use of this wonderful concoction that she would spread over everything and caught all of the men of the village stomachs and hearts. Totally kidding, historians think that it was developed in the late nineteenth century to pair with a chocolate cake, called the Mahogany cake. Now. I need to explain something. I grew up with one method of making this frosting. Then, a couple of years ago while researching this cake after Disneyland, I found out that there was a whole different way in which to make this frosting! I am going to provide you with the recipe I grew up with (and make), when there are changes, I will write those in bold.
Ingredients
- 6 Tablespoons AP Flour
- 2 cups of milk
- 2 cups of butter (yes, butter)
- 2 cups of granulated sugar (NOT powdered sugar)
- 1 teaspoons of vanilla or vanilla paste
Instructions
- Slowly pour your milk into the flour, stirring to ensure there are no lumps. Place your cauldron (pot) over medium to medium low heat. They take the sugar, flour, and milk and stir.
- Stir this mixture constantly until the ghosts of your past begin to emerge through the steam of the thickening mixture.
- Continue to cook this mixture for about 10 minutes or until it comes together into a paste/the mixture will thicken and resemble pudding, you will be able to see the whisk leaving lines
- Cool this paste completely and wrap in plastic. Let sit overnight (that’s what I do to ensure that it is cooled to room temp) Make sure to place the plastic wrap directly on top of the mixture to ensure it doesn’t form a skin.
- Place the paste, butter, sugar, and vanilla into your mixer. Mix the hell out of it for about 20 minutes – you are looking for the mixture to be light and fluffy and sugar and paste to somewhat dissolve (this can take up to 20 minutes) Place your butter into the mixer and mix until light and fluffy (also lighter in color). Slowly add your room temp. Pudding mixture into the butter until you have a light and fluffy frosting; add your vanilla.
NOTE: I did the bolded directions. I took my jello-like flour/milk mixture and slowly added it into my sugar/butter mixture. Don’t go too fast or you will break the frosting. If you do, just keep beating the tar out of it.
SUPER NOTE: I want everyone to note that I did double this recipe for this three layer cake, because I wanted to make sure that I had enough frosting for decorating (and I knew I would be using more frosting than usual cause I wanted to show off my decorating skills for Krissy’s birthday – tee hee hee).
TIMELINE
If you are making this cake over a couple of days, this is how I typically do it (especially if they are weeknights)
Day 1 – make the cakes, cool and cover
Day 2 – make the paste for frosting (cover and cool), make the cherry filling (cover and cool), and the jello mixture and pour of over the cooled cakes. Take the cakes and cover them and place in fridge.
Day 3 – Make the frosting and assemble the cake. If not consuming until Day 4, place in a cake box, covered in the fridge until you are ready to eat.
Conjuring the Haunted Cake into Existence (AKA putting it altogether)
Layer One: Place a thin layer of frosting on top of the cake. This is to prevent the filling from being sucked into the cake. The cake will act like a sponge and absorb the filling: that thin layer of frosting will prevent that from occurring. Take some frosting, and place in a piping bag with a large tip ( I used Tip # 1M) and make a wall around the edge of the cake. Again, this is creating a barrier to make sure your filling does not ooze out when you place the top cake layer over this. I took a picture to show you what I meant! Then, take a spoon and spoon in your filling.
Layer Two: Please just repeat what you did for Layer One.
Layer Three: Again, place the third cake upside down onto the cherry swamp of filling. If you piped your wall on there thick enough, you should be fine. Now. The Crumb Coat. What in the hoot-a-nanny is the crumb coat, you say? The crumb coat is where you apply a thin coat of frosting on the cake. You then place the cake in the refrigerator to harden the frosting. This locks the cake’s crumbs so that when you apply the final layer of frosting, there will be no crumbs sneaking their way out! So, gently apply your crumb coat. Put in the refrigerator. Then take it out and apply your final coat.
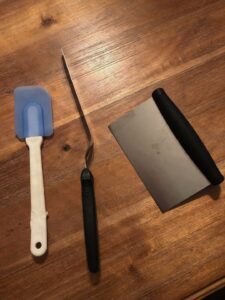
Smooth Sides: What utensils should I be using when applying the coats of frosting to the cake? Please refer to the picture and the three items in said picture. I use the spatula to scrape the frosting out of the bowl and onto the top of the cake. Then I use the off-set spatula to smooth the ginormous pile of frosting on the top and over the sides of the cake. Go slow and take your time. Move the off-set spatula in back and forth movements to spread out the frosting. Once you have the frosting covering the cake, use the bench scraper to smooth everything out. Place the bench scraper parallel to the cake at a 90 degree angle and rotate the cake to scrape off excess frosting and create a smooth surface. For the top, take the scraper and level off the frosting.
“I scraped off too much of the frosting!!!” Don’t worry! It’s frosting! All can be fixed with patience. I stress the patience. I don’t have any, but hopefully most of you do. HAHAHAHA. Simply take some leftover frosting from your bowl and reapply with the off-set spatula; then smooth off again. Just make sure you don’t have four inches of frosting. Unless you like four inches of frosting; in that case, frost to your saccharine heart’s desire!
Decorating
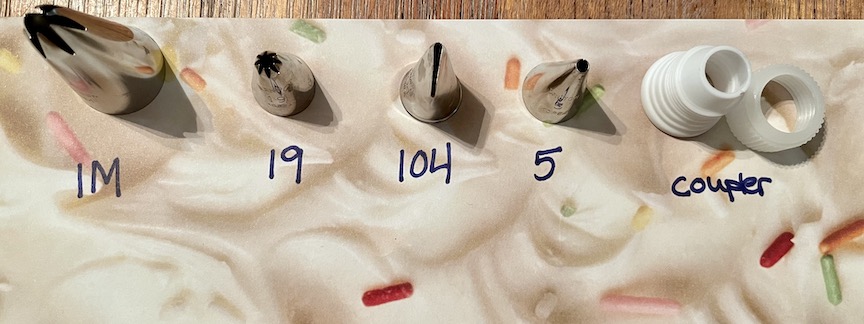
Get your Icing Bag Ready! Assemble your implements of torture!!! But really, get stuff together. Now, we will be using a number of decorating tips for this cake. The cake is white, no other colors. Therefore, I can use what they call a “standard plastic coupler”. You place that onto your bag. Then you can exchange your tips whenever you need to! Simply unscrew the coupler, remove the tip, place another tip over the case of coupler, and then screw that down!
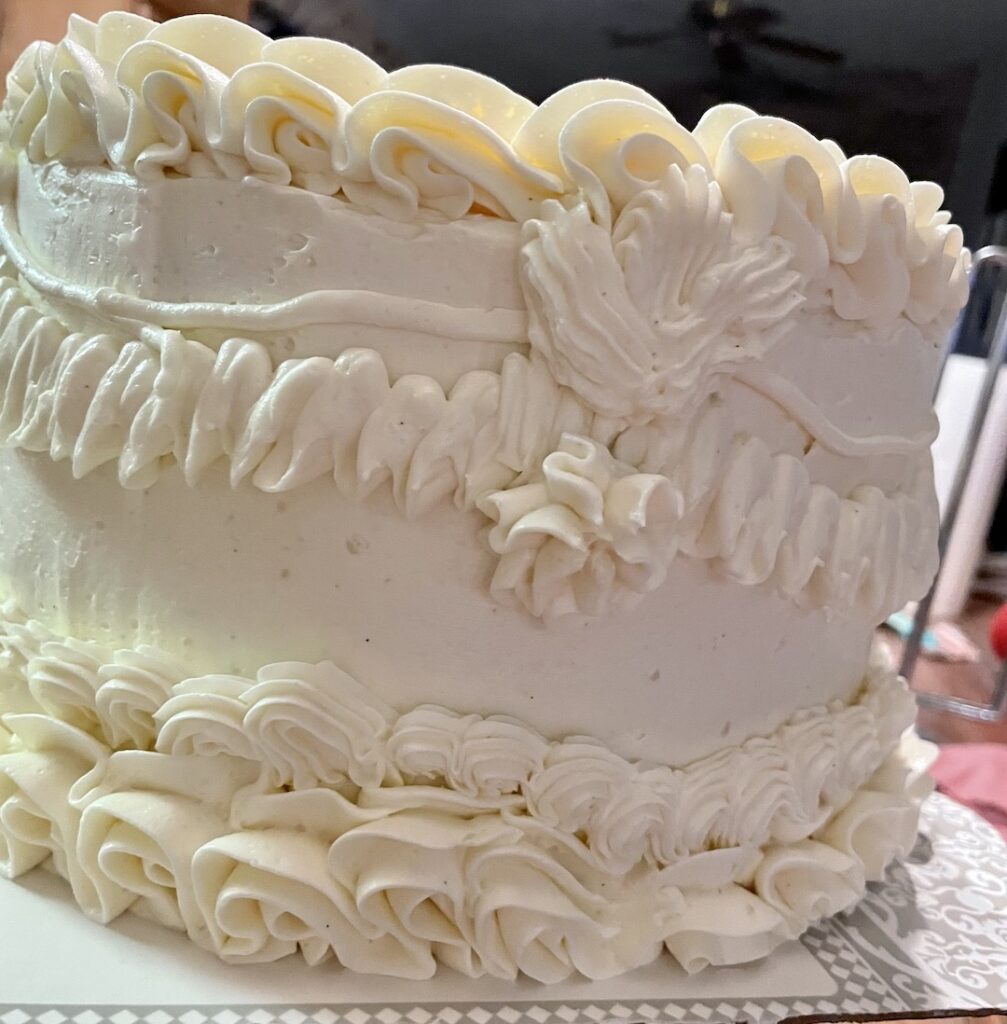
Bottom of the Cake
Tips used: 1M and 19
Step One: First piped the large shell border with the 1M tip
Step Two: On top of the large shell border, I then piped the small shell border using tip number 19
Middle of the Cake
Tips Used: 104, 5, and 19
Step One: Trace lines to follow for yourself (I had wooden skewers, so I used that)
Step Two: First I piped the ribbon/ruffle border using tip number 104
Step Three: Then I piped a small line on top of the ribbon/ruffle border with the use of tip number 5
Step Four: Lastly, I used tip number 19 to pipe the rosettes and fleur de lis to hide where the line and ribbon piping come together at the peak
Top of the Cake
Tips Used: 1M and 19
Step One: On the edge/outside of the top of the cake, I piped another large shell order with tip number 1M
Step Two: Using tip number 19, I then piped a small shell border on the inside of the cake, next to the large shell border
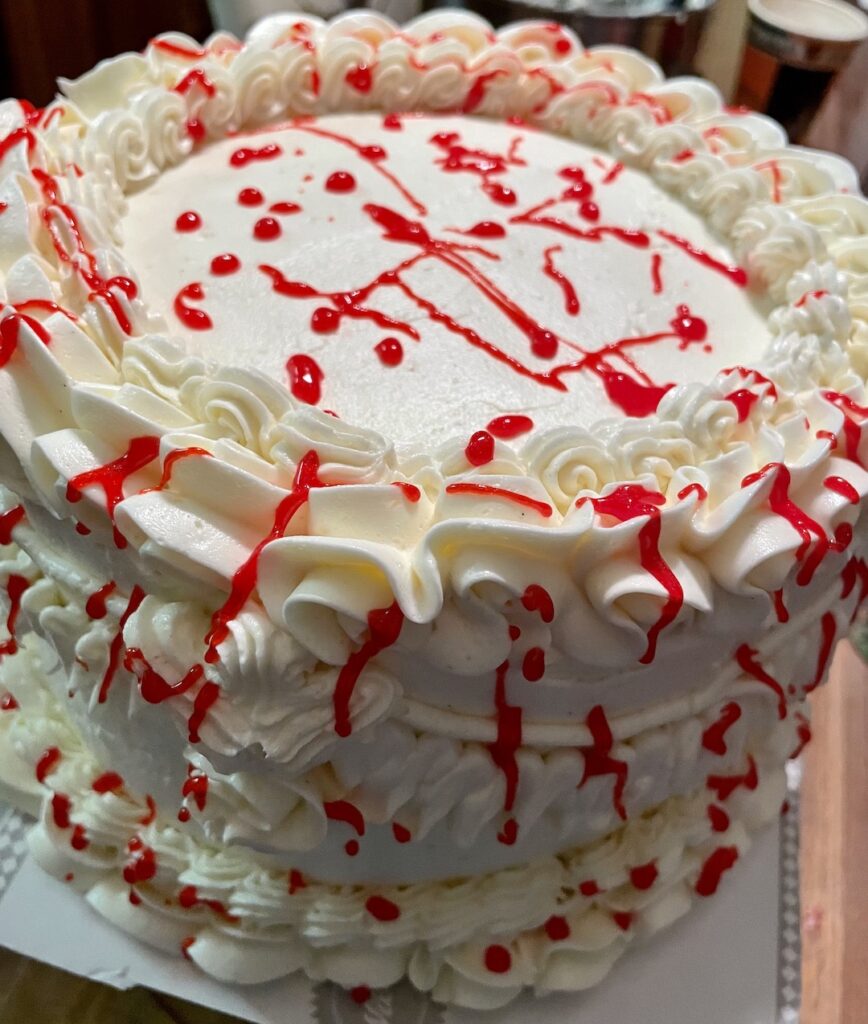
Blood-splatter!!!
Take your unsuspecting victim and slowly release their blood, making sure to collect as much as you can…
Just joking. (I know, I crack myself up too)! There are several ways you can do the blood-splatter. I used red (and sparkling, apparently) food gel. I simply took the tube and from a little bit of a height, let it drip out. Now, I will say, this was a bit thicker than I planned. I wanted more of a running down the cake look, but got splatters instead. Honestly, I was okay with this look, I really liked it.
You could also take some of the cherry filling and thin it out a little with water and let it run down the sides of the cake and then take you fingers and flick them to make the splatter effect.
NOTE: I think that the gel will give you better and brighter blood, or, you know, use the real stuff. (Just joking, I think that would be gross – well, and disturbing and probably illegal). LOL
Conclusion
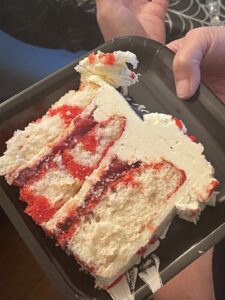
I hope that this helps and expounds more on the haunting world of cake decorating. As you can see, I placed a spooky Happy Birthday cake topper on it and BLAMO! Haunted Mansion Birthday Cake! I will now leave you with two last pictures: one of a very cute Quality Control Pibble tasting the frosting and the second picture is a cut piece of the cake so that you see the delectable layers of soft, moist almond cake soaked in cherry jello, fluffy, silky frosting, followed by sweet and tart vivid crimson cherries.

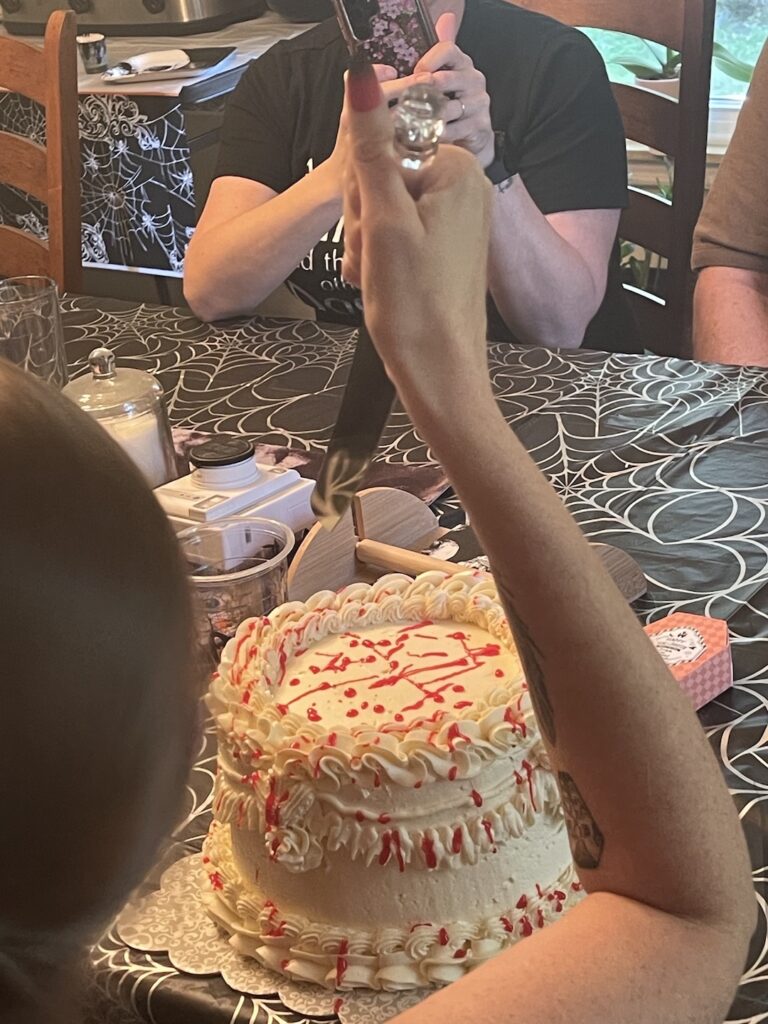
The heavy, dark oak door starts to creak open loudly while windows abruptly bang open with a sudden blast of icy cold wind!! BUT wait!! There’s more hauntings and gouls that need your attention!! Come back!! For one more exhibit: the gruesome Birthday Girl who has finally snapped! She slowly rises her hand, clutching the big and heavy knife, her intent clear with manic insanity. Her one purpose: to stab and consume the bloody birthday cake. Muwahahahahaha!!!!!
Happy Halloween!
This is my second attempt. I really enjoyed this post. I was hungry after reading and enjoying the pictures.
Sorry it didn’t take your post the first time! I am glad you enjoyed the post and yes, the cake was very tasty!
It looks so delicious. Love the frosting!
Yes! Was very happy how it had turned out! Thank you for reading!
I love this!! You put so much effort and love into it and the finished product reflects that.
Fantastic job! Oh, and it’s so pretty!! 🙂
THANK YOU SO MUCH!! And thank you for editing and being a cheerleader! I truly appreciate it! This was so much fun to write (and the cake was also so much fun to make)! I am so glad you enjoyed the post!
I want one of these…..Halloween is coming!!!
LOL! It was both fun to make and to write up!! Thank you!
This is absolutely wonderful!! You did an amazing job!!
Thank you so much!!