A hoy-hoy and welcome back!!! IT IS TIME!! We shall now embark into the soft and patterned world of sewing!! I’ve thought about how to go about writing this first sewing post. I was honestly going to jump right in and tell you all about sewing pajama bottoms. However, the longer I thought about it, the more I think it would be beneficial to post an introductory blog. So, that’s what I am going to do. As we read through this, I will explain my reasoning and hopefully by the end, you will agree with my logic. Therefore, without further ado…
The History of Bridget’s Sewing Life! (I know, buckle up, Buttercup; it’s gonna be a crazy ride) LOL
THE BEGINNING: I swear, I will not bore you!! Don’t leave!! Come back!! LOL. Now, I am maybe guessing that like most you (maybe) had a grandmother who sewed. God Bless my other grandmother, she did not. At All. BUT, in her defense, her sister could just look at clothes and recreate them (no pattern needed apparently). My other grandmother did sew, and again, God Bless, she tried to get me involved in sewing and cross-stitch. I did attempt the cross-stitch but found my lack of patience very disturbing. Therefore, all sewing endeavors stopped at a young age. However, I did enjoy watching her and my godmother sew.
HIGH SCHOOL & COLLEGE: I did not sew. At all. Not at all. I asked my godmother to hem any pants and enjoyed her gifts and sewing endeavors. I re-did my room and asked her to sew the curtains for it. LOL. No sewing. You are probably wondering why I am telling you this. It is simply to establish that I have not been sewing my entire life. All you need is the determination and joy in creating something for yourself, your family, or your friends. Also, as mentioned before, I am like my father and like to have many options for hobbies. LOL.
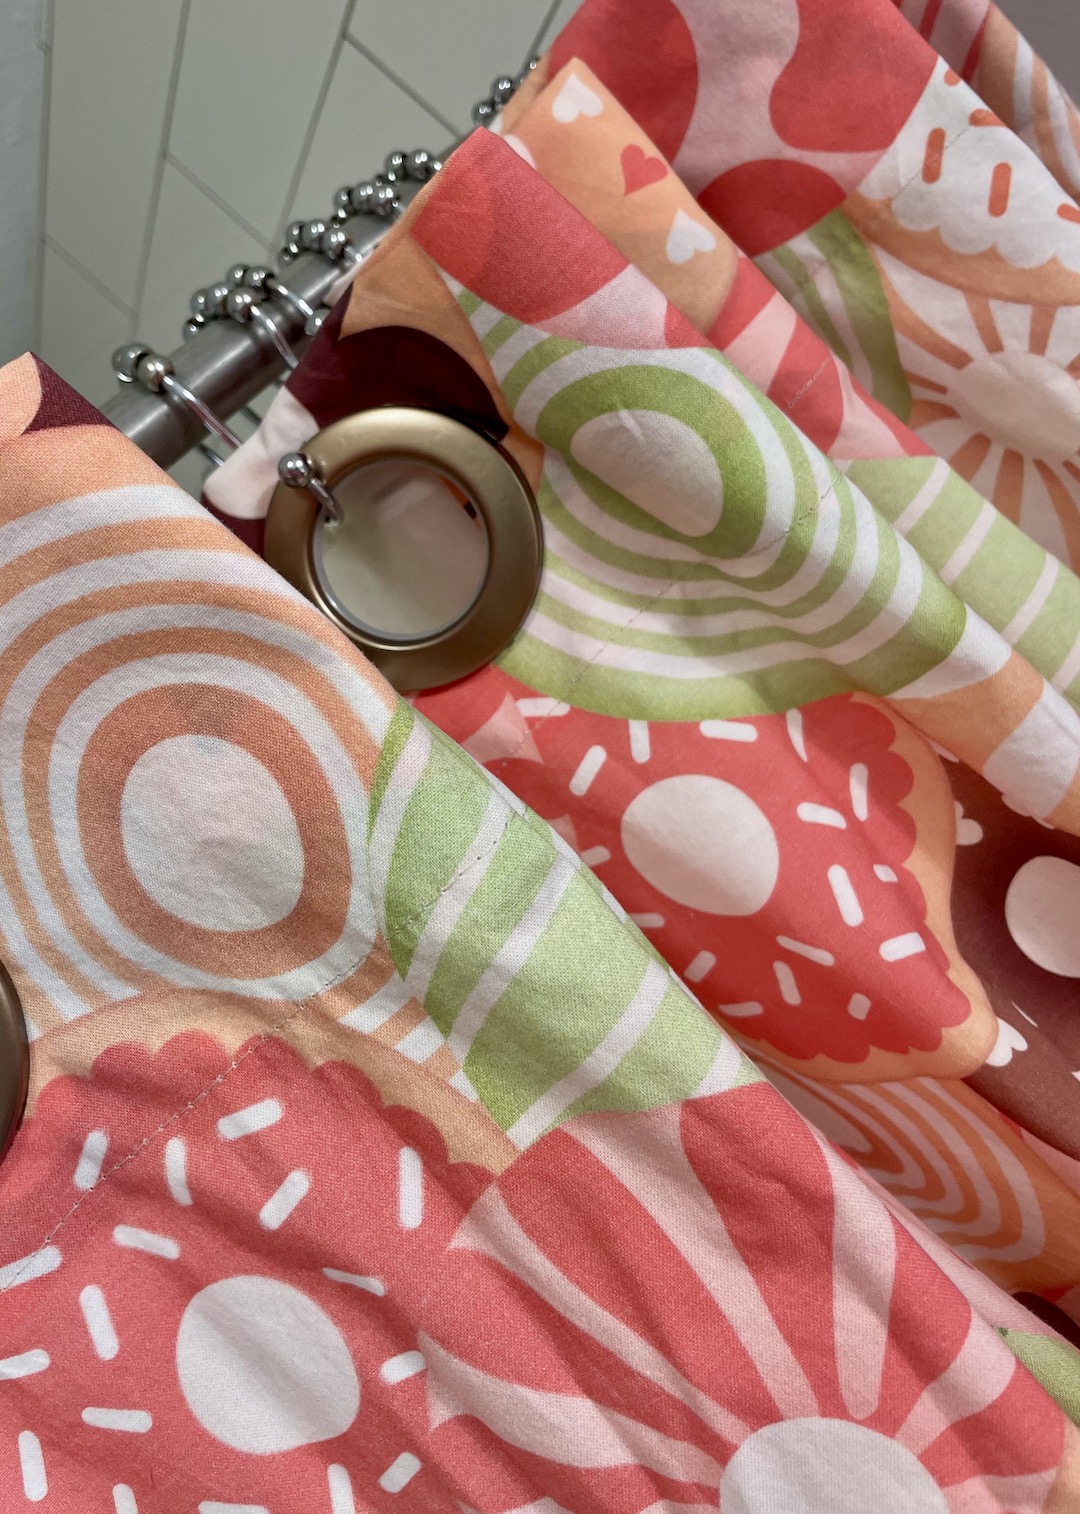
MARRIED LIFE: So this is interesting. I get married, we move into our apartment, and suddenly I wanted to sew these HUGE, I mean, massive curtains for our walkout sliding glass doors. With my godmother’s help, I made these massive, red curtains (sorry, I do not have pictures). Fast forward two years and we move into our house. I go on a curtain sewing spree! I was sewing curtains for anyone who would let me! I was a curtain sewing machine! After everyone was sufficiently curtained out, I moved onto pajama bottoms, then pillow cases, then bags/purses. I have even made slip covers for our A-frame camper’s cushions (that was fun!).
NOTE: I have to stop here and just mention (and thank) all of the people in my life who not only support my crazy hobbies, but have me make things for them, or read my latest stuff. I am just fortunate to have such supportive friends and family! That’s why I am saying: bake that cake, sew that curtain or pajama bottom, scrap those scrapbooks! Even if it is not perfect, they will appreciate it because you made it, and gave it to them with THEM in mind. And with practice, comes kinda sort of perfection. LOL!
AGAIN, BRIDGET, WHAT IS THE POINT??
THE POINT, is that you can start any project or new skill at any point in your life! Think about Julia Childs. She didn’t learn how to cook until she was in her 40s! And think about the impact she has had on cooking! Also keep that in mind. For the remainder of this post, I am going to go over some basic sewing concepts that have helped me throughout the years. Later, I will shock and awe you with a post about sewing pajama bottoms or pillow cases. Please remember (and be gentle with me); I am self taught. These tips and tricks have helped me, keep in mind that there is a plethora of online support and videos of professional seamstresses that you can check out. Okay. Now! Here we go!!
Sewing Machines
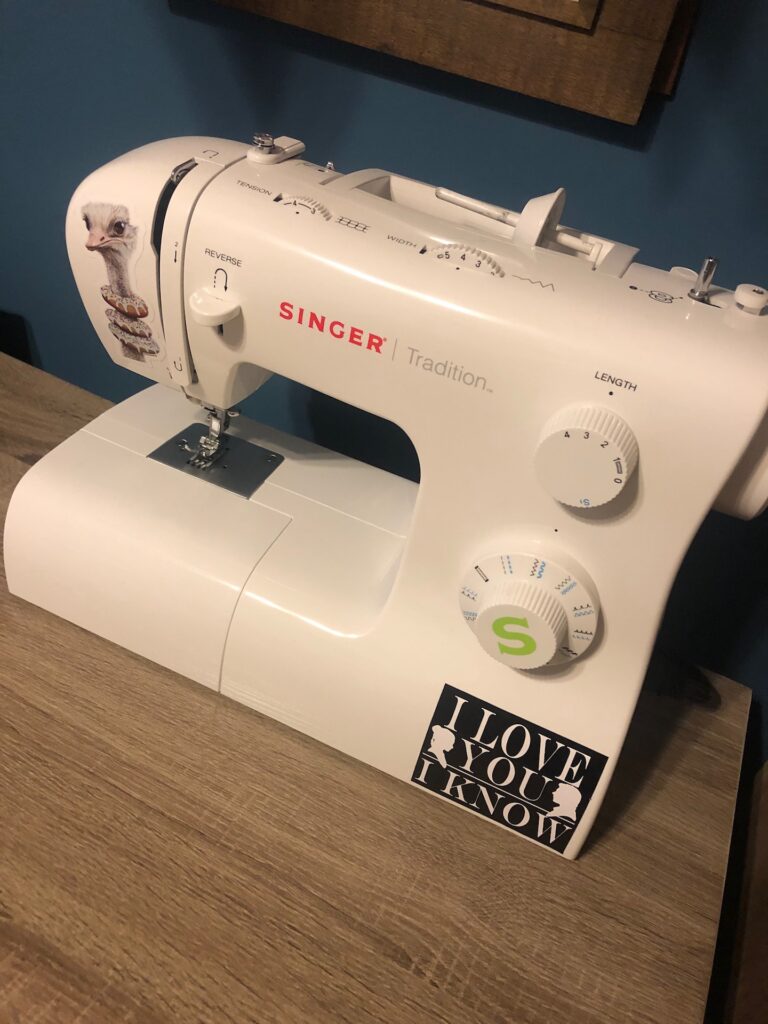
Remember when I told that my grandmother tried getting me to sew back in the day? At some point, she gifted me a sewing machine. A very nice, sturdy sewing machine with a case and everything. Bertha, as I lovingly named the old girl, sat, unused at my parents house for years. Hidden under clothes, family picture albums, and who knows what else? It was her time to shine when Hubby and I moved to the house, and I went on the curtain sewing kick. LOL. However, I realized, late at night, while watching Blade Runner and sewing curtains, that poor Bertha started smoking. Yes. That’s right, she started smoking. After that interesting turn of events I decided that I should probably purchase a newer model.
Therefore, with birthday and Christmas money, I went and purchased June. I told Bertha we were moving and put her up in the attic (I just couldn’t get rid of her). Now. I love June. She is hard working little machine. BUT. shhh, don’t ever tell her I said this. I wish I would have splurged and gotten a stronger model. The woman at the store was quite haughty when I was trying to buy June stating that the machine wouldn’t be able to do certain things because the motor wasn’t strong enough.
So, in my bullheaded way, I thought to myself, “the heck she can’t, I’ll show you, snotty sewing machine lady”, and purchased June. I know, feel free to shake your heads at me. I must say, though, so far, June and I have indeed shown that mean sewing machine lady up and whatever we have attempted we have prevailed. At times, not so well, but in general, not too bad. That being said…
Breaking a Needle
Uh, yes, so, it can happen. Like stated above, June isn’t the strongest. And when your motor isn’t up to going through a lot of thick layers of material, you put stress on your poor needle. When stress is put on the needle, they can bend and break. Let me tell you, the first time it happened, I thought I had been shot. I literally fell off of my chair and hit the deck. The needle had hit my cheek and I therefore thought I was blinded. After the inner dramatics, I reevaluated my life, picked myself up off of the floor, checked my face, and then looked over June to see what in the hell had actually happened. That’s when I saw the broken needle dangling, I am not going to lie. I turned June off, went into my living room, and did not continue sewing for the remainder of the evening. LOL.
I have broken a couple more needles (I am not a professional!! June and I are trying our best) and I will tell you, each time it scares the crap out of me, but now instead of hitting the deck, I curse and replace the needle. Easy Cheesey. LOL, yeah…
Moral of the story, if that the next time I get another sewing machine (you know, in another twenty years or so) I will splurge and get a stronger machine that will be able to better handle thicker materials.
Measuring
Disclaimer: If you are a seasoned seamstress, maybe skip this part. LOL. Thanks. Have I mentioned that I am horrible at math? I don’t like it. Never have. Most likely never will. LOL. When purchasing material for your project, you need to know how many yards you will need.
1 yard = 3 feet
When I first started sewing my curtains, I searched the Internet for, “how to measure how many yards of fabric”. Yup. Formula after formula popped up. I read through them all, I watched the videos, I asked my godmother, and I had no idea what was going on. Which lead to me over estimating how many yards of material I needed. You should see my stack of “extra material” from those early days: not pretty. Now I do not remember if I figured this out on my own (unlikely) or if I read it somewhere (likely) lol, but, I realized something.
The width of the fabric is set. When you are searching for fabric, the manufacturer has the width set. For example, most fabric width (that I have noticed) is found 42 to 45 inches and 52 to 59 inches. You can find other widths, but your choices in fabric type and patterns diminishes. I must say that I have noticed most are set at 42 inches. What the heck does that mean? Let’s run through two examples:
EXAMPLE 1 – BEDROOM CURTAINS:
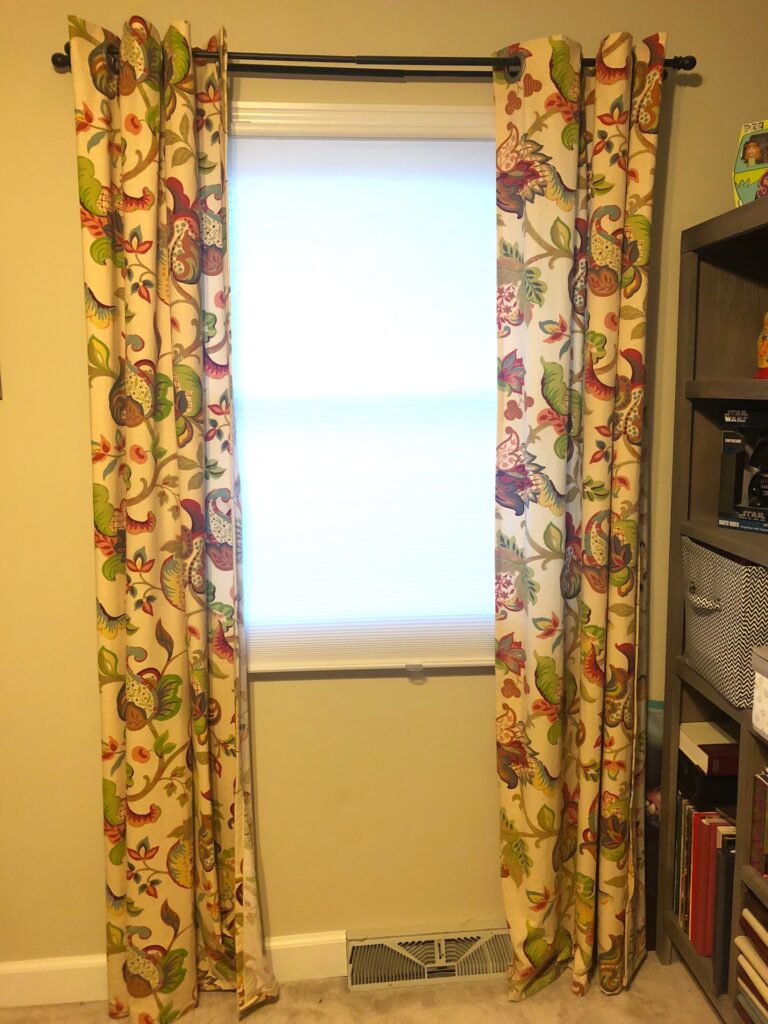
- Measure your window. Do what? Measure the width of your window from the outside of the left side of the window frame straight across to the outside of the right side of the window frame. The width of my window is 44.5 inches. Don’t do what I did at first! I was going to just get panel of fabric with 42 inches and then it dawned on me that yeah, hello, you need two full panels! I know, I know… don’t judge.
- Again, I wanted full curtain panels, so I wanted to start each panel at 42 inches. Figuring out the width is done. Now, I need to figure out how long I wanted each panel. Did I measure the length of the window from the very top of the frame to the floor? Yes I did. However, I also looked on the Internet at store that sold curtains to see what a standard curtain panel length and width were in the package. They offer different lengths. Measure your window to see which one fits yours.
- I went with a finished length of 84.5 inches
- For the length of each panel, I added the 84.5 inches plus 5 inches for seam allowance (this is the extra material you leave for your seam) and rounded that for one panel length, I needed around 90 to 95 inches or 2.5 or 3 yards. (Honestly, you can look up the conversation online, they do all the work for you!).
- THEREFORE, when ordering your material, you would want to order 5 or 6 yards (2.5 to 3 yards per panel).
What do you mean “finished” length???
Remember to take into account your seam allowance for all four sides of the panel. For the sides, I usually make a 1 inch allowance and for the top and bottom, I go for two or three inches. This is your preference, honestly.
EXAMPLE 2 – PAJAMA BOTTOMS:
- Again. The width is the width, more than likely 42 inches. So now you just need to look and measure your length. From my waist to the floor is 35 inches which is about 1 yard. Again, give yourself extra to allow for seam allowances. I typically round up to around 40 inches.
- But remember, you will need to cut out four pieces, so you will need 2 yards for one pair of pajama bottoms or, if they allow it, 2.5 yards. If they don’t let you buy in halves, then get 3 yards to be safe. Well, or whatever amount of yards you need. I am so short, so….
That, my friends, is how I measure. I hope this helps with some of the confusion I went through when first starting to sew. When I post of blogs on specific projects like the pajama bottoms and pillow cases, I will get into the nitty-gritty of measuring and such . For now, though, I just wanted to go through the basics.
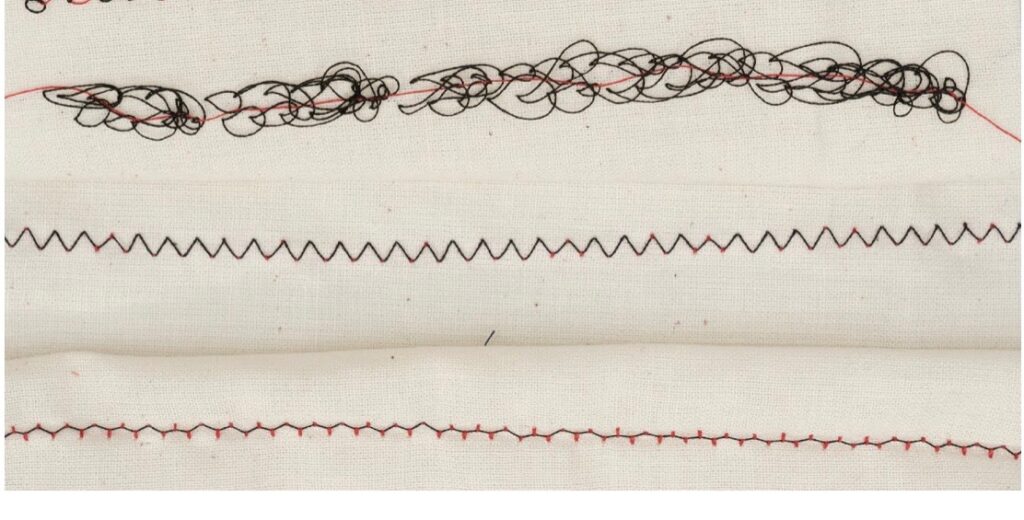
Thread Tension
Most of your troubleshooting when sewing will come from the tension of your thread. In the beginning I always thought it was this major, complex disaster and in the end (most times) it was that I simply needed to re-thread June. What do I mean thread tension? Please refer to the following photo I have provided for your easy reference. You can either have issues with your thread becoming too tight, pulling and too loose and creating a rat’s nest in the back. (PS – I loath rat’s nests with a burning passion that consumes all). You think all this going well then BAM, you got a hot mess of thread all jumbled up back there.
How do I fix this? Simple, really. Just rethread your machine. Usually that does it for me! When it comes to the actual settings on the machine, itself, I leave them at factory suggested settings. As you adventure through your sewing projects, you will see the need to different settings, but I have honestly kept mine as is, for the most part.

WELP, I hope this beginning guide is helpful! In the future, I will be posting Blogs on pajama bottoms, curtains, and much more!! Thanks for stopping by and see you again!!