A hoy-hoy and welcome back! Hope you all had a wonderful Holiday and a Happy New Year!! Around these parts (AKA – my house) the New Year also harkens another pretty spectacular event – my birthday! Quite honestly, the reason I am excited for my birthday is because I get to try out a new cake recipe! Yup, we are back to cake. Last year I made the Ultimate Chocolate cake, which I still love and still make because it so amazing. However, this year we will embark on the exact opposite of the spectrum – that’s right people, vanilla cake. Now wait!! Don’t hate on vanilla. I know many think of vanilla as boring or basic (The Husband, I am looking in your direction on that one), however, vanilla in most recipes can be the enhancer or even the backbone of the flavor profile! Whereas chocolate is deep, dark, and dramatic with heavy, luscious flavors: vanilla is light and airy. It has a subtle sweetness that lends itself to a deeper complexity that ranges from earthy to floral. It’s sweet and creamy with warm flavors that harken back to comfort and home. Of safety. Not in a bad way. Like your mom or grandma giving you a hug type of comfort and safety. So see? If you give vanilla a chance, she can perform in different ways and in different flavor profiles.
What gave me this idea? YouTube. LOL. I was watching my Erin Jeanne McDowell, and she had a video on vanilla cake – vanilla cake with a vanilla pudding filling and vanilla Russian Buttercream frosting. Now, originally I watched this video because I have never had a go-to vanilla cake recipe. I have always used the boxed cake mix for white and then added to the boxed cake mix. No one has noticed the difference and all think that I have a magical go-to recipe. Here is my confession. LOL. I do not. When I have tried, I felt that the cakes were flat tasting and just mediocre. And dry. Like chocolate cake, vanilla cake also tends to be on the dry side. I trust Erin and her baking abilities, so I was pondering on trying her vanilla cake recipe to see how it turned out. THEN it dawned on me that I was also looking for a new birthday cake to make for myself and loved ones for this upcoming birthday and I thought that THIS cake would be perfect! And quite frankly, vanilla cake is my favorite cake. The cake stars aligned for me, I double checked with The Husband and he agreed, this would be a good juxtaposition to the deeply chocolatey cake I made in 2024.
This blog will also introduce something I have thought about trying for awhile… homemade sprinkles!! Yes! My Erin Jean McDowell in another video talked about making your own sprinkles, and then recently posted a shorter video dedicated to Sprinkles. So, I did it!! And I will show you how!! So buckle up, cause this is gonna be one wild ride on the Vanilla Cake Rollercoaster with an added Haunted Sprinkles Mansion attraction!!
Cake Arbitration’s
Decisions, decisions, decisions… After watching Erin’s video, I came to the conclusion that I would be making a vanilla cake for my birthday, but…Which frosting, and did I want the filling to be frosting or pudding? So, I took a consensus amongst my friends and, of course, The Husband. For the frosting, it was between either the German Frosting or the Russian Frosting that Erin uses. On one hand, I have made the German Frosting with Claire’s Ultimate Chocolate cake and everyone loved it!! But, I have never made the Russian Buttercream, and why not try something new that Erin loves to use on a lot of her cakes. I know, I see you smiling sweetly at me and nodding your heads having no clue what I am prattling on about. Sorry. Here:
German Buttercream – is the pudding based frosting. You first make the pudding, then you whip the butter and sugar, and then you slowly add the pudding mixture to the butter mixture. Please see last year’s cake recipe for more.
Russian Buttercream – is simply whipping the tar out of the butter and then slowly adding one can of sweetened condensed milk. Like, super easy to make, but I had been told it is not too sweet and has a great light and fluffy consistency.
Everyone was deferring to me – I deferred to The Husband and he suggested the Russian for the simple fact that I had never made it before, so I decided to give it a try. Sounded good to me! The final decision was pudding or no pudding filling. Everyone voted pudding filling. And if I am being honest, in case the vanilla cake is dry, the pudding will do a nice job masking it. LOL. Therefore, Vanilla cake with Russian frosting and pudding filling!
But First! Sprinkles!!
Woman, you can make your own sprinkles? What crazy witchcraft is this?! Powdered meringue witchcraft! Honestly, I never thought to make my own sprinkles either until, behold behold, I saw Erin doing it on a video. And let me tell you – it is crazy easy and kind of (for bakers like me) a “duh” moment. LOL.
Ingredients
2 TBL meringue powder
3 TBL water
2 cups powdered sugar
This is the basic Royal Icing frosting recipe. Most people use this for decorating Christmas cookies. We will be using it to make two different types of sprinkles!!
- Add Meringue powder, water, and powdered sugar in a mixing bowl. Mix on low until the sugar is hydrated, then mix on high or until the frosting is thick and glossy. And honestly, that is Royal Icing.
ADDED BONUS: I am making mine flavored for the my birthday cake: vanilla and cinnamon and nutmeg. Therefore, I will add a step into this process:
2. At this point, you 1 teaspoon of whatever flavoring you want and add it to it. You can even use food color for colorful sprinkles! I added 1 teaspoon vanilla paste for one batch and for my second patch I added cinnamon and nutmeg – 1 teaspoon in total. Mix in and you are ready to pipe these bad boys!
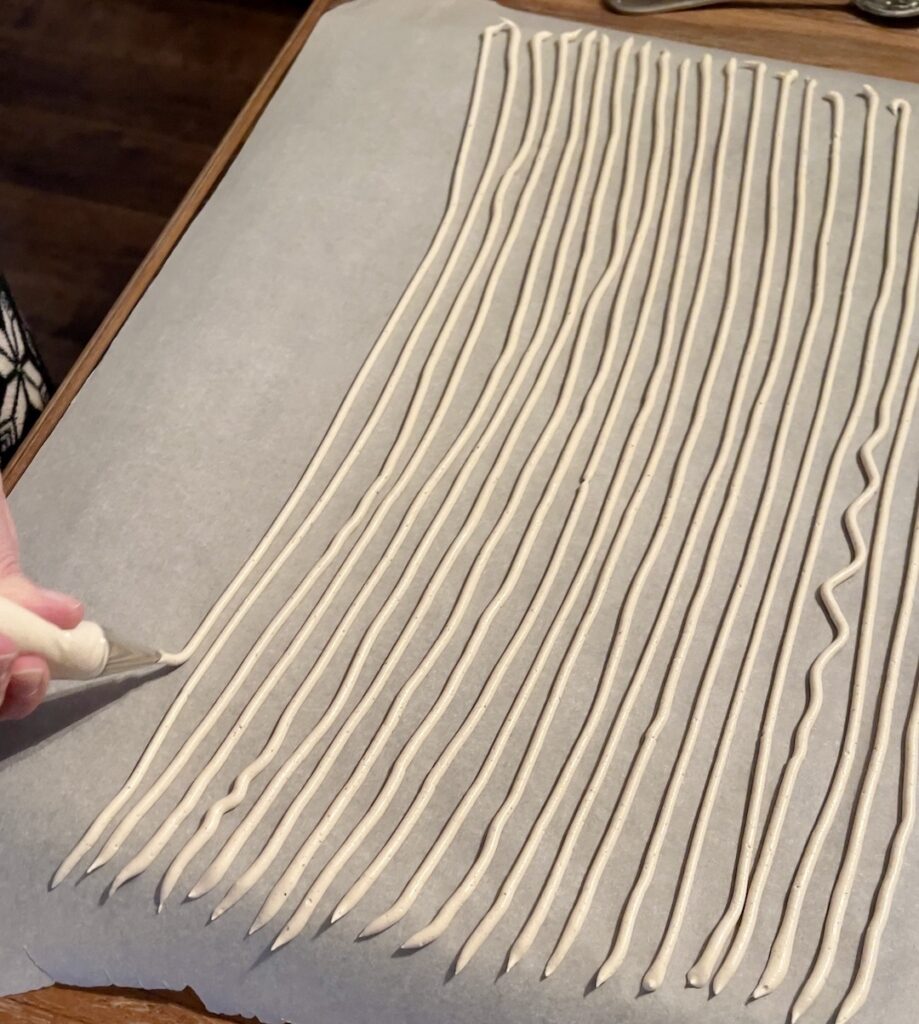
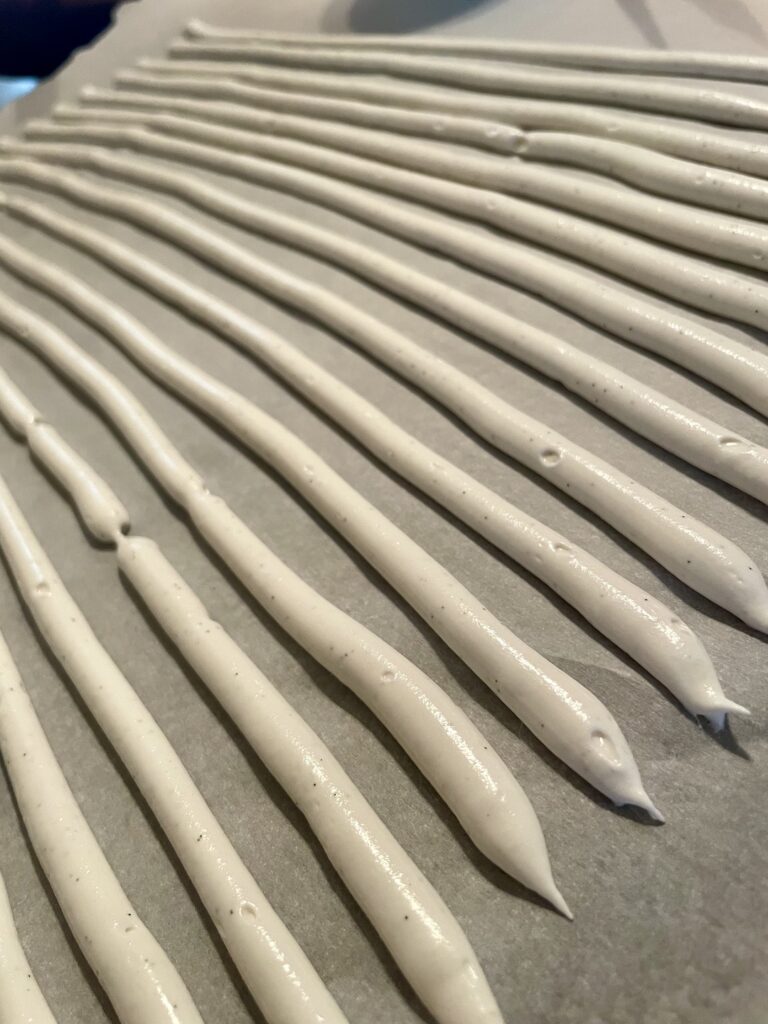
Piping – Now add the Royal Icing to a piping bag with whatever tip you want to use! Remember that the bigger the tip, the longer it will take to dry. Now, on a parchment paper lined cookie sheet, pipe out lines of frosting. Then, place them somewhere secret, somewhere safe (where are my LOTR peeps?!) to dry out. Now. This depends on where you live and your humidity. I live in the midwest in the midst of winter – therefore our air is super dry right now. Because the air is so dry, it took my sprinkles less then 24 hours to dry. Now, it will be interesting to see how long it would take in the summer, when we get pretty muggy.
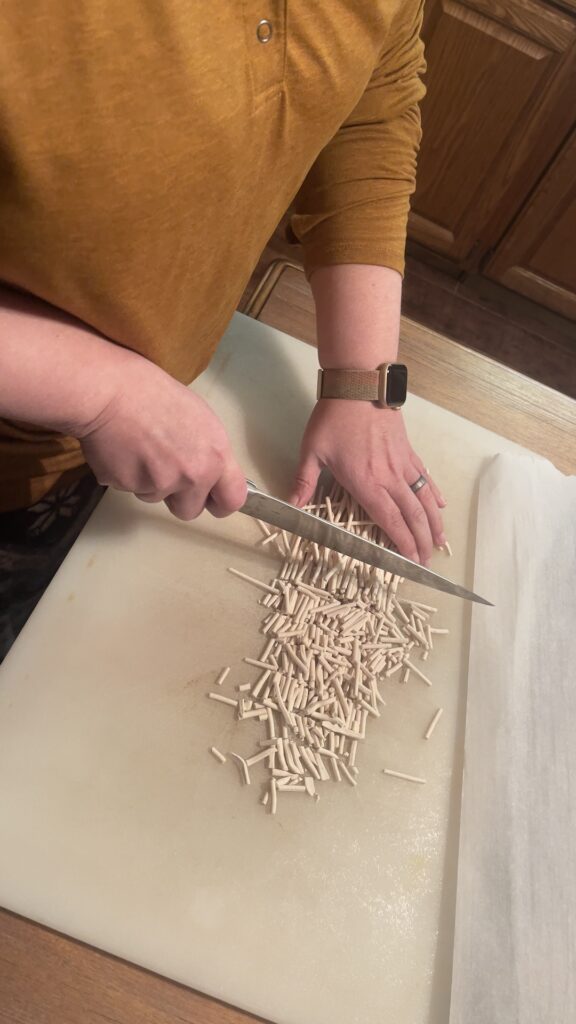
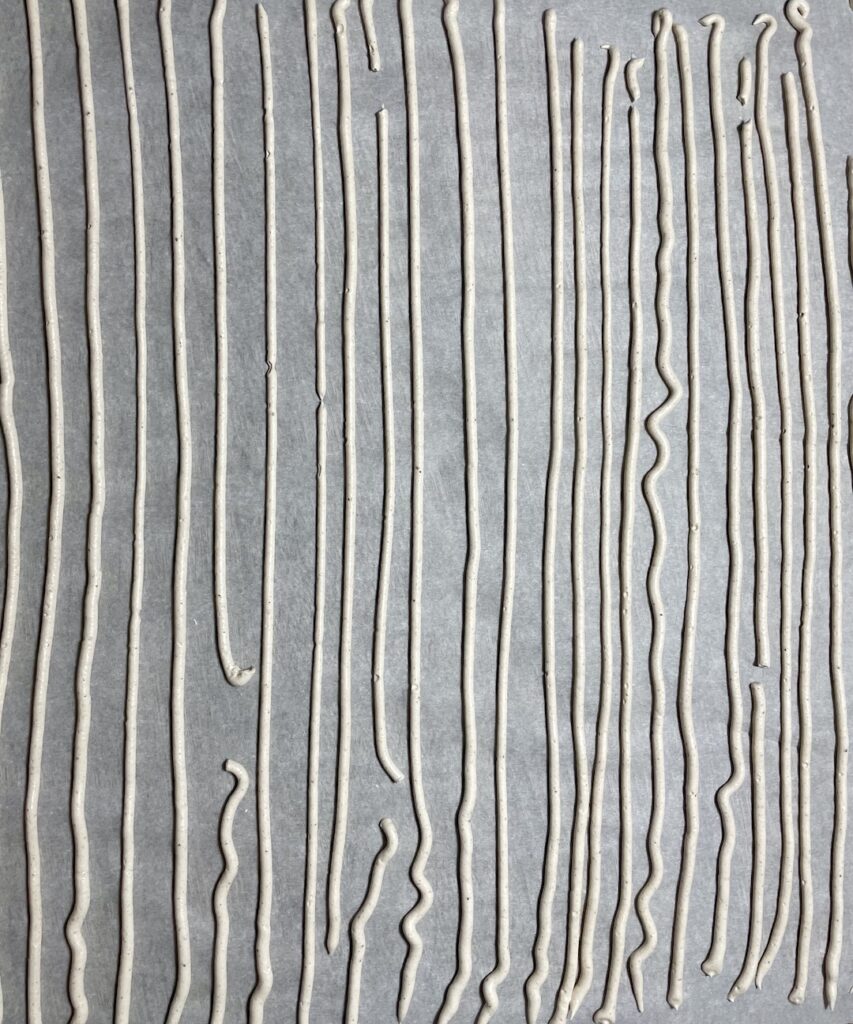
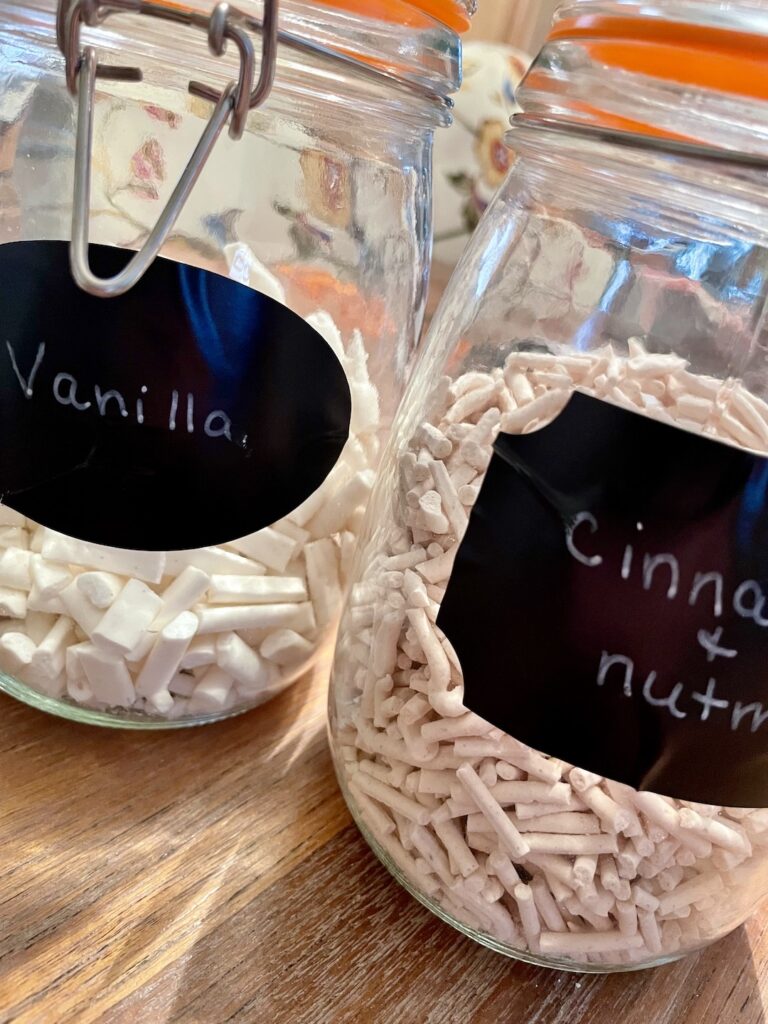
Once they are dry, break them up or cut them up and place in an air tight container. I bought these fun canisters. They should keep for months as long as moisture doesn’t get to them! If the moisture gets to them, they will re-hydrate and become mushy and break down. Don’t want that.
There! Sprinkles are done and ready for cake time!
Cake is happiness! If you know the way of the cake, you know the way of happiness! If you have a cake in front of you, you should not look any further for joy!
-C. Joy Bell
The way of cake!! I LOVE this!! Yes, I think we are learning the way of cake!
THE CAKE
So this was a comedy of errors for sure. But, I will tell you what I did wrong so that can you benefit from my mistakes. I will tell you the correct way to make the cake and then at the end, I will tell you what I did incorrectly. Lets get on with it!
Ingredients
450 grams of all-purpose flour
2 teaspoons of baking powder
1 teaspoon of salt
285 grams of room temperature butter – this is important
396 grams of sugar
1 teaspoon vanilla paste plus a teaspoon of vanilla extract
1/4 teaspoon of almond extract
8 large egg whites at room temperature
11/3 cups of whole milk
1/4 veggie oil
Organize yourself first!
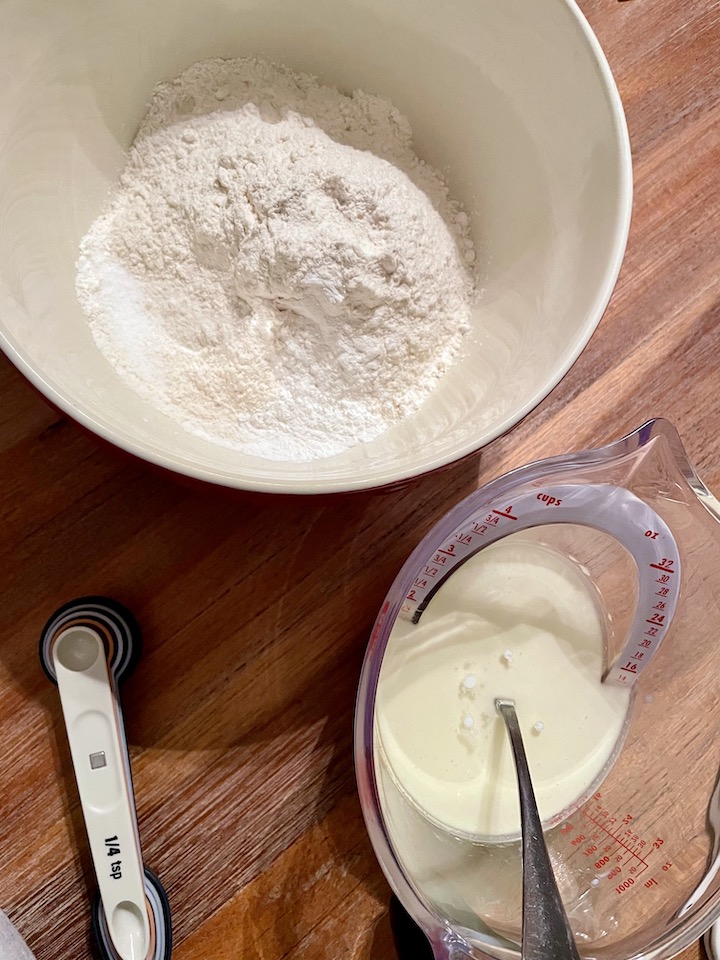
- Mix the four, baking powder, and salt in a large bowl and whisk to combine
- In your mixing bowl, put the butter and eggs
- Have your egg whites at the ready in a bowl
- Mix your milk, oil, and vanilla extract
- Get your 3-9 inch cake pans ready. Spray them with non-stick spray. Add parchment on the bottom and then spray again.
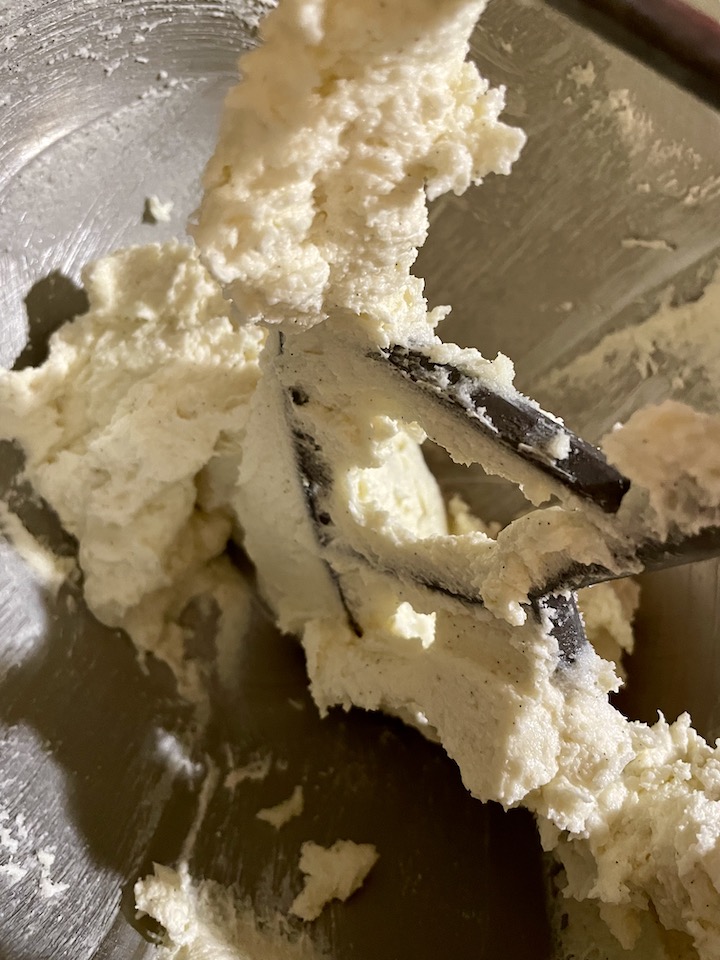
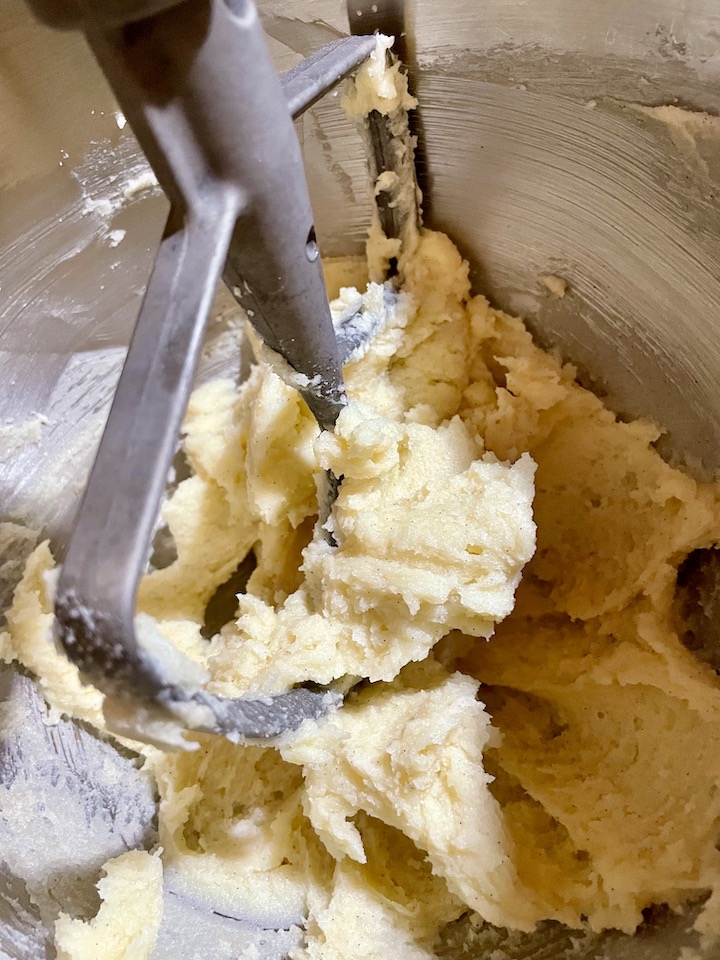
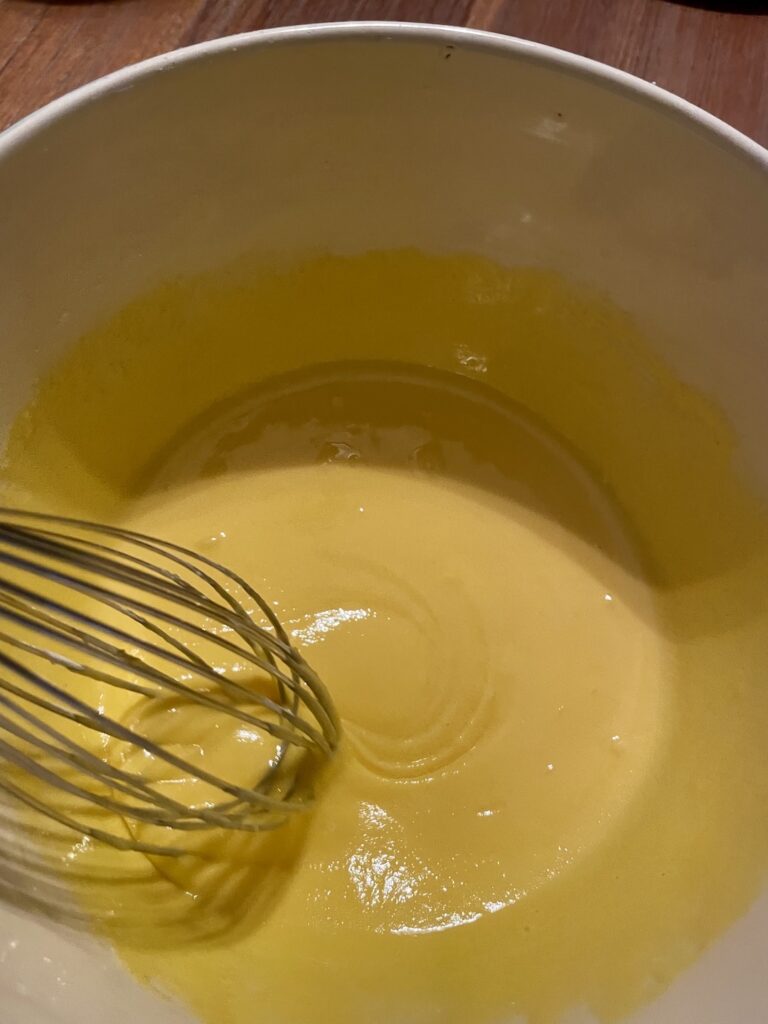
Step One – Using the paddle attachment, beat your room temperature butter and sugar together until light and fluffy – color will almost turn white – this can take 5-6 minutes. Scrape down the bowl. Add your vanilla paste and almond extract, mix to combine.
Step Two – In four installments, add the egg white to the butter/sugar mixture, beating on medium speed to incorporate before adding more. Do this slowly. Scrape down the bowl. You want to keep the mixture as light and fluffy as you can.
Step Three – Now take your flour mixture and your milk mixture and add them in alternating installments, beginning and ending with the flour. When adding the milk mixture, do so slowly while the mixture is running. Scrape down the bowl to ensure all flour gets incorporated. Again, keep in mind to keep batter light and fluffy. Light and fluffy, people!
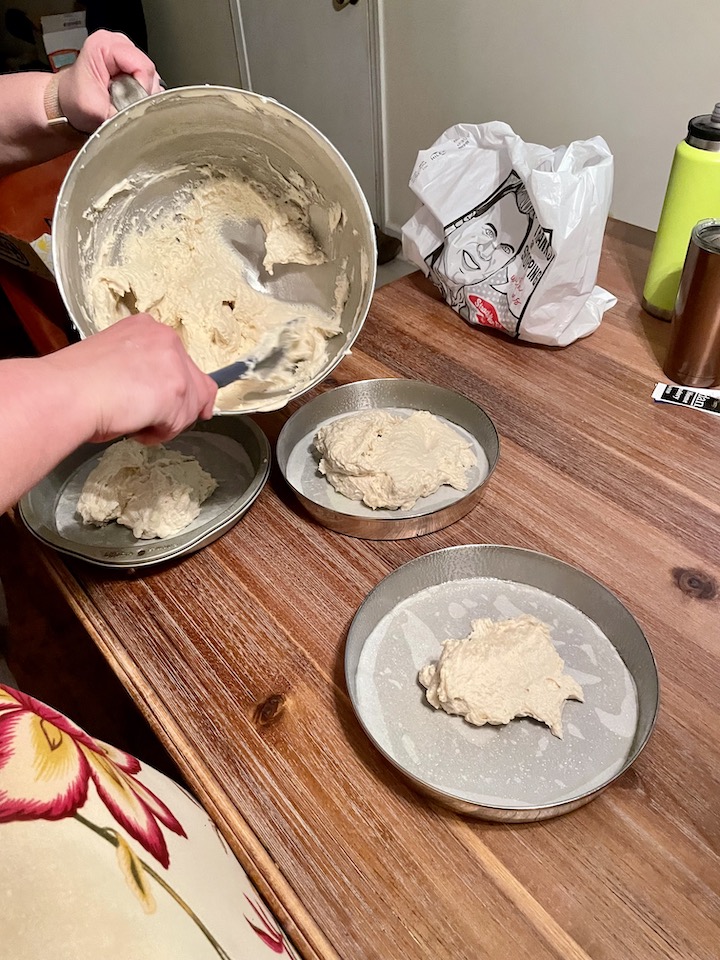
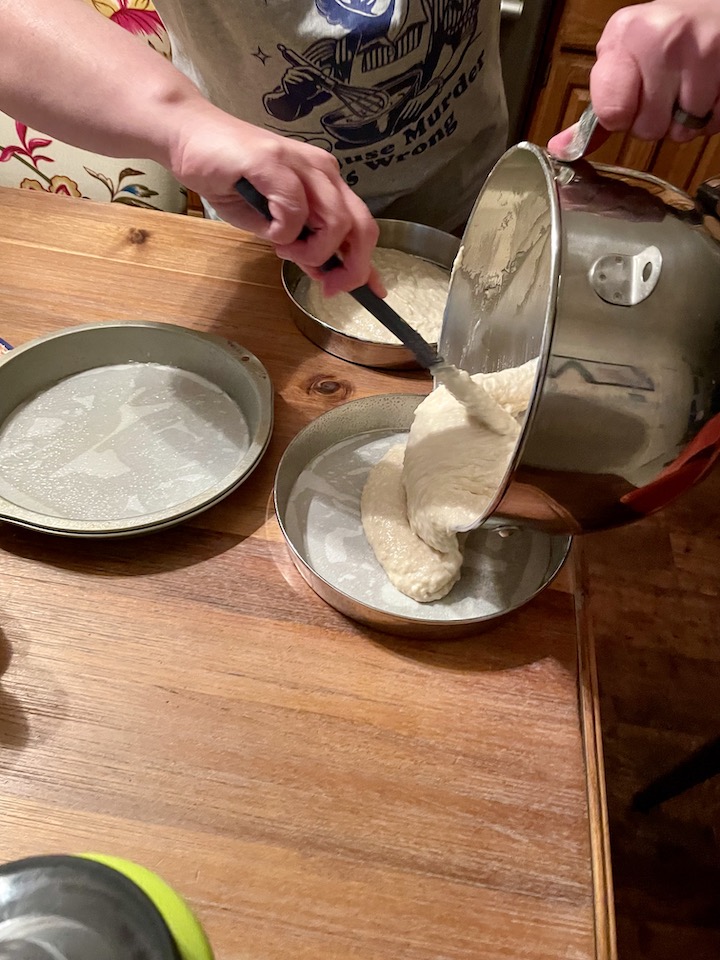
Step Four – Divide your batter equally between the three 9 inch pans. Take a small off set spatula to level off the top of the cake. Bake at 350 degrees for 30-34 minutes.
Step Five – Let cool in pans for 10 minutes, then turn out of the pans and allow to cool to room temperature. Wrap in plastic wrap tightly once cooled.
What Went Wrong?
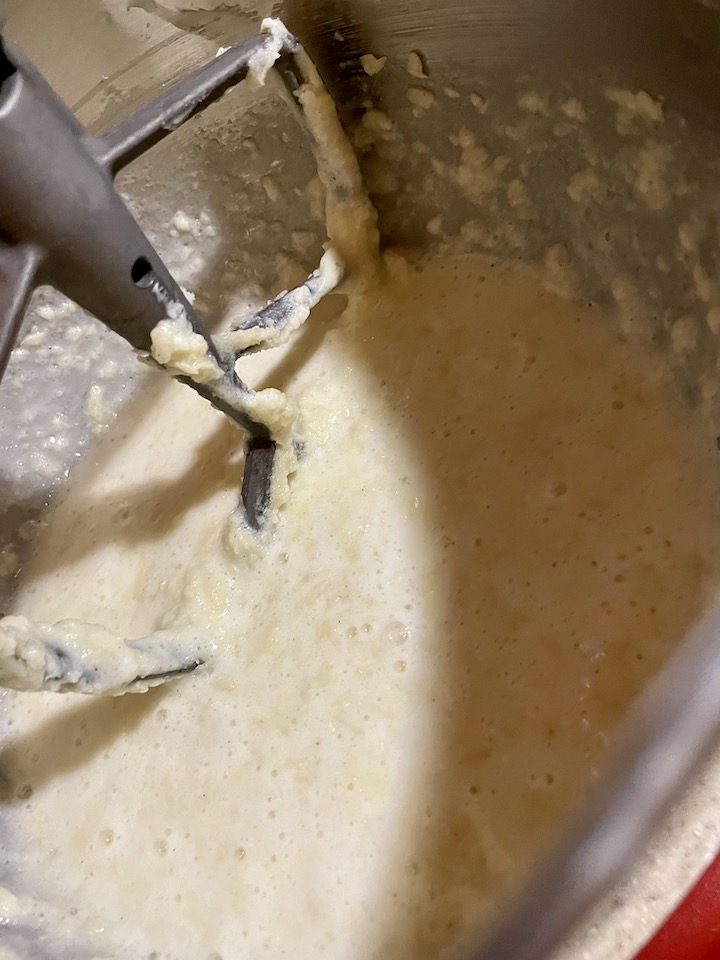
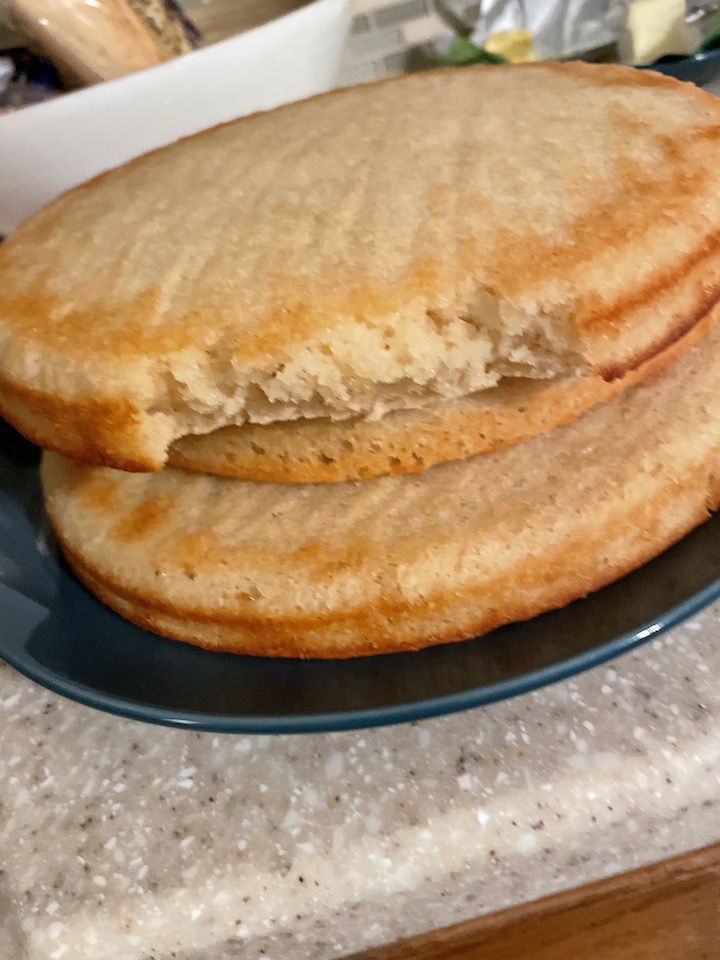
Super funny question. So. I am making this cake in January in the Midwest. It is currently 18 degrees outside. Therefore, “room temperature” at this time of year is still too cold for making cakes. Even though I had set out the butter the night before, that’s right, the night before, when I went to put this together, my butter was still too cold. So, when I went to mix it with the sugar, it did not become light and fluffy, instead it clumped together. When I then added the egg whites, it simply became a lumpy, soupy mess. Thinking the flour might save it, I went forward and completed the cake. The end batter was lumpy and could be poured into the pans.
Now, some cake batters are intended to be like that. Not this one. This one should have been thick and fluffy. Even while I was baking the cakes, they didn’t smell right. They were frying instead of baking. This being said. The cakes, although flat and with a texture of corn bread or pound cake had a great flavor. I just could not use them for the cake I was making, as they were too dense and did not rise as they should have. Moral of the story – make sure your butter is at room temperature or “squishy”, your egg whites should be at room temp too. I ended up taking both the butter and the egg whites and slowly, oh so slowly, warming them up int he microwave in 5 second bursts. Don’t melt the better, and be careful not to scramble the eggs. Do this slowly, if you need to. And yes, I do have pictures to show you what not to do! Always there for my readers.
Should I have known better? Yes. Was I cocky and rushing. Also yes. Did I learn my lesson? Yes, that was a lot of ingredients to waste (we are keeping the did not turn out cake because it is still good eats, just not for a layer cake). No cake left behind, LOL.
THE PUDDING
Homemade pudding. It has been done on this Blog before. Don’t worry, we can do it again. I have found when it comes to more complicated cooking or baking items, the key is to slow down and take your time. When you rush, you tend to turn up the heat, which can burn or scorch what you are making. Take your time and get everything lined up and ready to go.
Ingredients
2 cups of whole milk (use whole milk – for real)
1 cup heavy cream
1/2 teaspoon sea salt
1 1/2 teaspoon of vanilla***
1/2 cup granulated sugar
1/4 cup cornstarch
7 egg yolks (keep the egg whites for the cake)
2 Tablespoon cold butter
Step One – First of all, separate your egg yolks from their whites. SAVE the egg whites for the cake. Get your set-up ready, with pudding, when its time to go, it is time to go.
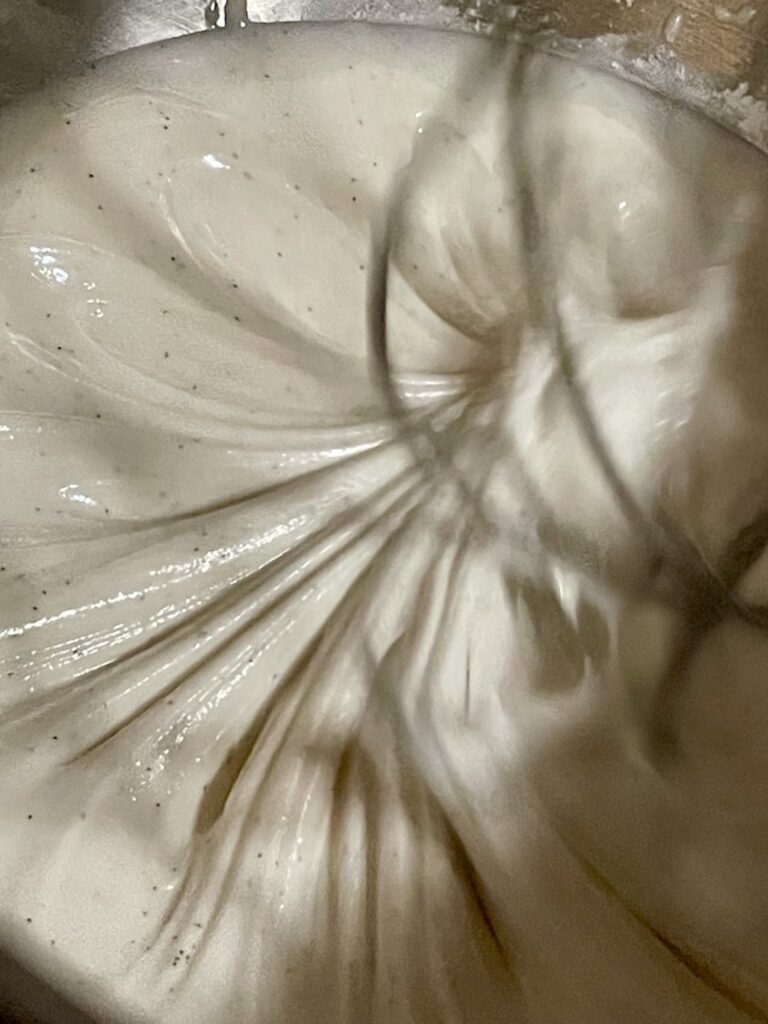
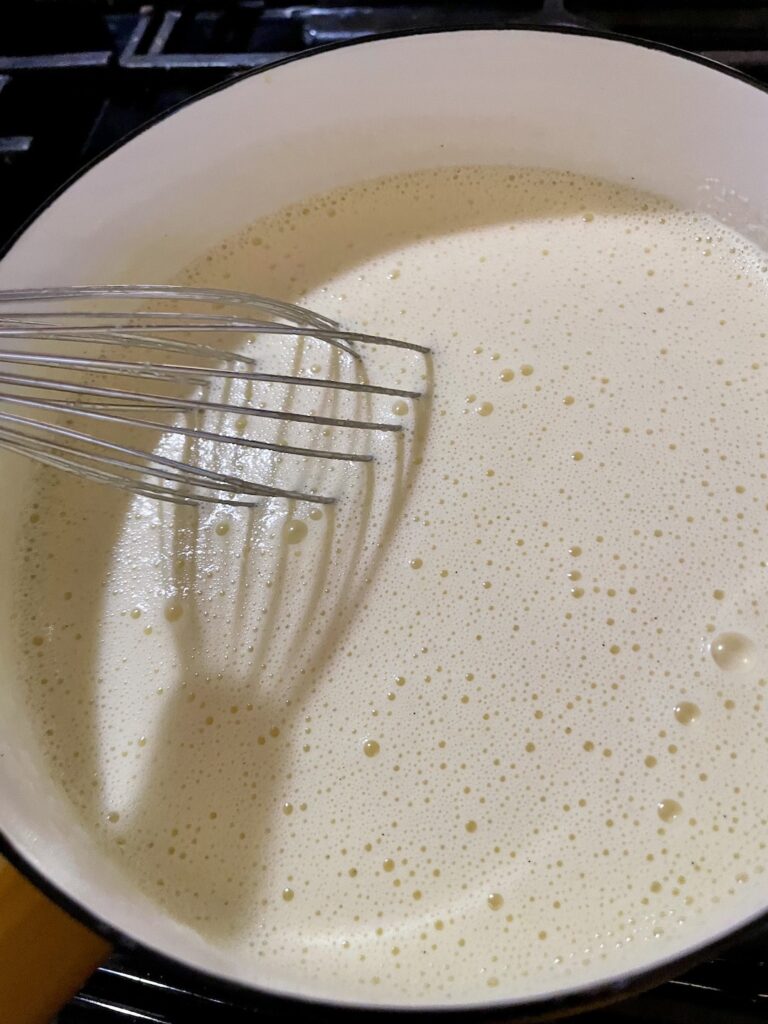
Step Two – Combine the milk, heavy cream, salt, and vanilla in a saucepan; whisk and set over medium to medium-low heat. Wait until you see steam coming from this mixture – do not bring to boil. In a separate bowl, combine your egg yolks with sugar and cornstarch – mix until smooth.
Note: Do not mix the egg yolks with the sugar and cornstarch until you are ready to use this mixture. The longer this sits, the more the sugar will draw out the moisture from the yolks, making the mixture look curdled or cooked.
Step Three – For this part, I take a measuring cup and fill it with the hot milk liquid from the saucepan. I find that when I try to pour some of the hot liquid from the saucepan, it get everywhere. When you use a measuring cup, the liquid is contained and anything that pours all over is contained within the saucepan. I took a 1 cup measuring cup and filled it twice – slowly pour the hot liquid into the egg, sugar, and cornstarch mixture, whisking constantly to avoid scrambling the eggs.
Step Four – Pour this mixture back into the saucepan and continue to whisk constantly. Make sure to whisk in the corners and bottom of pan to prevent scorching. Continue whisking until the mixture thickens, once in awhile, stop whisking to see if large bubbles come to the surface in the middle of the saucepan (about two to three) then it is ready to take off the heat. Whisk in the two tablespoons of cold butter.
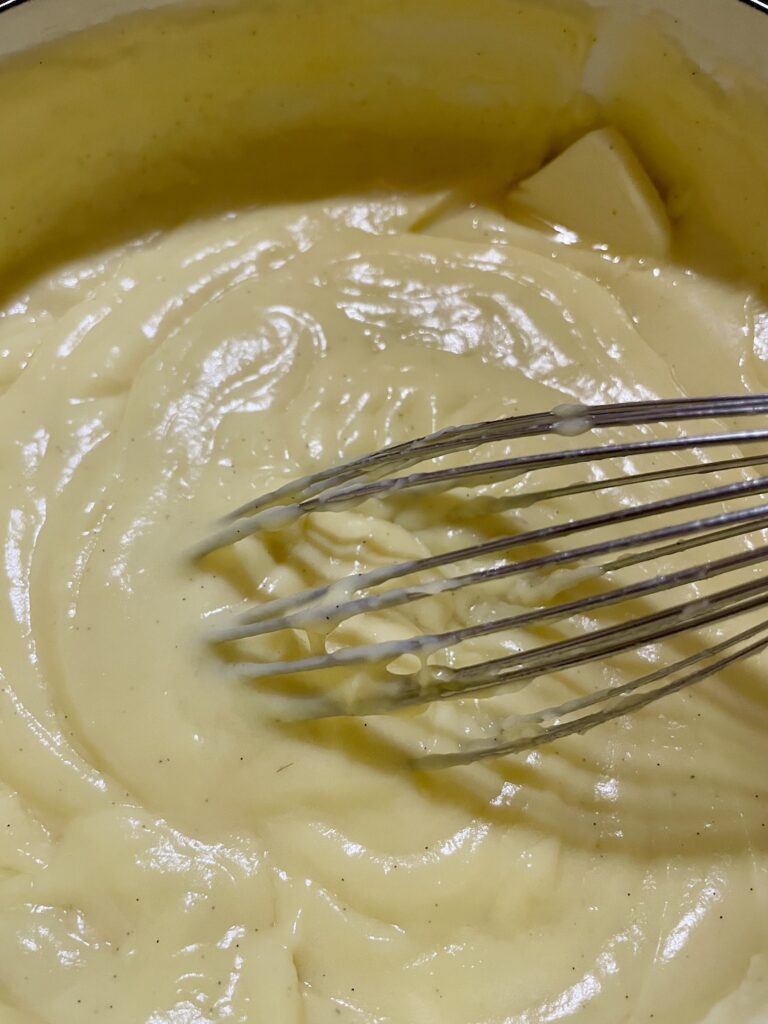
*** It is here, that I added more vanilla paste – I really wanted a good, rounded vanilla flavor.
Step Five – Pour the pudding into a bowl and cover with plastic wrap – make sure the plastic wrap is touching the surface of the pudding to prevent a skin from forming. This can be kept in the refrigerator for up to two days before use.
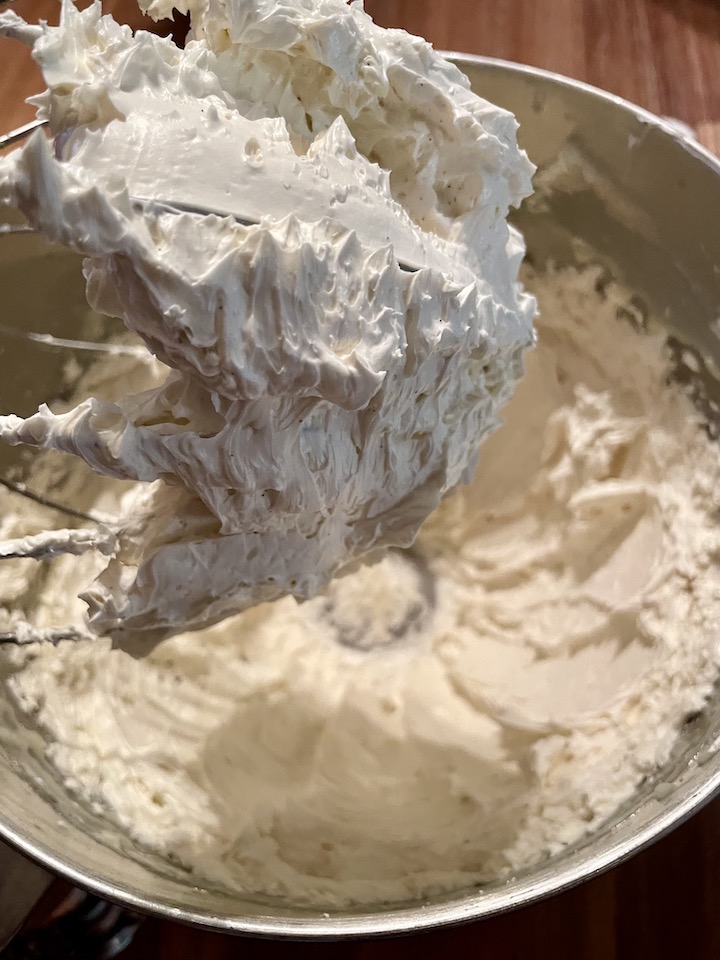
THE FROSTING
Russian Buttercream. The name of the game: Whip It Good. Like really, whip the heck out of it. Then whip it a little bit longer. This is what is important for this frosting is to make sure that you whip enough air into the butter. This is the first time I am making this frosting so, we will learn together!
Ingredients
2 cups of room temperature butter *Really, it has to be room temp and squishy
1 1/2 teaspoons vanilla paste
1/2 teaspoon of vanilla extract
1 teaspoon salt
14 oz can of sweetened condensed milk
8 oz finely chopped white chocolate, melted
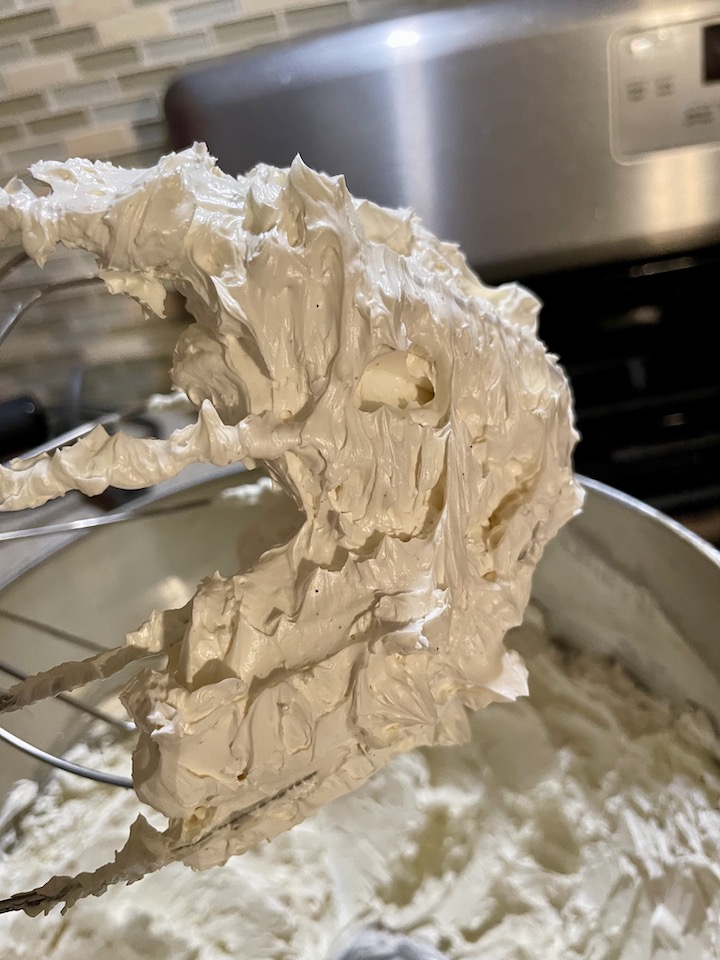
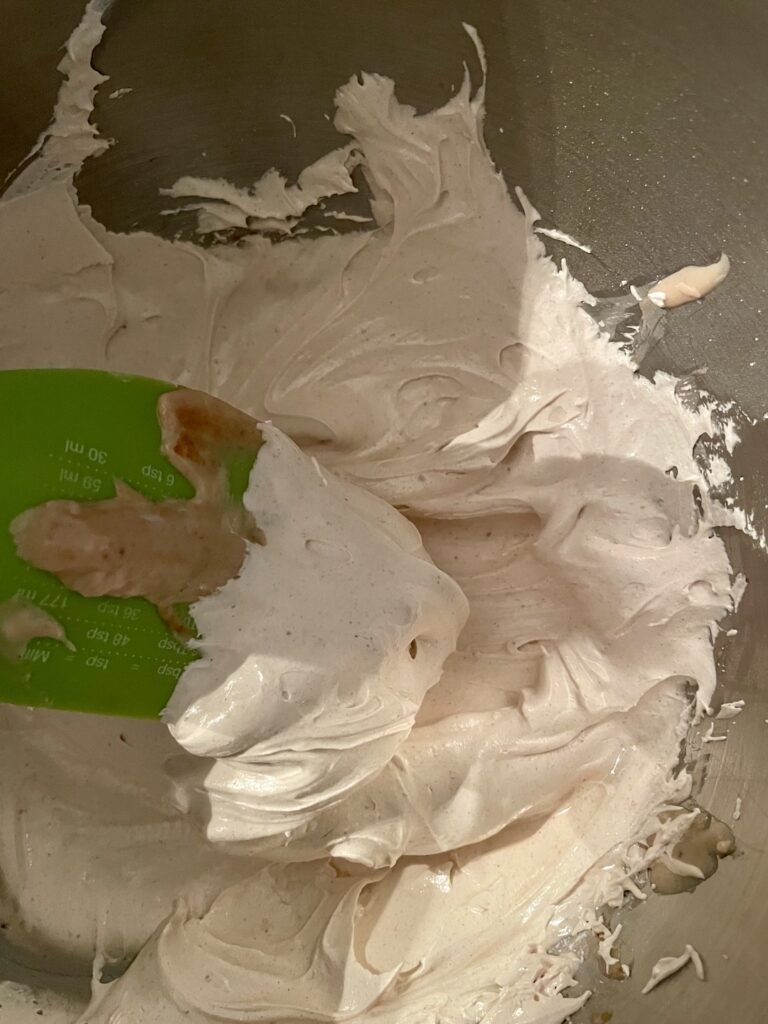
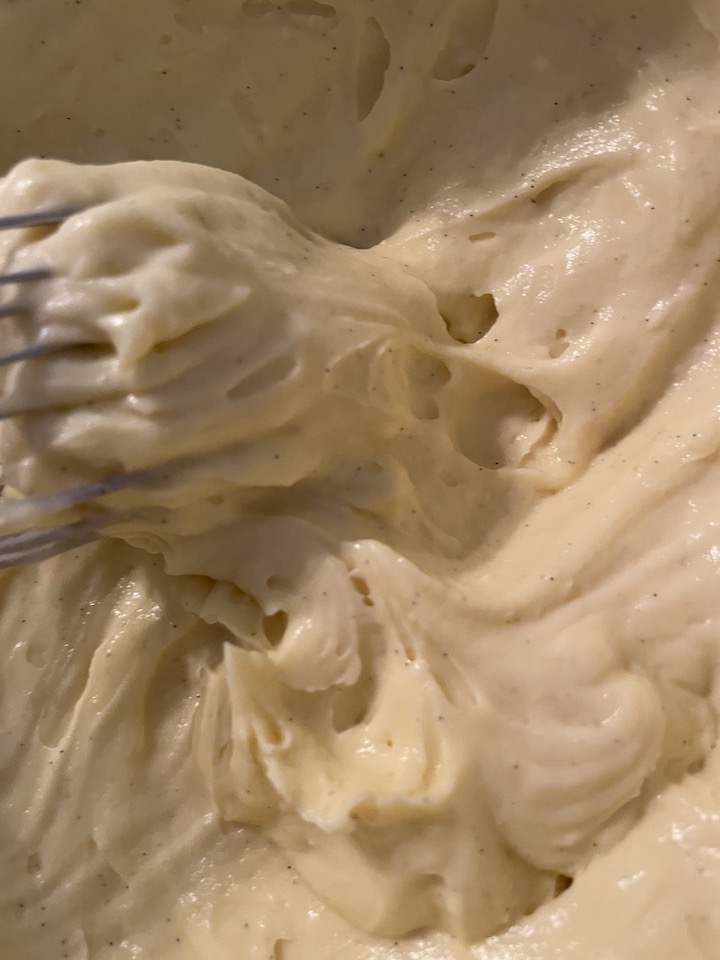
Step One – Combine your butter, salt, and vanilla in your mixing bowl. With the whisk attachment, whisk this until VERY VERY light, fluffy and white. This might take up to 5-6 minutes. ** This is why having room temp butter is important – when you press down on the butter, it should squish
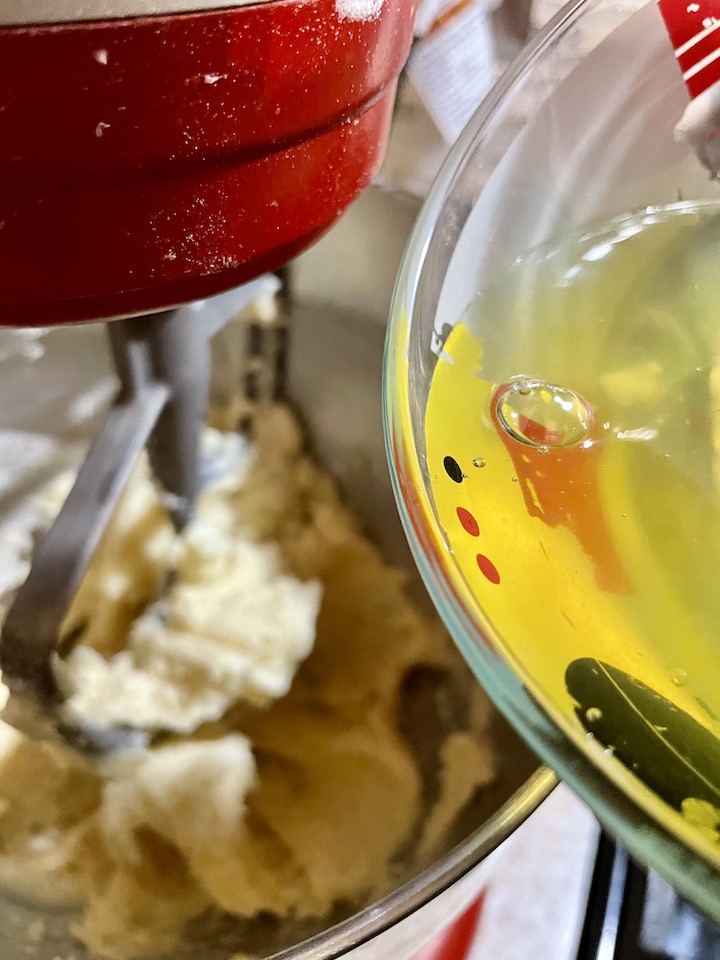
Step Two – Now. Erin says to slowly stream in the sweetened condensed milk as you are whipping. I don’t know what kind of witchcraft she employs to allow this to happen, I, however, do not have such skills and my sweetened condensed milk was whipping all over the place! Therefore, after much cussing, I decided to treat this like the Ermine frosting and would stop the whisk, add some milk, re-start the whisk to incorporate and continued to do this until all of the sweetened condensed milk was whipped in. Take your time, you don’t want to go too fast and break the frosting.
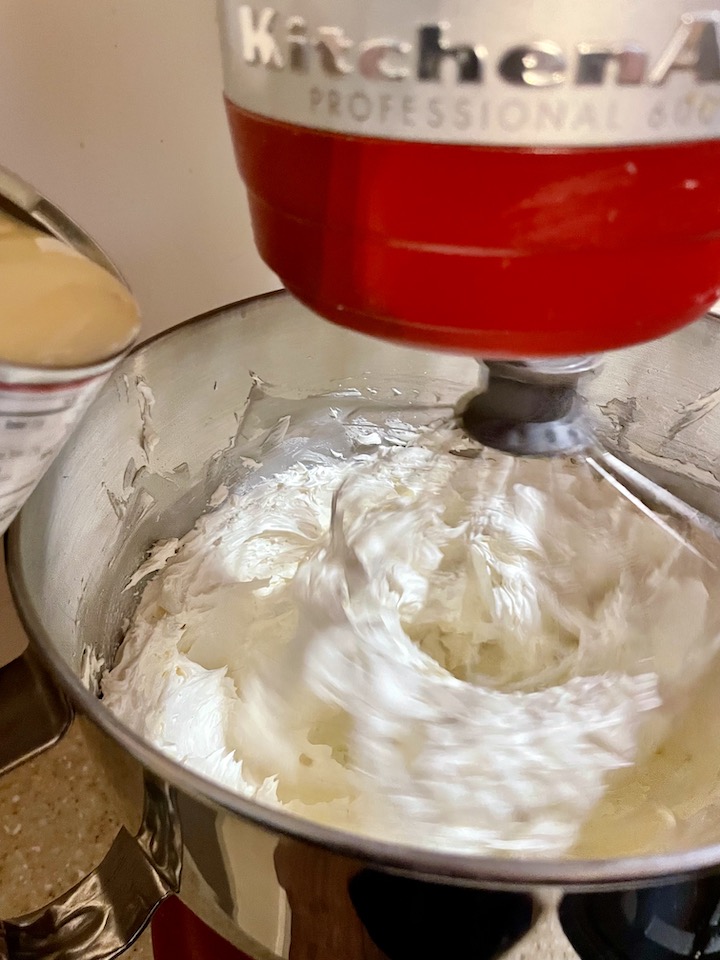
**Note: You could just use this frosting as it, however, Erin calls for 8 oz of melted white chocolate, so that it what we are going to do. I did, of course, try the frosting sans white chocolate and it tastes just like Swiss Meringue Frosting!!! Without all of the work!!
Step Three – in 30 second bursts in the microwave, melt your chocolate. Be careful to not over heat this as you can easily burn white chocolate. Once you have it melted, slowly, oh so slowly, stream this into your buttercream while whipping. If again, you have issues doing this because your damn whisk is flinging chocolate about, then do what we did for the sweetened condensed milk and add it a little at a time, stopping the mixer to do so.
Cake: check. Pudding: check. Frosting: check!! Lets put this bad boy together!! But first!! Read this:
The Order of Things – We enjoyed this cake on a Saturday. I didn’t want to rush myself by making everything at the same time, therefore I broke up the ingredients into three days. First, I made the pudding and placed that in the refrigerator on Wednesday as I knew that it would be fine in the fridge until Saturday. Friday after work, I baked the cakes and allowed them to cool, covered overnight. Saturday morning, I made the frosting, then put the cake together and allowed it to sit before dinner and then… CAKE TIME!
Decorating
Okay. I am not going to go too in depth here, as I have already done so on the Lemon Cake and the Halloween Cake blogs. But I will go over the main ideas.
Step One – Put some frosting in a piping bag and cut the tip off. On the bottom of cake layer one, around the perimeter of the cake, pipe a wall – this is to keep the pudding filling contained inside and to not squish out.
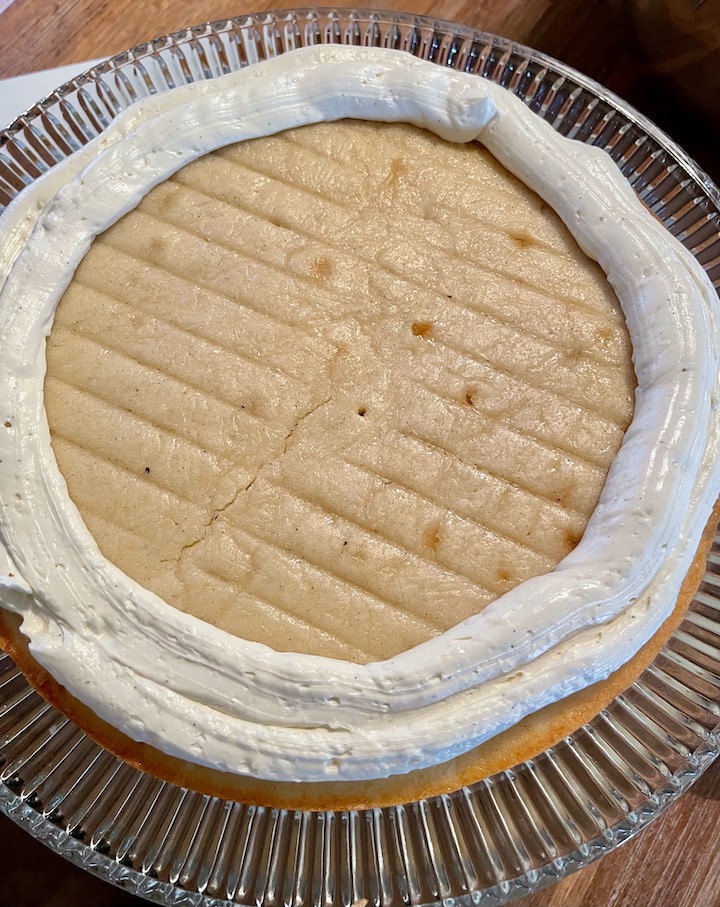
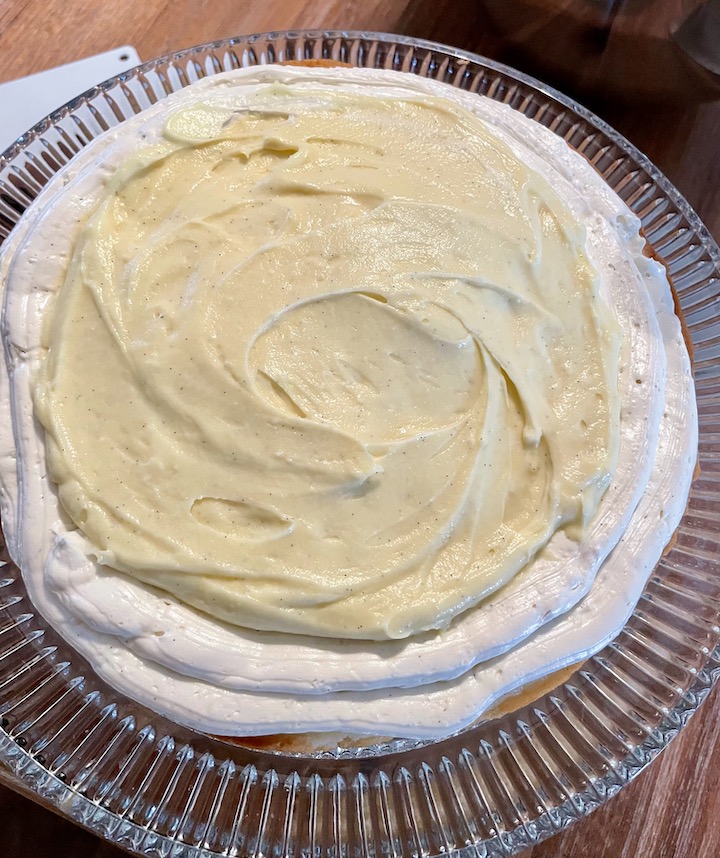
Step Two – Add the pudding and spread it out into a layer, add the middle layer of cake and repeat. Once the cake is layered, frost it!
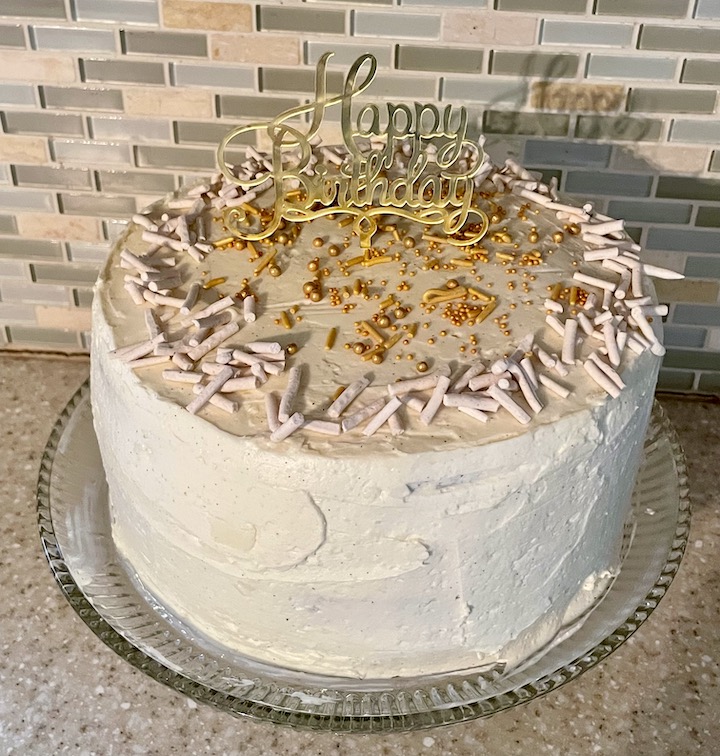
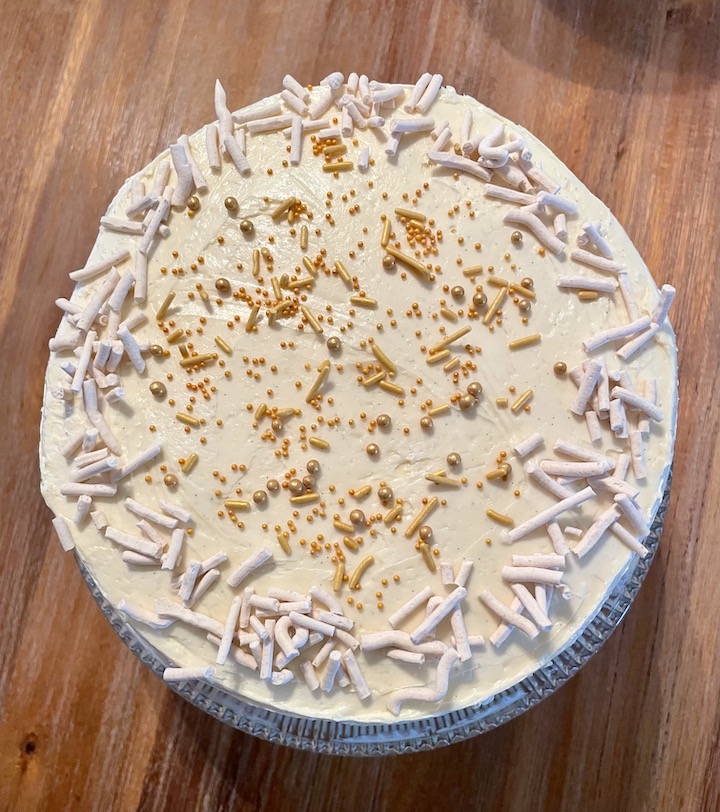
Step Three – Now, there is not enough frosting for piping decorations, so just decorate it and then I added my homemade cinnamon sprinkles and some gold sprinkles I had purchased. Add a “Happy Birthday” sign and we are done!! Now, if you don’t want to pipe some decorations, I suggest either doubling the frosting recipe or make one and a half of the frosting.

THE END.
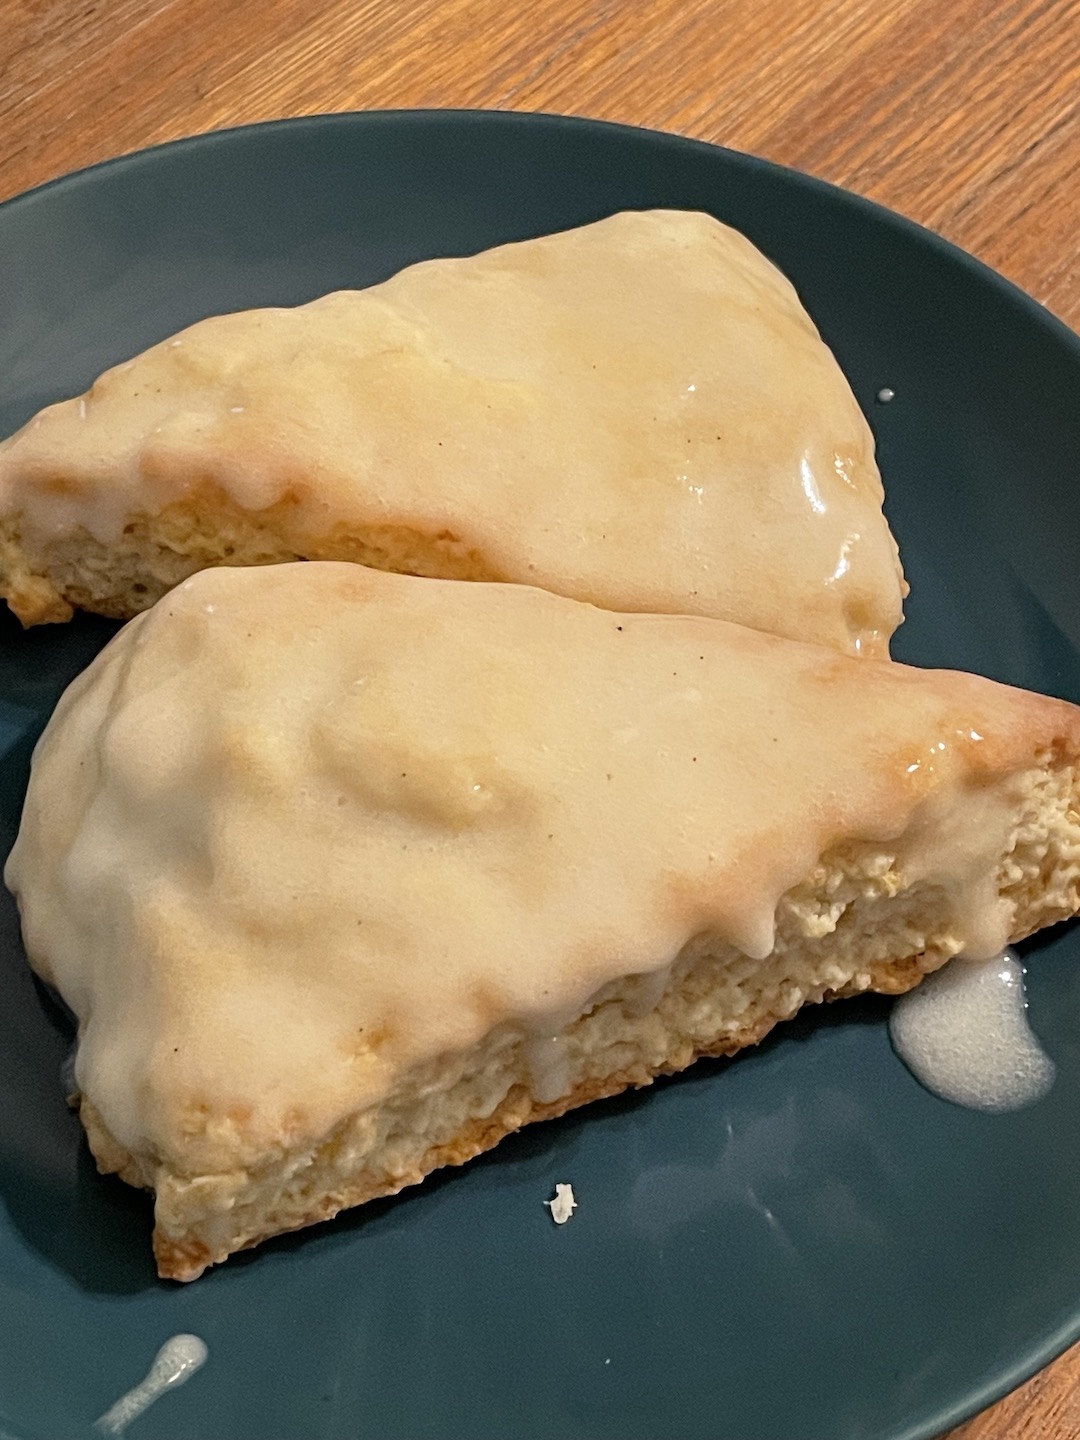
Ha, not quite. Let’s talk about the taste, shall we? Everyone loved this cake. The cake was tender and moist – not dry. The frosting tasted (to me) like Swiss Meringue Buttercream but without all of the work. Luscious, soft, and creamy. Honestly, I feel like you could take or leave the white chocolate addition. And the pudding…. Holy Mary, the pudding. Thick and creamy with a wonderful burst of vanilla flavor. Putting all of this together was a wonderful vanilla explosion. I must say, unlike the depth flavors of the chocolate cake, this is subtle – sweet, floral, and not too overwhelming. And I am very happy with the cake itself. I would like to make this again for a bigger crowd to see what others think as well. In general, this was a very satisfying vanilla cake. I hope you have enjoyed this and had a Happy New Year! Until next time, Charlie Brown.

Love it!!!
Thank you!!
‘‘Twas a good cake
Love You, thank you for your help and going to the store at 8pm for more sugar!
My mouth is watering! It sounds amazing!!!! Thanks for sharing!
Thank you for reading! I am so happy that you enjoyed this post!
Beautiful blog and twas a good cake indeed!
THANK YOU!!
Beautiful blog and twas a good cake indeed!
Very good cake and a great blog.
Thank you so much! I mam glad everyone enjoyed it
I really want to try to make a cake like this. I love the idea of vanilla taking the starring role here!!
Yes!! Especially because I made all chocolate last year!